


December 27, 2020
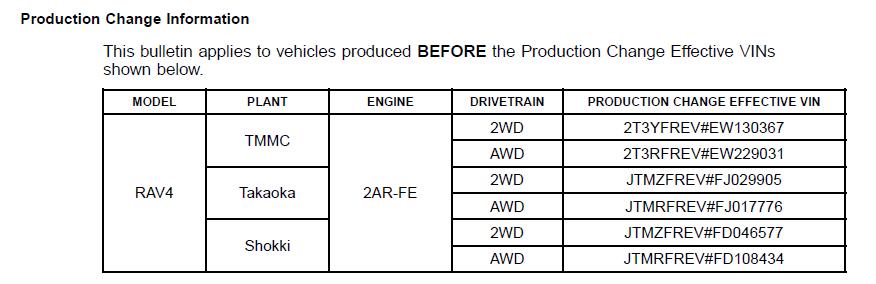
Some 2013 – 2015 model year RAV4 vehicles may exhibit a brief shudder intermittently while driving under light loads between approximately 25 and 50 mph. The torque converter and Engine Control Module/ECM (SAE term: Powertrain Control Module/PCM) logic have been modified to reduce the possibility of this condition from occurring. Follow the Repair Procedure below to address this condition.More repair Toyota case,please check it here:Toyota Trouble Repair
Repair Procedure
1.With the vehicle at operating temperature, confirm the condition described in the Introduction.
Is there a brief shudder intermittently present while driving under a light load between
25 – 50 mph?
NOTE
The condition will be most noticeable prior to an upshift.
* YES — Continue to step 2.
* NO—This bulletin does NOT apply. Continue diagnosis using the applicable Repair Manual.
NOTICE
Be sure to follow the procedure below in the order provided to prevent contamination of previously cleaned parts.
2.Drain the ATF from the transaxle by removing the drain plug.
Refer to the Technical Information System (TIS), applicable model and model year
Repair Manual:
* 2013 – 2015 RAV4:
Drivetrain – Automatic Transmission/Transaxle – "U760E / U760F Automatic
Transmission/Transaxle: Automatic Transaxle Fluid: Replacementâ€
* Remove and replace the torque converter.
Refer to TIS, applicable model and model year Repair Manual:
* 2013 – 2015 RAV4:
Drivetrain – Automatic Transmission/Transaxle – "U760E / U760F Automatic
Transmission/Transaxle: Automatic Transaxle Assembly: Removalâ€
* With the transaxle installed in the vehicle, remove the transaxle oil pan.
Refer to TIS, applicable model and model year Repair Manual:
* 2013 – 2015 RAV4:
Drivetrain – Automatic Transmission/Transaxle – "U760E / U760F Automatic
Transmission/Transaxle: Valve Body Assembly: Removalâ€
* Remove and discard the two oil pan magnets and clean the inside of the oil pan by wiping it off with a clean cloth ONLY.
NOTICE
Do NOT use ANY chemical cleaners to clean the inside of the oil pan.
6.Install four NEW magnets as shown.
6
7.Reinstall the oil pan using a NEW oil pan gasket.
Refer to TIS, applicable model and model year Repair Manual:
* 2013 – 2015 RAV4:
Drivetrain – Automatic Transmission/Transaxle – "U760E / U760F Automatic
Transmission/Transaxle: Valve Body Assembly: Installationâ€
8.Reinstall the drain plug using a NEW drain plug gasket and refill the transaxle with ATF.
Refer to TIS, applicable model and model year Repair Manual:
* 2013 – 2015 RAV4:
Drivetrain – Automatic Transmission/Transaxle – "U760E / U760F Automatic
Transmission/Transaxle: Automatic Transaxle Fluid: Replacementâ€
9.Check for the Authorized Modifications Label affixed to the vehicle in the locatio shown below. Confirm if the ECM (PCM) calibration has been updated.
Is the calibration ID listed the latest ECM (PCM) calibration?
* YES — Go to step 12.
* NO — Continue to step 10.
7
10.Flash reprogram the ECM (PCM).
NOTE
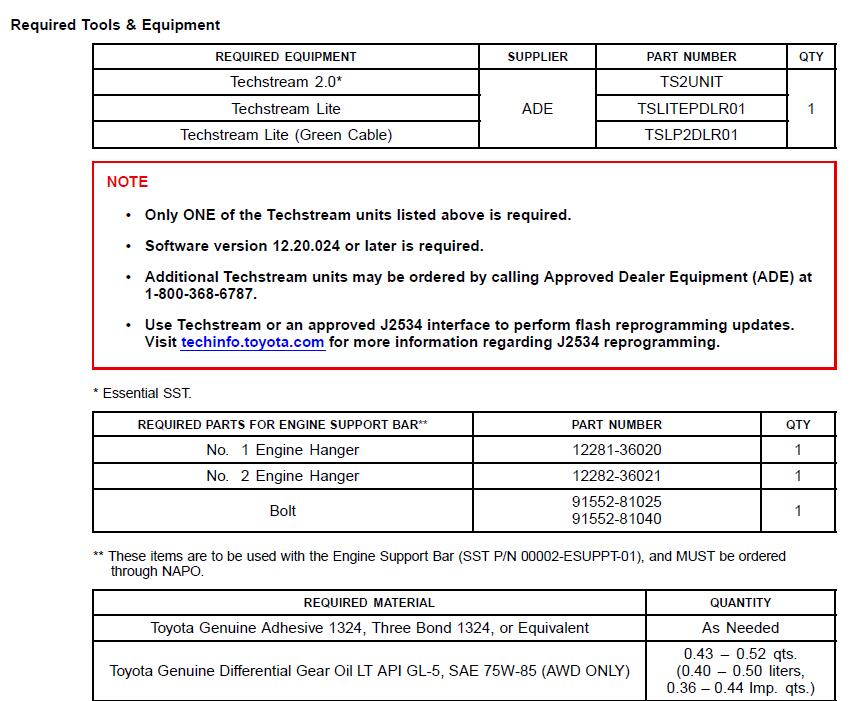
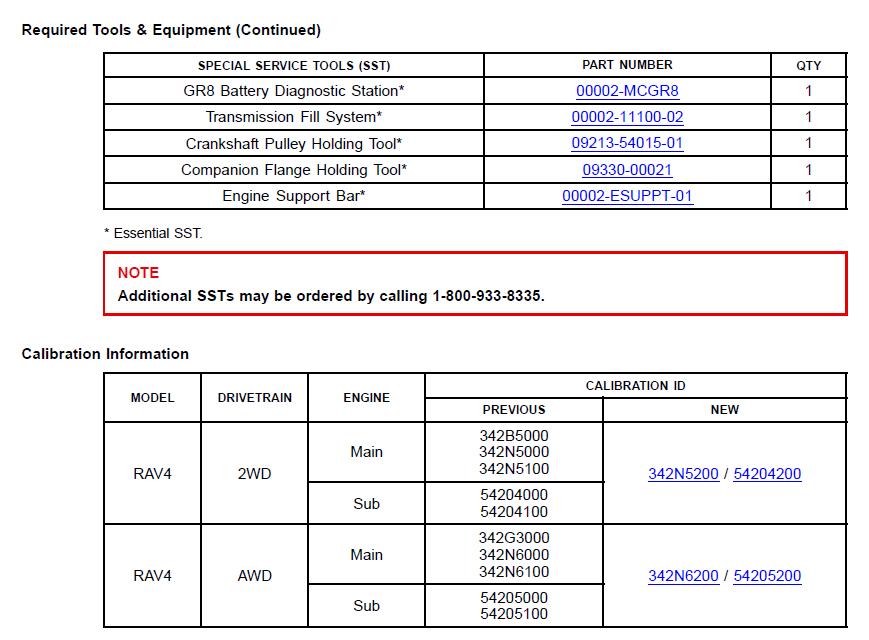
* The GR8 Battery Diagnostic Station MUST be used in Power Supply Mode to maintain battery voltage at 13.5V while flash reprogramming the vehicle.
* For details on how to use the GR8 Battery Diagnostic Station, refer to the
"GR8 Instruction Manual†located on TIS,
Diagnostics – Tools & Equipment – Battery Diagnostics.
Follow the procedures outlined in Service Bulletin No. T-SB-0012-13, "Techstream ECU Flash
Reprogramming Procedure,†and flash the ECM (PCM) with the NEW calibration file update.
11.Install the Authorized Modifications Label.
Using a permanent marker, enter the following information on the label:
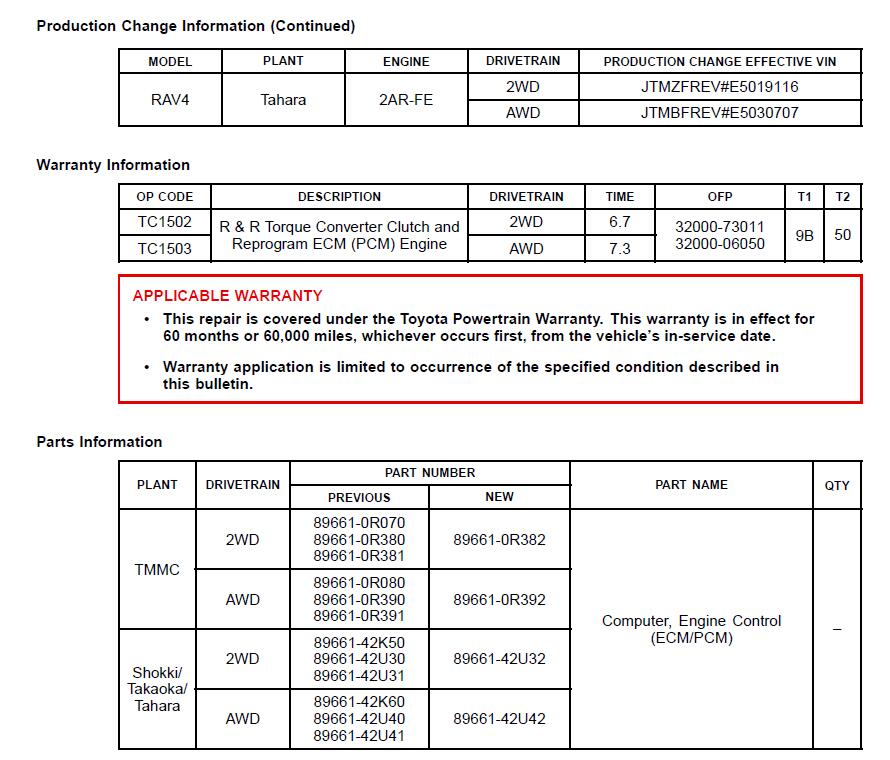
* ECM part number [Refer to the Parts Information section for the NEW PART NUMBER]
* Calibration ID(s) [Refer to the Calibration Information section for the NEWCALIBRATION ID]
* Dealer Code
* Repair Date
* Change Authority [This bulletin number]
B.Affix the Authorized Modifications Label to the vehicle at the location shown in Figure 2.
The Authorized Modifications Label is available through the MDC, P/N 00451-00001-LBL.
12.Perform the Techstream ECT Reset Memory Utility and test drive the vehicle to confirm the repair.
Posted by: obd2tool at
10:29 AM
| No Comments
| Add Comment
Post contains 621 words, total size 6 kb.
This instruction show you guide on how to use JLR PATHFINDER to code for Land Rover Range Rover L494 2017 keyless access retrofit.

Preparations:
JLR Pathfinder Free Download and Installation
How to Install Jaguar & Land Rover JLR Pathfinder on Win7 and Win 10
How to Register New JLR of Pathfinder Software
Procedures:
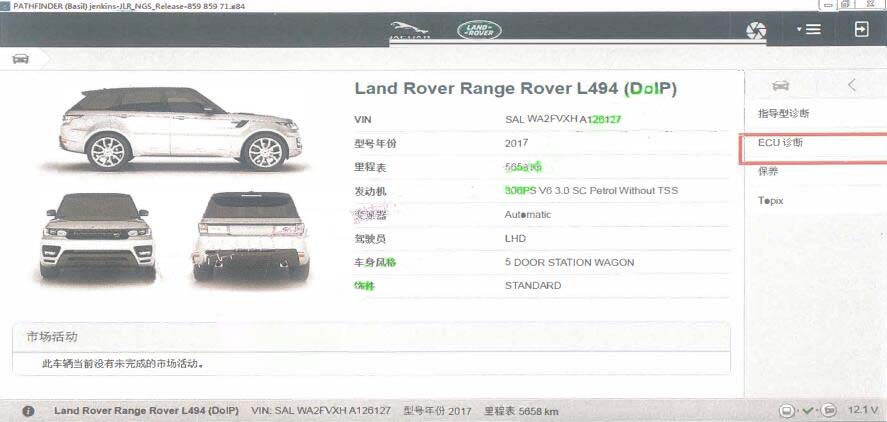
Connect JLR VCI DoIP to Range Rover L494,and run JLR PATHFINDER
After vehicle identification,click "ECU Diagnosticsâ€
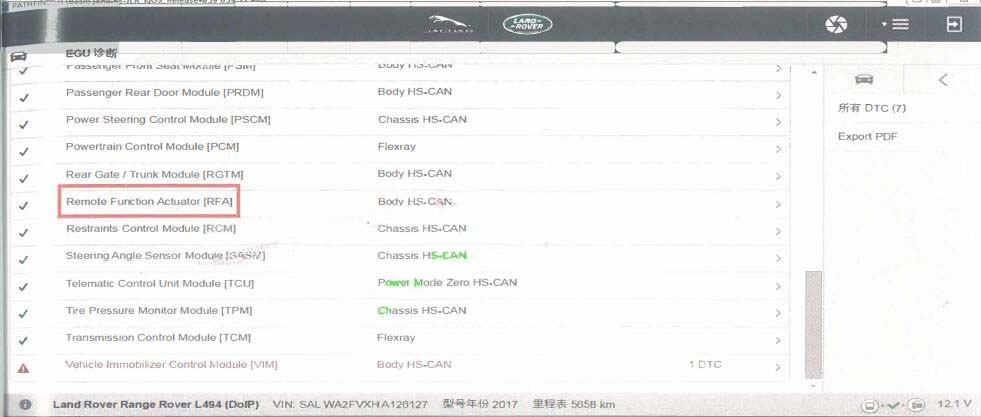
Select "Remote Function Actuator (RFA)â€
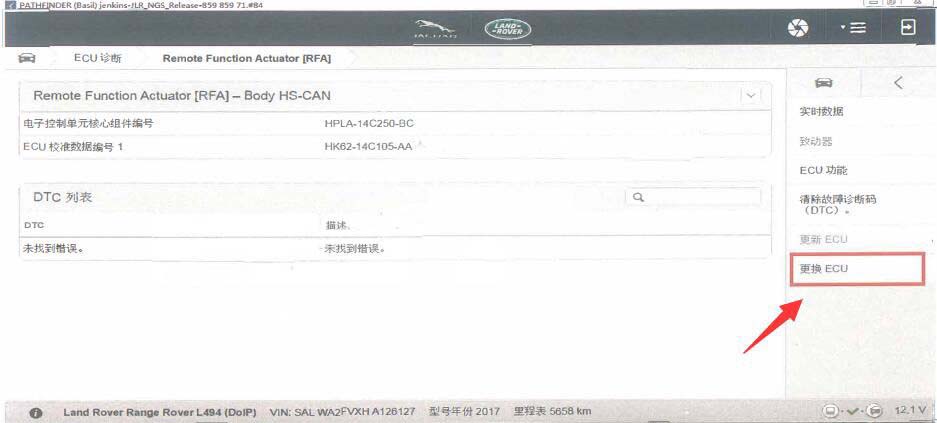
Click "ECU Replacementâ€
Follow the PATHFINDER prompt message to finish keys programming,after programming it will work.
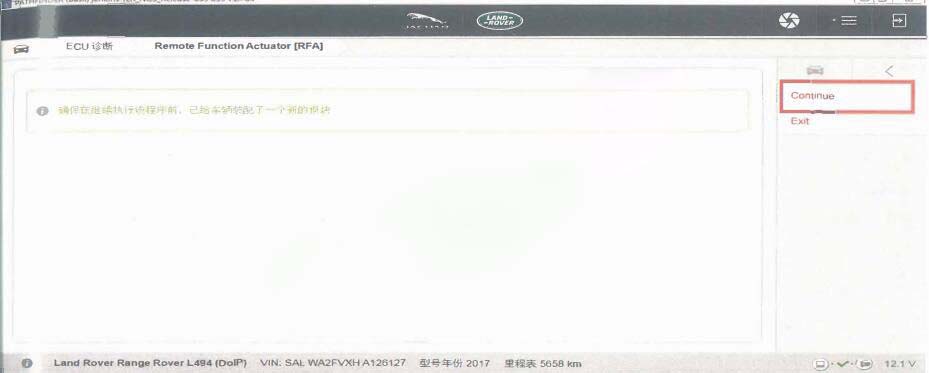
Note:Keyless module recommend use new module,if used keyless module applied,please flash a new data for the used keyless module.
Posted by: obd2tool at
10:23 AM
| No Comments
| Add Comment
Post contains 119 words, total size 2 kb.
32 queries taking 0.0901 seconds, 142 records returned.
Powered by Minx 1.1.6c-pink.

