


January 31, 2018
Launch X431 Diagun IV is an slim evolutionary vehicle diagnostic tool. Featuring a quad-core 1.1GHz processor, and a 5.5 inch capacitive screen, X-431 Diagun IV delivers diagnostic functionality which helps to diagnose vehicle issues more efficiently.
In addition, X-431 Diagun IV supports Wi-Fi connection, one-click update, diagnostic feedback and all kinds of service functions (including oil lamp reset etc)
High Light:
1. 2017 Diagun Latest version :X431 Diagun IV
2. With Android 7.0 system, support wifi one-click update
3. 2 Years Free update on Launch Official Web
4. Handset, Easy to operate, avoid broken or lost bluetooth adpater.
5. SD Card storage: 16GB Storage,(Expandable up to 64GB)
6. Support System: ECM,ABS,SRS,TCM,BCM,IMM,BMS,TPMS,SAS
7.Add Special Function: Brake Reset,Oil Reset,SAS
Reset,BAT.Reset,Bleeding,Elec.TH Tottle Rottle Rlrn, TPMS Reset, DPF
REG.IMMO,Injector
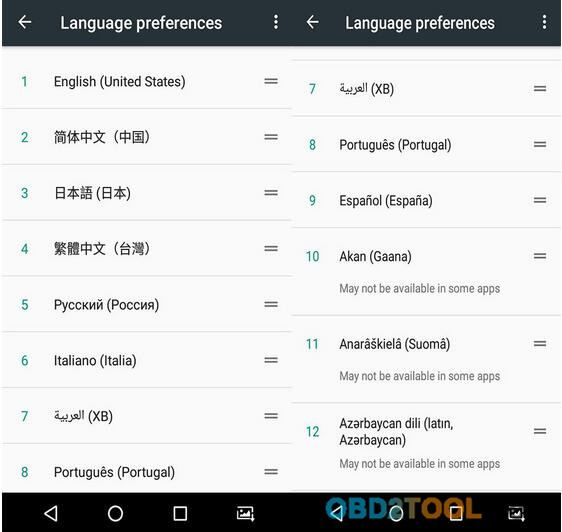
8. Language:Multi-language
(English,Spanish,French,Russian,Japanese,Arabic,Korean,Italian,German,Danish,polish,Finnish,Dutch,Czech,Portuguese,Swedish,Turkish,Greek,Hungarian,Romanian,Serbian)

Function:
Diagnose: Configures X-431 Diagun IV to operate as a diagnostic tool.
Special Function: To perform some maintenance items, including
electronic throttle position reset, ABS bleeding, oil lamp reset etc.
Feedback Diagnosis: This option allows you to feed back the diagnostic
reports/software bugs to us for troubleshooting and analysis.
Software Upgrade: To update vehicle diagnostic software. If you keep
signed in, a pop-up message will appear on the screen once a newer
version is detected.
Maintenance Help: To browse the FAQ, Quick Start Guide, User Manual and How-To videos.
Personal Center: To manage, activate your VCI connector, diagnostic report or personal information etc.
Special function:BRAKE RESET, OIL RESET, SAS RESET, BAT.RESET , BLEEDING, ELEC.TH ROTTLE RLRN, TPMS RESET , DPF REG, IMMO, INHECTOR
Features:
1. Diagnostics:A. Diagnose
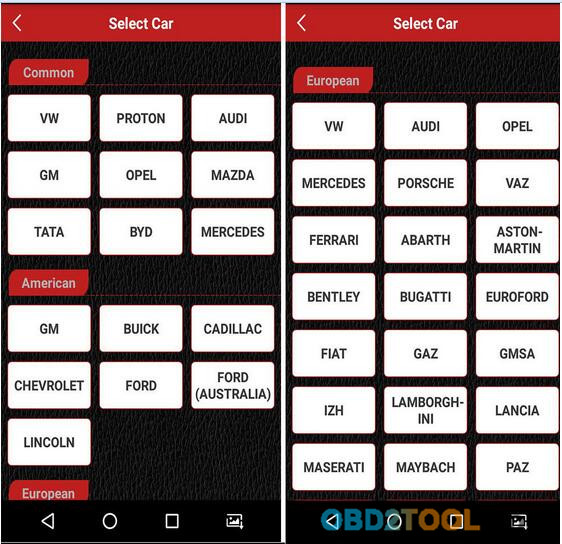
* Diagnose the electronic control systems of prevailing vehicle models
covering Asian, European, American and Chinese. Diagnosis functions
include: Read DTCs, Clear DTCs and Read data stream etc.
* Specially designed for Android platform with clear and user-friendly interface.
* Via Bluetooth, it is simple for the VCI connector to communicate withX-431 Diagun IV.
B. Reset: Include all kinds of maintenance resets.
C. One-click Update: Let you update diagnostic software and APK more efficiently.
2. Browser: Built-in Wi-Fi module makes surfing on the internet freely.
3. Email: Allows you to send and receive emails.
4. Settings: To configure your personalized X-431 Diagun IV through it.
5. Applications: Other android based applications can be customized to install or uninstall.
Vehicle connection:
The method used to connect the VCI connector to a vehicle’s DLC depends on the vehicle’s configuration as follows:
A vehicle equipped with an OBD II management system supplies both communication and 12V power through a standardized DLC.
A vehicle not equipped with an OBD II management system supplies communication through a DLC connection, and in some cases supplies 12V power through the cigarette lighter receptacle or a connection to the vehicle battery.
For OBDII vehicle,proceed as follows:
1. Locate vehicle’s DLC socket.
2. Plug the VCI connector into the vehicle’s DLC socket (It is suggested
to use the OBD II extension cable to connect the VCI connector and DLC
socket).
3. Choose one of the two ways to obtain power from:
A. Power adaptor: Connect one end of the included power adaptor to DC IN port ofX431 Diagun IV handset, and the other end to AC outlet.
B. Internal battery pack
For non-OBDII vehicle, proceed as follows:
1. Locate vehicle’s DLC socket.
2. Select the corresponding non-16pin connector.
3. Plug the non-16pin end of the connector into the DLC socket, then
connect the other end to the OBD I adaptor, and then tighten the captive
screws.
4. Connect the other end of the adaptor to the included VCI connector.
5. To supply power to OBD I adaptor from:
A. Cigarette Lighter cable(optional): Connect one end of the cigarette
lighter cable to vehicle’s cigarette lighter receptacle, and the other
end to the power jack of OBD I adaptor.
B. Battery Clamps Cable(optional): Connect one end of the battery clamps
Reset function:
The Reset section is specially designed to provide you quick access to
the vehicle systems for various scheduled service and maintenance
performances. All resetting operations are driven by executive commands.
Just by following the on-screen prompts to select appropriate execution
options, input correct values or data, and perform necessary actions,
the system will guide you through the complete performance.
Vehicle lists:

http://cheapobd2tool.com/2018/01/19/x-431-diagun-iv-high-light/
Posted by: obd2tool at
05:28 AM
| No Comments
| Add Comment
Post contains 703 words, total size 7 kb.
January 28, 2018
SKP900 V5.0,Super obd SKP900,skp 900 programmer,skp 900 price,superobd skp-900 review,skp 900 key programmer manual,Superobd SKP900 auto key,SKP900 Auto Key Programmer,skp900 programador chave original,


1.Connect SKP-900 and 46/4D/48 adapter.
Plug the SKP-900 key programmer into the vehicle OBD socket.
That’s preparation to copy the original car keys and 46 chips.
2.Choose Special features into the SKP-900 -> chip key copy-> 46 chip copy, which has four options, according to the order entered were 1-2-3-4.
3.Firstly enter 1 and read original key ID, then place the original key near the adapter and press [YES], the original key ID will be read.
Note: If reading error, check if the key chip is 46, or adjust the position of the key and reading coil, and re-read the key ID. After reading key ID, press [NO] to return.
4.Enter 2 to get collector information: place the collector already with collected data near reading coil (refer to the user manual for the collector user manual), press [YES] to go on. At this situation, the collector data indicator (green) will flash, the screen displays the collector data. Then press [NO] to return.
5.Enter 3 and decode original chip, press [YES] to continue. The screen will display: working, please wait… It normally takes about 5-30 seconds. (Need about 4 minutes in some case). If the decoding failed, please re-collecting data and re-do step 3 and step 4. If the decoding successes, please press NO to return.
6.Enter 4 and create clone chip, place the copy-able 46 chip near the reading coil, press [YES] to continue, copy successes 1 second later; if not, please adjust the position of the coil and chip, or replace the chip can be copied.
http://lovecartools.webnode.fr/news/how-skp-900-key-programmer-add-ford-focus-remote-key-in-3-steps/
Posted by: obd2tool at
08:06 AM
| No Comments
| Add Comment
Post contains 319 words, total size 3 kb.
January 17, 2018
1.Software update
1). Our GM MDI software has updated to V2017.09.It can support 2010-2017.09year new cars.
2). If you think installation procedure is difficult for you,you can choose the GM MDI with Lenovo E49AL laptop,GM MDI software will be preinstalled in the Lenovo E49AL Laptop ,you can use it directly after receiving it.

2."No Connection†error solved
Here is the detail explanation of GM MDI Wifi multiple diagnostic system "no connection†error and solution.
Problem:
When get the GM MDItool connected with computer and plugged into car’s DLC OBD port, only two of the indicator light flashed while the other two are off. And then the GM MDI software system displayed "no connection†error message. See Fig.1 and Fig. 2.


Possible reason:
Improper operation procedure leads to the communication failure.
Solution:
Quit the GM MDI software and disconnect the GM MDI main unit
Open MDI Manager to check the driver
Open "Network setup†to check the network condition
If your MDI Manager shows a connection with your MDI and says software is compatible with pc, it is OK.
Reconnect the MDI device and load software again.
Follow the correction connection procedure and settings:
USB connection:
Once install and run the MDI manager, power up the MDI tester using the A/C 12-volt adapter. Then connect it to your computer with via USB cable. The MDI appears in the application’s Explorer window where all the MDI units detected by your PC.
WIFI wireless connection:
1) Click MDI_Manager icon to start the MDI Manager software
2) Connect MDI with PC using USB cable
3) Power on the MDI by plugging in the A/C 12-volt adapter
4) Select and Connect to your MDI in the MDI Manager software MDI Explorer tab.
5) Select "Network Setupâ€
6) Select "Wireless†tab.
7) Select "Enable Wireless Interface check box in the Interface Control box to enable the interface. Once you enable the interface, the IP Address Configuration box and the Apply and Cancel buttons become active.
![]() Select Obtain an IP address automatically if your LAN automatically assigns IP addresses. Otherwise enter the assigned IP Address and Subnet mask.
Select Obtain an IP address automatically if your LAN automatically assigns IP addresses. Otherwise enter the assigned IP Address and Subnet mask.
9) Select "Access Point†to start wireless access configuration.
10) If you are not within range of the access point you want to use, or the access point is not broadcasting its SSID, select the Enter Network Name [SSID]: radio button and type the network name.
11) If you are within range of your wireless access point, choose the Select from available network list radio button and then select Refresh to cause the MDI to search for wireless network signals. The detected networks are displayed in the Network Name box.
12) Select Configure after you have entered the network name
13) Enter the security setting that are required by your network, then select Next.
14) Select Yes to re-configure your MDI, or if you want to start over select No.
15) Select OK.
16) Choose the Properties tab to verify that the MDI is configured correctly.
17) Write down previous settings you did for future reference.
NOTE:
Installing the MDI Manager software installs certain utilities that are required for your TIS2Web programs to use the MDI. But, it is not necessary to start the MDI Manager software before using TIS2Web programs.
Please click here to place an order.
Posted by: obd2tool at
12:07 PM
| No Comments
| Add Comment
Post contains 563 words, total size 6 kb.
January 07, 2018
Here’s my personal review on Tech2 Scan Tool clone diagnostic scanner with my Saab 2003 9-3. Big thanks to those who help me a lot in the thread.
Model:
Saab 2003 9-3
Saab 2004 9-5
Issue:
the dreaded "alarm randomly going off†issue on my 2003 9-3
Purpose:
to diagnose and/or disable the alarm
Considering the following:
GM Tech 2 scan tool Link here
I also have a 2004 9-5. I’m starting tho think that it would be wise to invest in a tech2. as I usually do most of my own repairs.
Puzzle:
Is there some other Saab-specific card or software I need on top of this product?
Suggestion from folks:
You will need the Tech 2 and Saab 32MB card (specify when buying clone) listed in the link above. Those two alone should be able to read DTCs, I believe. To get security access and make changes via Tech 2, you will need an older Windows?XP laptop with built in serial port – a newer computer running a virtual machine program & serial to usb adapter should also work – and the Tis2000/GlobalTIS software.
Personal opinion: The Tech 2 at obd2tool.com in the link you posted is priced a bit higher than most ($349 vs $319). You might want to read back a few pages in this thread for some links to other sellers with better pricing and more sales.
My Tech 2 Scanner hq clone is paid for $319. It is with with a 32MB card and TIS2000 software CD.
Eidt: Tech II review:
Received the parcel today. All are packed well in a box and the machine looks good…. I will try it tomorrow and update here… I should be working good i think.
https://bm.cari.com.my/home.php?mod=space&uid=2249422&do=blog&id=80710
Posted by: obd2tool at
08:53 AM
| No Comments
| Add Comment
Post contains 299 words, total size 3 kb.
32 queries taking 0.0656 seconds, 149 records returned.
Powered by Minx 1.1.6c-pink.

