


December 18, 2021
OBDSTAR x300dp plus is a new Android-based vehicle trouble diagnostic device which with Full configuration functions contain : Immobilizer+ odometer adjustment+ EEPROM/PIC adapter+ OBDII+ ABS+ TPS+ SRS reset+ TPMS(low tire)reset+ Steering angle reset+ CVT learning/Value reset+ EPB+ Oil/service reset+ Battery matching+ OBDII Diagnosis(Japanese and Korean cars)
There have customer who have met the issues " [core03.bin]load exception,error code:-101†as bellowing picture
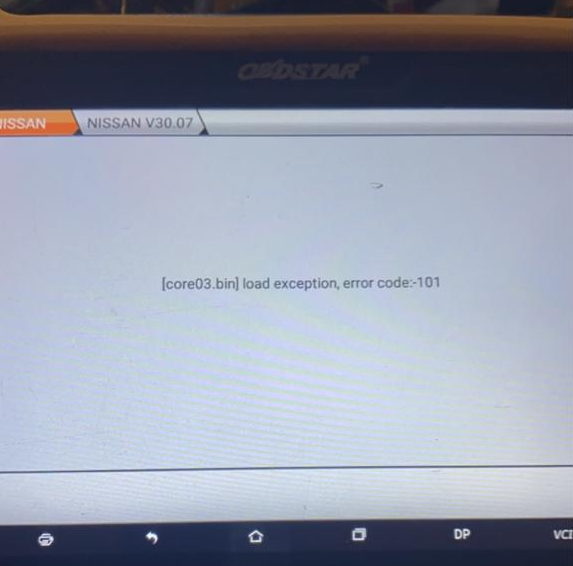
So how to solve this problem ? Lets check the solutions from engineer :
At first , you should check your machine update whether expired or not
1.If the update not expired , you just need update the machine click "One Key Upgradeâ€
2.If your update expired , please do it with steps : Click "ES file
browser†–local–Main directory–DP-serial number-Resourse-core03.bin ;
Copy the file of "core03.bin to TF†or memory card ; If this cannot fix
it, please buy one year update subscription from the distributor for
your device and update it
Posted by: obd2tool at
07:56 AM
| No Comments
| Add Comment
Post contains 163 words, total size 2 kb.
October 30, 2021
Operation steps of Launch X431 PAD 7 configuration online programming function:
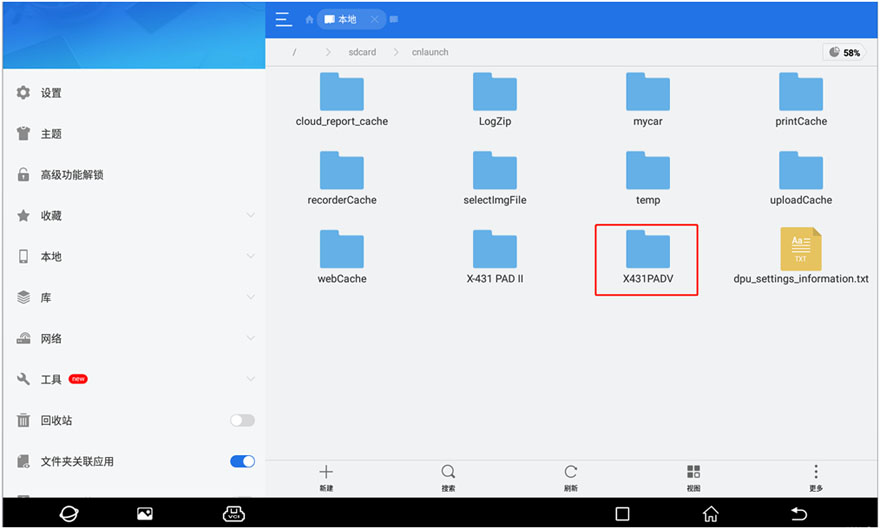
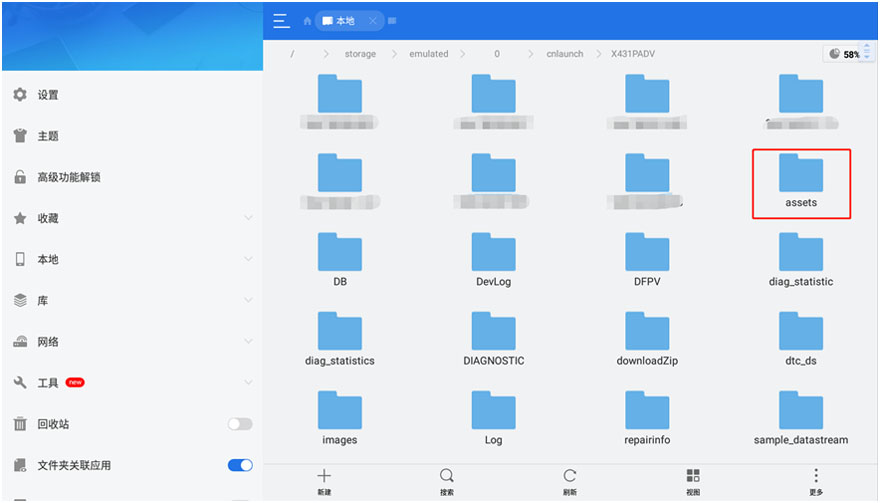
Go to options:
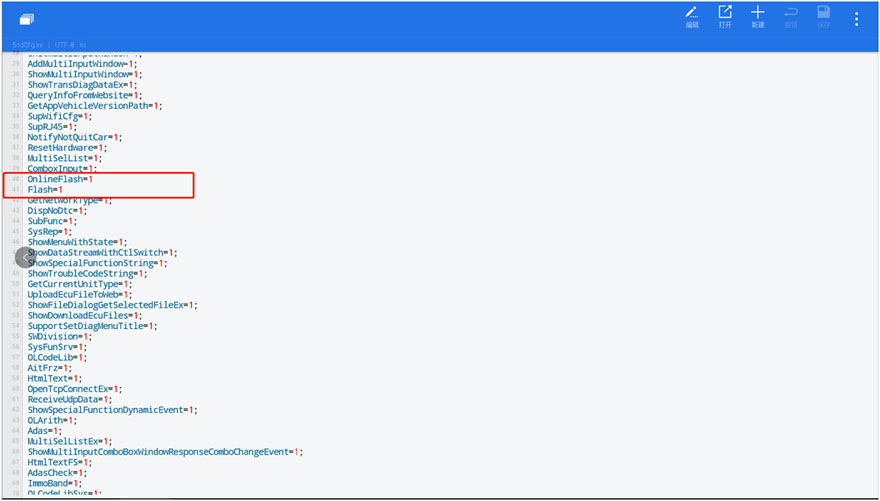
Other—Equipment—File Management—-cnlaunch folder—-X431PADV—assets directory, find the file named StdCfg.ini.
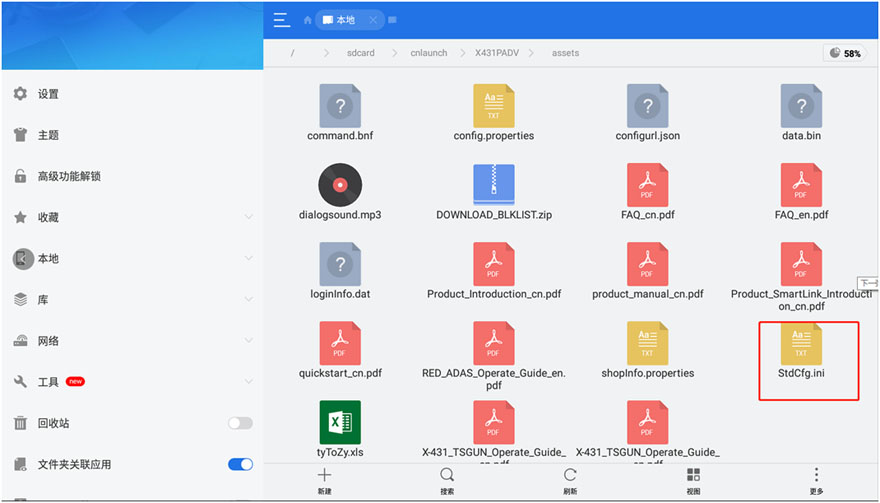
Open StdCfg.ini with a text editor and click the edit button on the upper right to make the file editable.
Find the two fields "OnlineFlash†and "Flashâ€, their default value is 0,
which means that the diagnostic software does not support online
programming.
Change these two values to 1, and then save. After the save is successful, the corresponding value will become 1, as shown in the circled part in the figure below, which means that the diagnostic software can support the online programming function.
Note: In addition to North America, which is not supported, other regions can be set and operated according to the above method.
For devices other than China, the "Online Programming†menu option will
not be displayed on the home page, and it will only appear after
entering the corresponding diagnostic software.
Posted by: obd2tool at
05:42 AM
| No Comments
| Add Comment
Post contains 167 words, total size 3 kb.
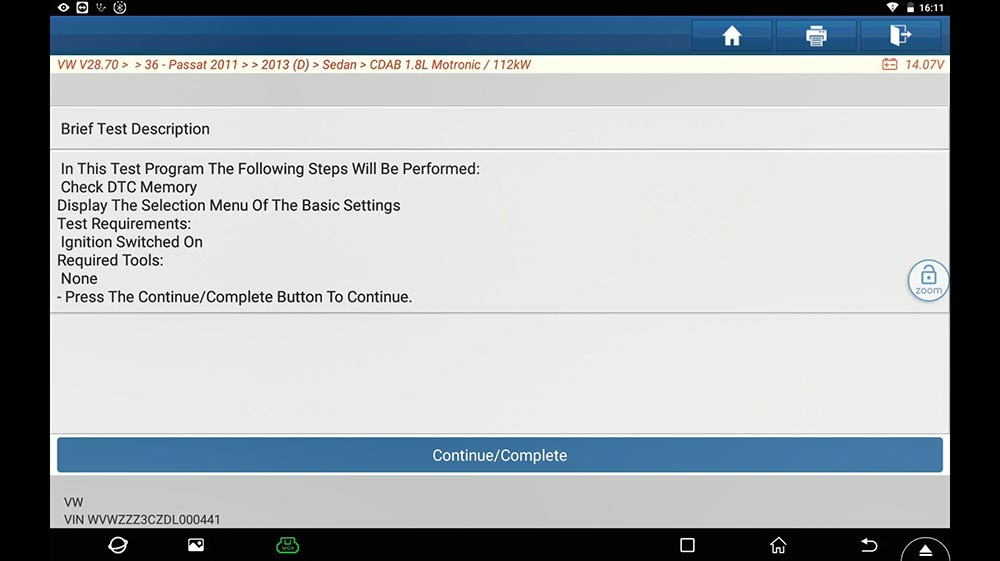
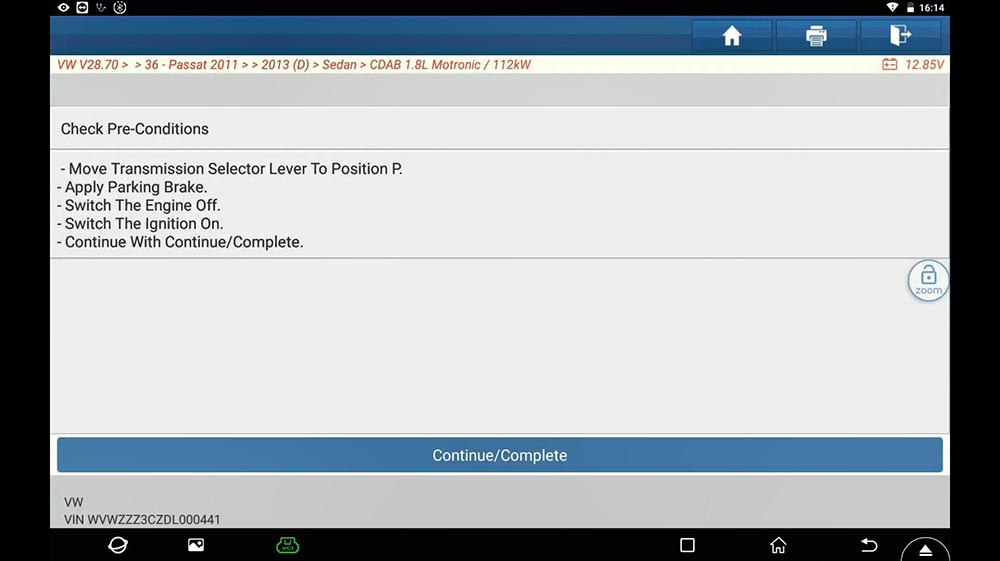
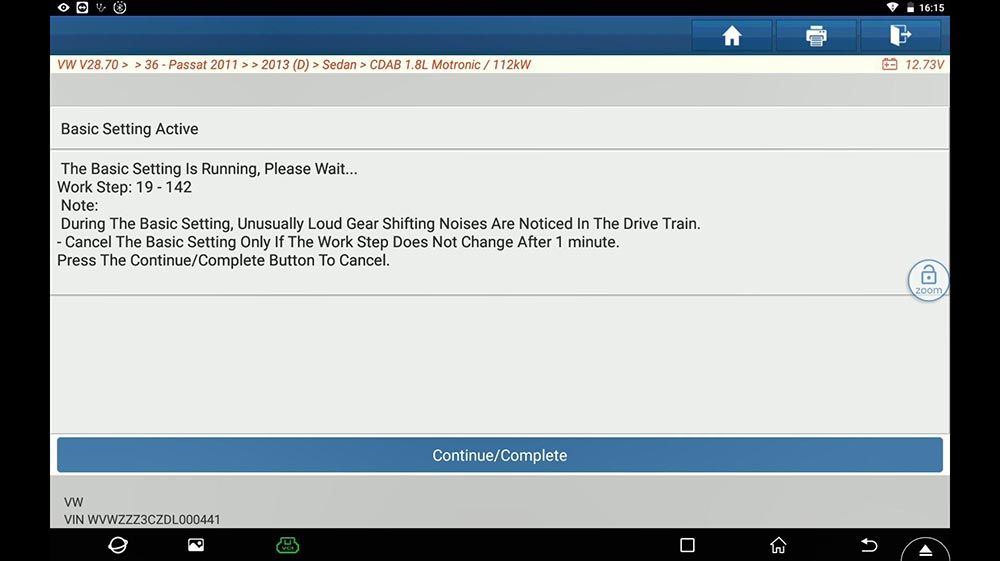
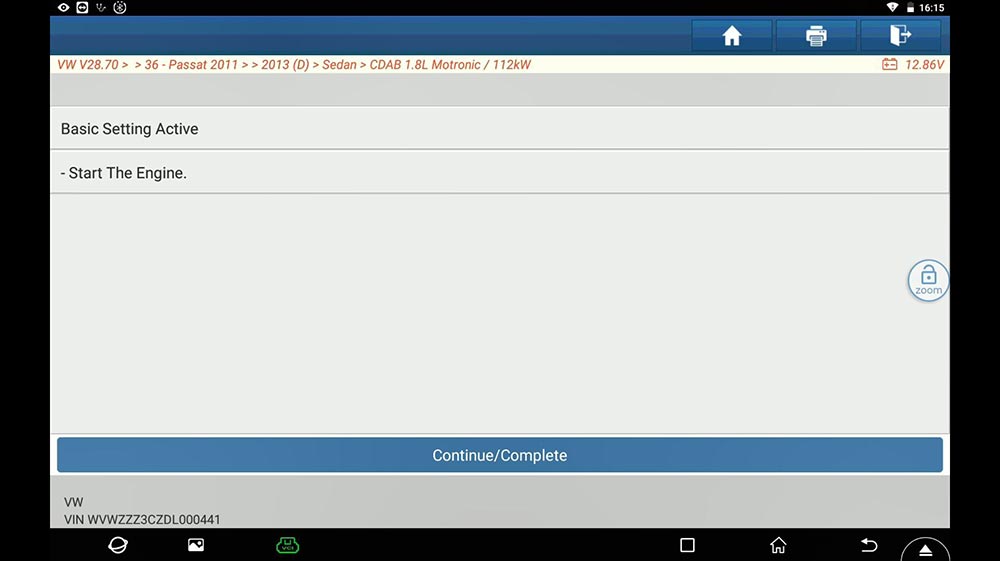
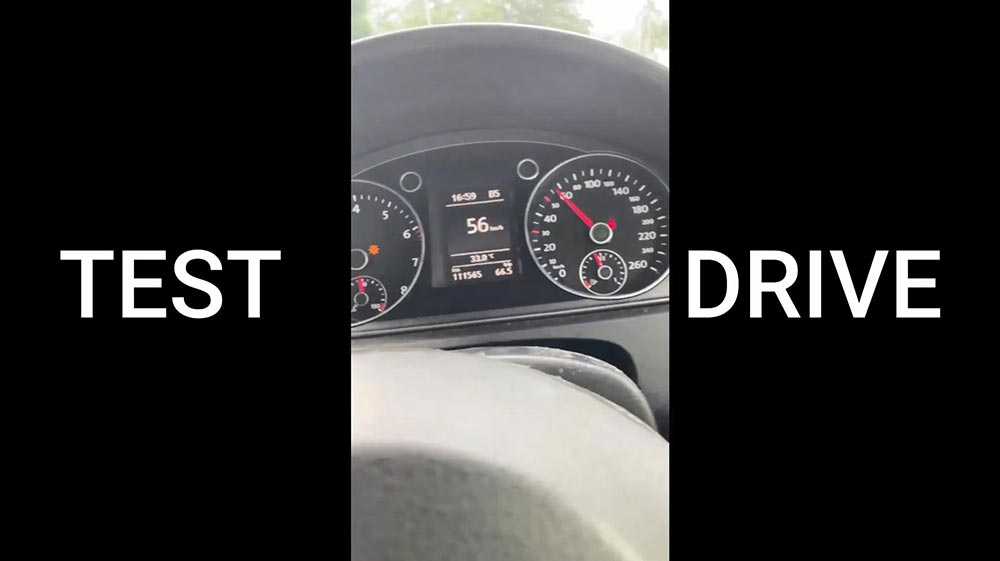
How to perform "DSG Transmission Basic Setting†for VW Passat 2013 with the guided function of Launch X431 PAD V. It is applied to X431 Pro V4.0, X431 Pro3 V4.0, X431 Pad VII etc.
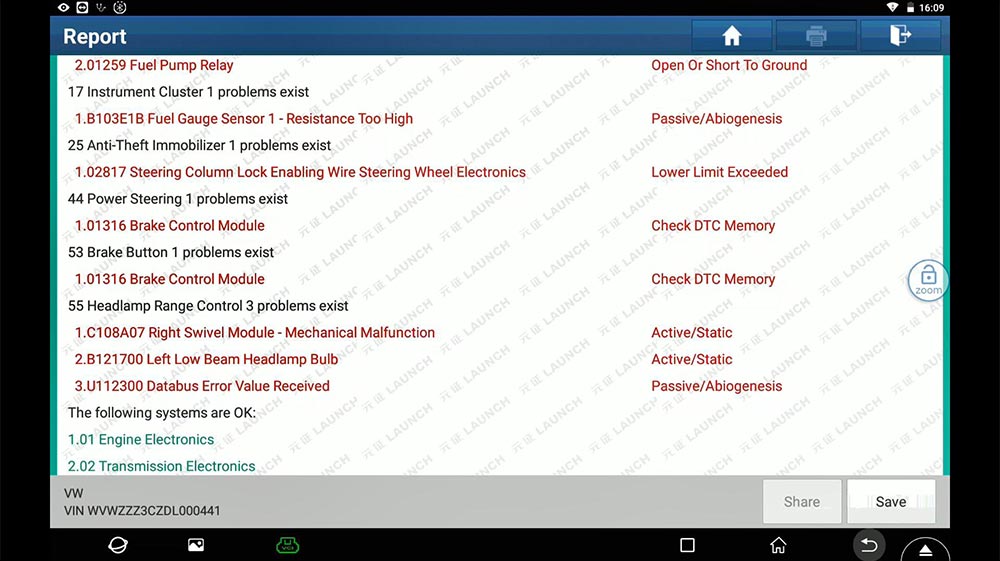
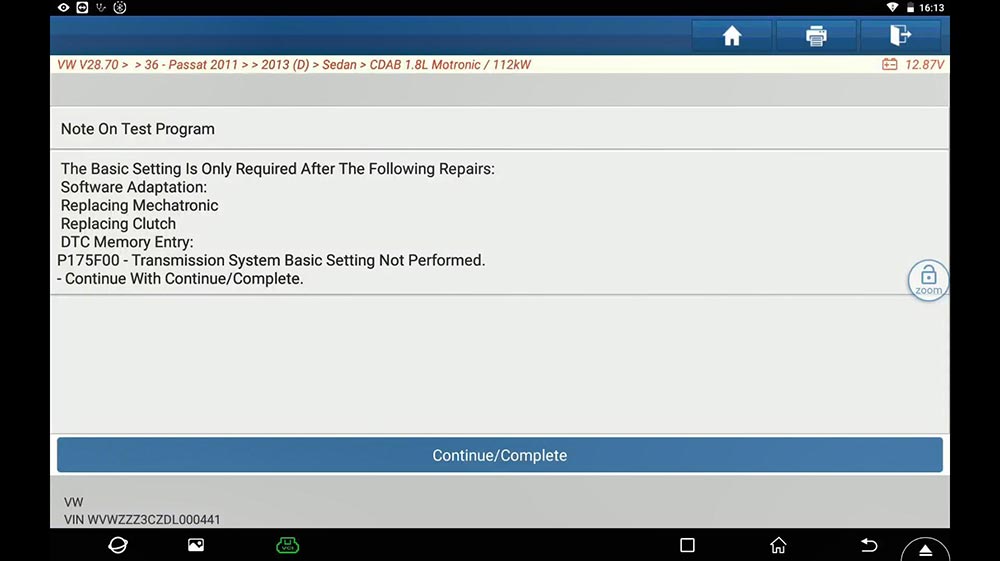
After change DSG Transmission, DSG clutch pack, DSG mechatronic, DTC -P175F00, transmission basic setting not perform. It is required to do DSG Transmission Basic Setting.
Here is the report.
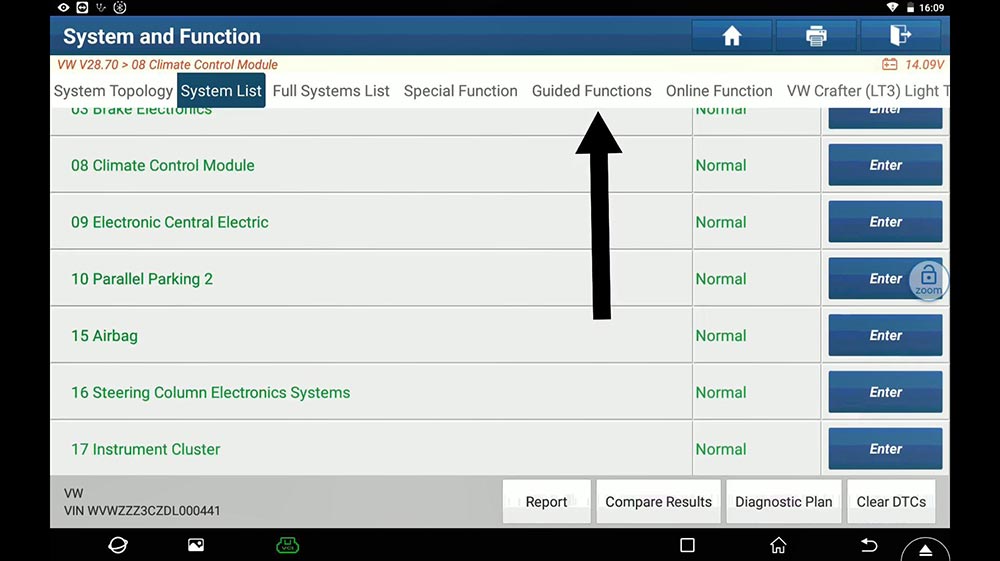
First "System List†and then "Guided Functionâ€.
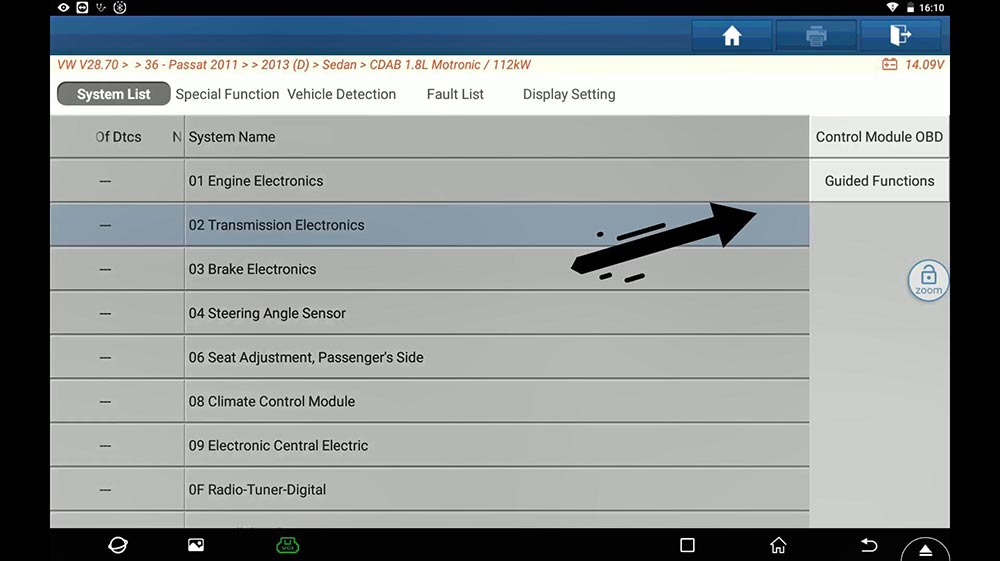
Choose the basic vehicle information: Passat 2013 Sedan.

Choose †Transmission Electronics†and then "Guided functionsâ€.
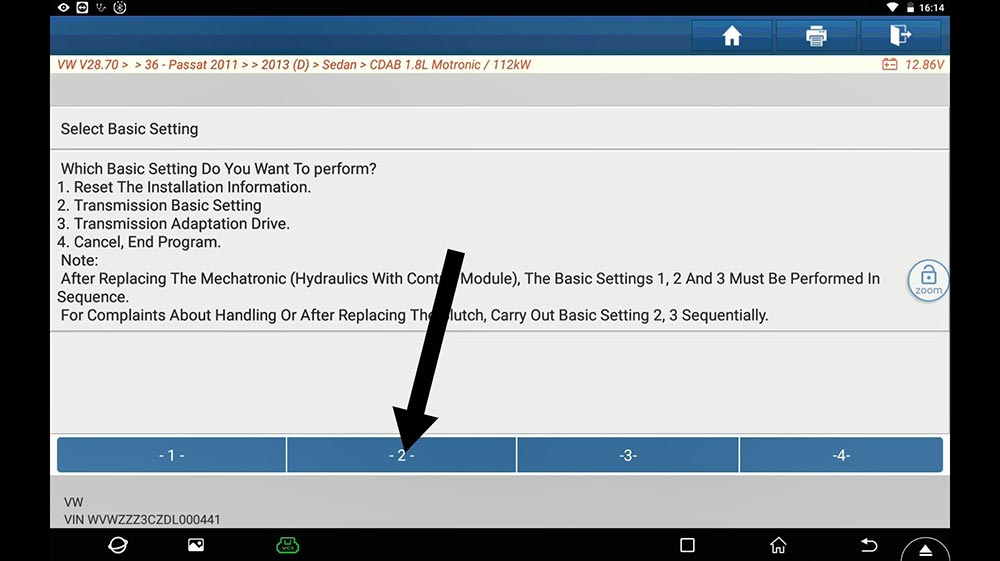
Choose "J743 – Mechatronic, basic settingâ€.

Next is to follow the on-screen guide to perform:


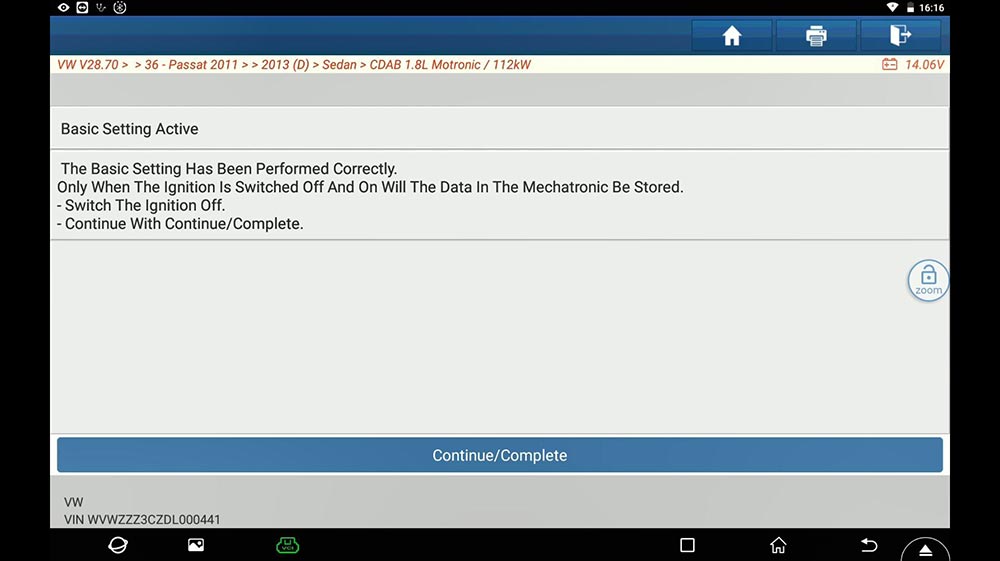


Finally, test drive and done.
Thumb up Launch diagnostic tool X431 PAD V, X431 Pro V4.0, X431 Pro3 V4.0, X431 Pad VII.
Posted by: obd2tool at
05:33 AM
| No Comments
| Add Comment
Post contains 132 words, total size 8 kb.
October 07, 2021
The registration, updates, language changing, data log uploading of Autel professional scanners, especially Autel MK808 is quite important for new starters/users.
For this article is going to share with you guys the updates on firmware part, that is, the vehicle connector interface for Autel devices.
You also have to know: the process is also the same among the kind of Autel products.
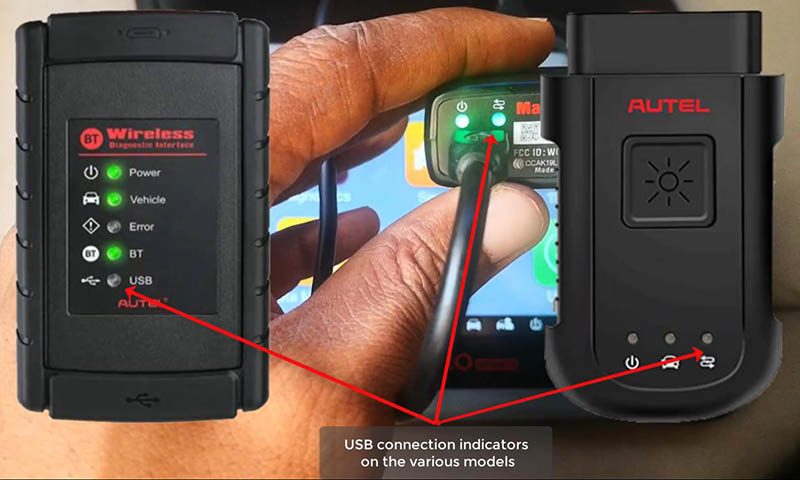
Main Autel VCI types:
MaxiVCI Mini: for MK808TS, MX808TS, MP808TS etc.
MaxiVCI V100: for MS906TS, MS906BT etc.
Wireless Diagnostic Interface: for MK908, MK908P etc.

1.Update via display tablet
Caution:
Ensure device is well charged
Connection to VCI is firm
Internet connection is stable
1)Connect the VCI to the tablet via the USB cable.
Once the two green lights on, thing are connected well.
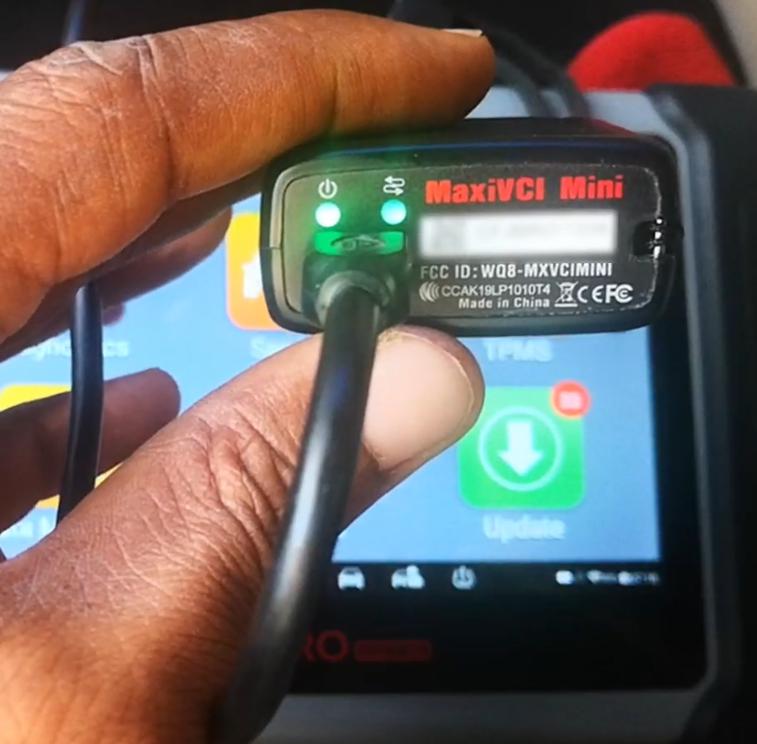
For other VCIs, there will be similar indicators.
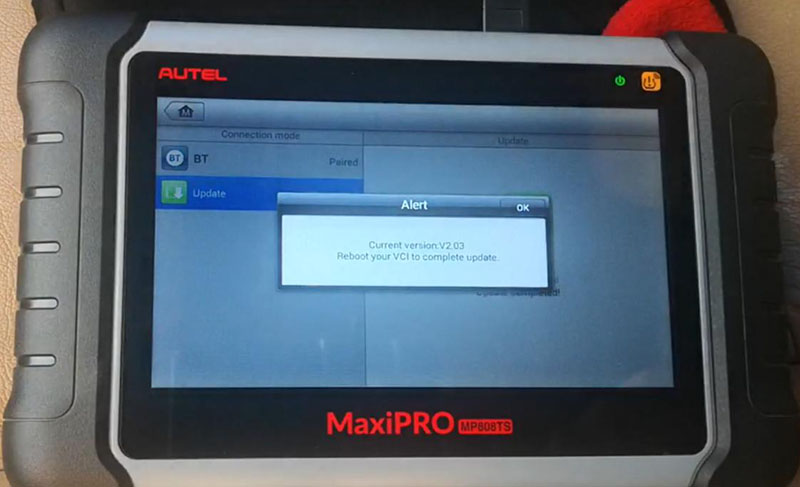
2)On homepage, press
VCI Manager>>Update
Wait for the pairing of the device and the VCI.
Then click on "Update now†to download the latest version.
Reboot your VCI to complete update.
2.Update via PC
1)Download and install "Maxi PC Suite†from www.autel.com.
Support>>Downloads>>Maxi PC Suite
2)Connect the VCI to PC via the USB cable.
3)Launch "Maxi PC Suite†and select your VCI type
4)After the update tool recognize the VCI automatically, choose an available version to update.
Completed! Nice professional tool that you derseve to have.
That’s all. Thank you for sharing your time with us!
Posted by: obd2tool at
05:50 AM
| No Comments
| Add Comment
Post contains 237 words, total size 3 kb.
My friend has a 2012 Chevy Equinox that uses newer GM network platform. No diagnostic coverage using a GM Tech2. The Equinox has been suffering some BCM problems lately with no way to plug in.. Only thing I could get was powertrain codes using a cheap scanner.
Anyway GM MDI 2 Used. I got a good MDI clone from atrustedsource OBD2tool.com. I have used this site since July 2009.
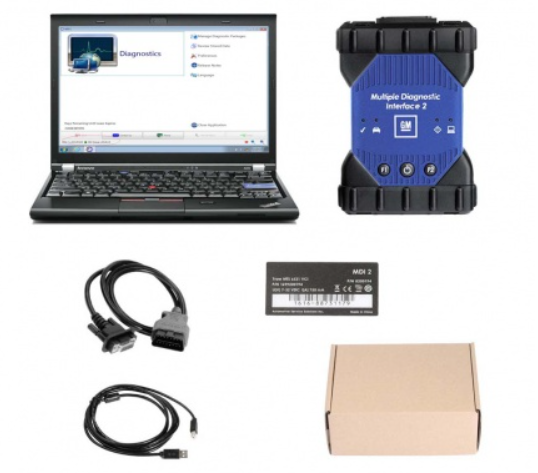
Bought amdi2 wifi version with a hard drive. Came in today. It uses a laptop.
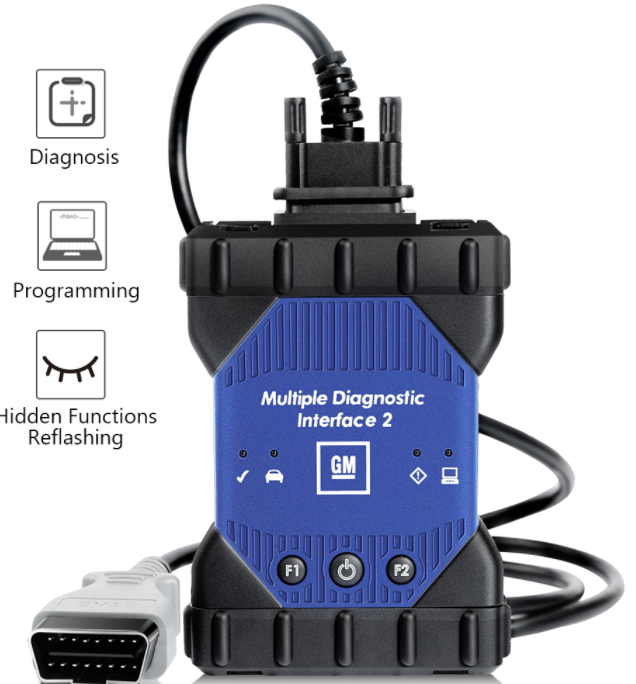
https://www.obd2tool.com/goods-10445-GM-MDI-2-GM-Scan-tool-Plus-Lenovo-X220-Laptop.html
works well, would recommend cloning HDD, as they seem to be easy to
wipe it windows does a check disk. The HDD has many different packages
to install as needed. I have used on the Chevy, will try on a Buick next
time I have one to work on.
This interface can do system diagnostics and ….added bonus….program replacement modules.
There is a MDI 1 version too. I don’t mind if clone mdi 2 is same as mdi 1. I saw people using it without a problem.
Lenovo X220 Laptop is now setup with the GM MDI 2 manager software. GDS2 identifies it as aMDI2.
So then wireless GM GDS2 diagnostics from home network(using ACDelco 3
day subscription)tolaptop in garage…..then wireless from laptop to the
MDI 2 in the car 30 feet away….it does work.
Lots of BCM codes. Equinoxmain problems were the wipers and washer
would cycleon at key on…..4 way flashers were coming on 30 minutes
after key off. Both go thru the BCM.
Equinox is fixed with a new BCM. Ended up having local GM shop program the new BCM.
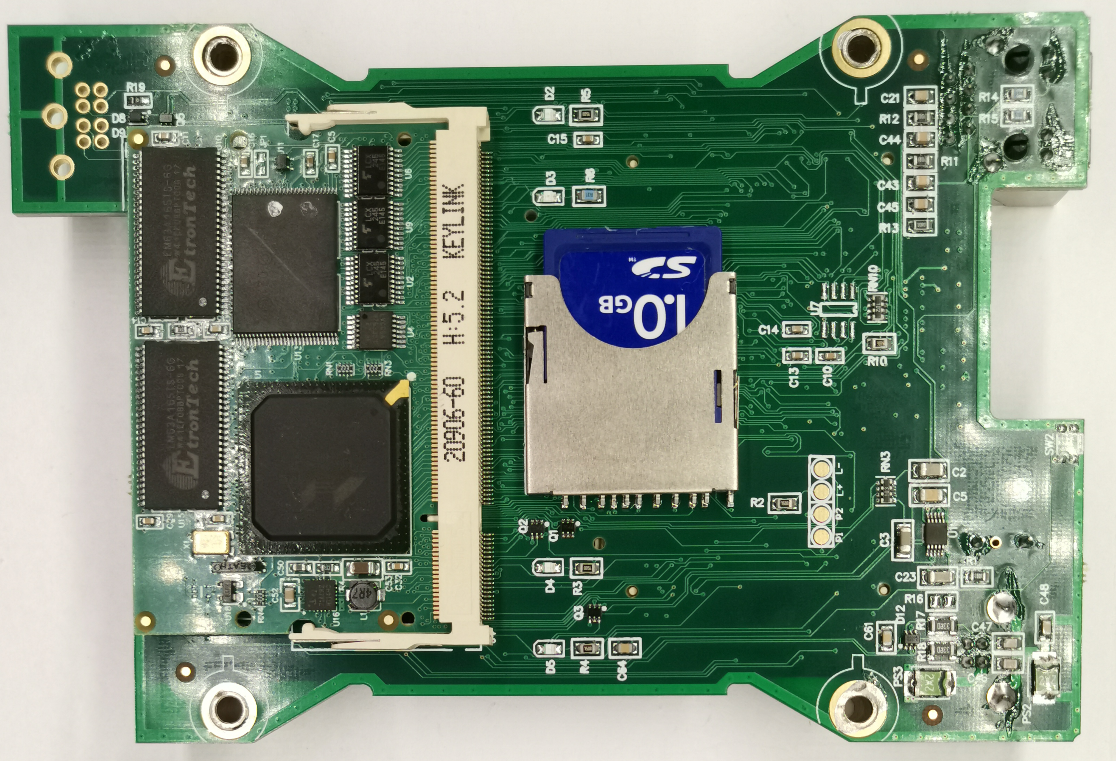
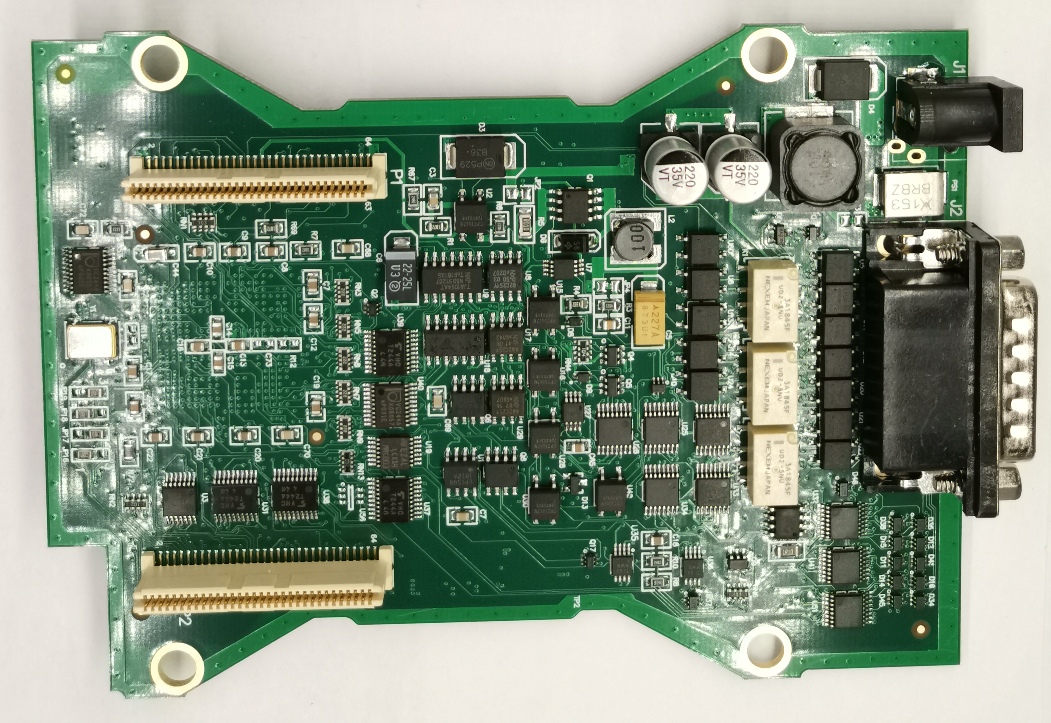
In case someone is interested, these are the PCBs ofGM MDI2 .
Posted by: obd2tool at
05:43 AM
| No Comments
| Add Comment
Post contains 289 words, total size 3 kb.
October 01, 2021
Ford VCM 2 with Ford IDS Software for Ford diagnostic & programming. Quality Ford VCM2 can work with oringinal Ford IDS software from Obd2tool.com, Ford VCM2 Ford diagnostic tool also support firmware update. Here share How to use Ford VCM 2 reprogram Existing Module Step by Step.
Ford diagnostic Tool Ford VCM 2 Clone with Ford IDS Software

Obd2tool.com Ford VCM 2 with IDS Ford diagnostic software reprogram an existing module, follow these steps:
(please connect the cloned Ford VCM2 unit to the car and run Ford IDS)
Step 1:Select the toolbox tab at the top of the screen
Step 2: Select "Module Programmingâ€
Step 3: Select the tick mark or the Enter key
Step 4: Select "Module Reprogrammingâ€
Step 5: From the fly out menu, select the type of module to be reprogrammed
Step 6: Select the tick mark or the Enter key
Step 7: The application will compare the current calibration level to the latest one available for thatvehicle. A message will appear.
Step 7A: If no later calibration is available, a message will appear indicating this. Select the tickmark or the Enter key to return to the Module Programming menu.
Step 7B: If a later calibration is available, a message will appear asking if you want to reprogramthe module with this calibration. If you do not want to reprogram the module, select "Noâ€. You willbe returned to the Module Programming menu.
Step 8: If you want to reprogram the module, select "Yes†in response to the question "Do you wantto program the vehicle with this calibration?â€
Step 9: Make sure that an Internet connection has been established and then selectâ€Confirmâ€
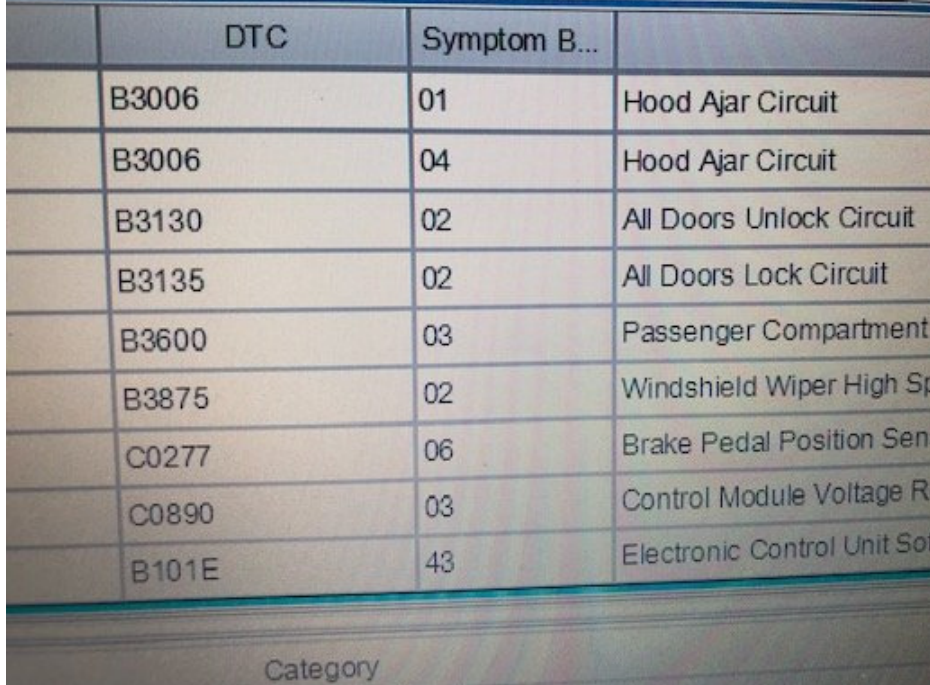
Step 10: You will be presented with a screen that recommends that you carry out Self Test. If youchoose to complete this test, you will receive a list of Diagnostic Trouble Codes (DTC’s) that havebeen set on the vehicle. When finished viewing this list, select "Exitâ€.
Step 11: Follow the on-screen instructions to prepare the vehicle and turn the ignition key off and on.
Select the tick mark or the Enter key after each one.
Step 12: If necessary, apply the reprogramming label to the PCM
If an emissions recall has been performed or a required emissions-related TSB has been completed,an Authorized Modification label must be placed on the PCM. These labels can be purchased at theparts counter of a Ford or Lincoln/Mercury dealership.
Step 13: Select the tick mark or the Enter key to return to the Module Programming menu.
Ford VCM 2 important note for PCM reprogramming:
Ford VCM2 IDS Error Code:11.0×0 851082 when PCM reprogramming
It’s aimed to help how to reprogram/reflash Ford PCM via IDS software esp. for those with Error Code:11.0×0 851082 will be shared here by other users.
Error message:
"The operation cannot begin because the PCM failed to complete a service procedure. Perform PMI on the PCM to resolve the issue.â€
Possible scanners working with:
VXDIAG VCX NANO Ford
Ford VCM2 clone
Customer solutions:
Customer A:
Turnoff your firewall
Customer B:
Uninstall fmp and reinstall it. I have had this happen before.
I have had some new pcm be un programmable.
And just for reference. Fmp doesn’t like Google. Use 32 bit processor as well.
I had to slow my computer down from 64-32 because fmp would not work correctly with 64.
Good luck.
Customer C:
If you are checking PCM for up-dates, Ford will advise on 6.0L powertrain if there is a reflash avail for TCM, FICM or PCM, if it states there is no update then all three modules are at latest level, no action required, I am aware it states to remove FICM relay prior to reflash FICM, this is a carryover note from when we used PDS or WDS to reflash the FICM, if you are using IDS with VMM interface its not required to remove the FICM relay, I have reflashed over 1000 of them this way over the last 7 years, as always make sure the battery stays in the sweet spot @ 13.5 volts, make sure your laptop has sufficient power, I always plug in, make sure cables to veh and laptop are safe from accidental disconnect, Good luck!
Customer D:
If you try to VCM2 genuine or clone to make reprogaming well you need IDS V98.01 or higher.
It would be good to check if during initiation programming interface output 18,5V on pin 13 in OBD connector.
More question about Ford VCM 2Ford Diagnostic Tool with Ford ids software just keep your order number to contact us freely.
https://fordtroublerepair.blogspot.com/2021/08/how-to-use-ford-vcm-2-reprogram.html
Posted by: obd2tool at
09:37 AM
| No Comments
| Add Comment
Post contains 766 words, total size 6 kb.
GM’s new Vehicle Intelligence Platform, or VIP, currently used on 2020-2022 Corvette, CT4, CT5 and 2021-2022 Tahoe, Suburban, Yukon, Escalade and Envision models, offers increased capacity and the ability to better manage technology complexity.
With a fivefold increase in system capacity and responsiveness over the current Global A system, the next-generation VIP electrical architecture offers the capability of managing over 100 computer modules. It’s able to support active safety systems, Over-the-Air (OTA) vehicle software updates, 5G networks, enhanced cybersecurity protections and EV technologies.
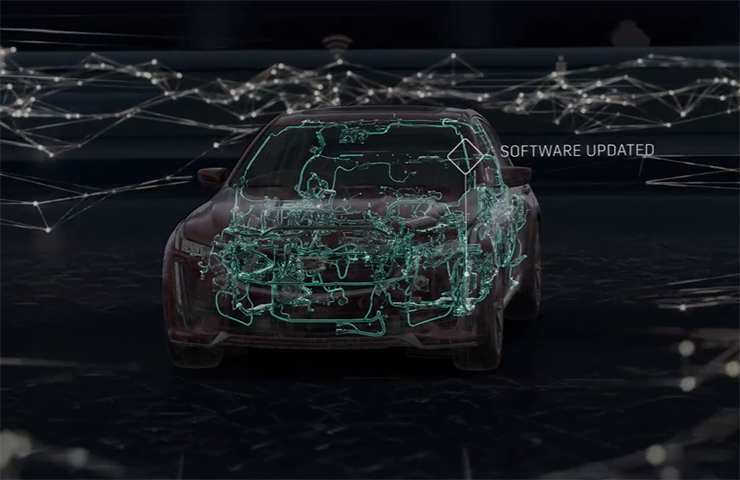
The VIP electrical architecture includes two-wire CAN buses and two-wire Ethernet buses to ensure high speed data transfer and multiple single-wire LIN buses to exchange information between master control modules and other smart devices. Low speed General Motors Local Area Network (GMLAN) networks are no longer used in VIP vehicles.
CAN Protocol
The VIP architecture communication protocol is based on the widely used CAN (Controller Area Network) protocol. CAN buses are used where data needs to be exchanged at a high rate, primarily by a control device using the information to adjust a vehicle system, such as powertrain or body controls. Each CAN data network consists of two twisted wires, called CAN (+) and CAN (-), with a 120 ohm (Ω) termination resistor at each end of the bus between the CAN (+) and CAN (-) circuits.
Ethernet data communication technology uses a single twisted copper pair of wires at speeds of 100 Mbit/s and 1000 Mbit/s. The Ethernet system uses point-to-point communication that is connected via an Ethernet switch [Module <–> Switch <–> Module]. The Ethernet bus does not use terminating resistors.
The K56 Serial Data Gateway Module and the A11 Radio have an Ethernet switch that connects to other Ethernet modules. These modules communicate with other devices and systems in the vehicle via CAN and LIN buses. DTCs will be read on CAN to diagnose Ethernet, LIN, and system faults.
Any Ethernet harness failures should be repaired only using the appropriate kit to perform de-pin/re-pin overlays. In cases where the wiring harness repair kits are not available, the entire harness should be replaced. No crimps or splicing should be performed on the Ethernet wiring harness.
Serial Data Gateway
To signal any loss of communication and set DTCs, the K56 Serial Data Gateway Module must know and learn the control modules on the vehicle and their associated buses. If the Serial Data Gateway Module is replaced or another module is added to the bus, such as a dealer-installed accessary, a learn process must be done using the Serial Data Gateway Module learn procedure in SPS.
The learn process will not cause any previously learned contents to be forgotten or overwritten. If the learn process is not completed on a new Serial Data Gateway Module, DTC U1977 (ECU Identification Self Learn Not Completed) will be set until the learn procedure is performed. If the learn process is invalid due to internal malfunction or a Serial Data Gateway Module swap, DTC U3000 42 (Control Module – General Memory Failure) or DTC U3002 56 (Vehicle Identification Number – Invalid/Incompatible Configuration) will be set. The Serial Data Gateway Module will then lose communication with all control modules and set DTCs against control modules not on the vehicle.
The Serial Data Gateway Module also functions as a gateway to isolate the secure networks on the vehicle from unsecured networks. Isolating primary networks helps ensure advanced driver assistance systems and active safety features, such as enhanced collision avoidance, can all operate in conjunction with each other. If harmful software enters the vehicle through the infotainment system, OnStar, or the DLC, other vehicle systems may be affected.
Power Moding
In the VIP architecture, the K9 Body Control Module (BCM) is the Power Mode Master (PMM) and the K56 Serial Data Gateway Module is the back-up PMM. There are five power modes: Off, Accessory, Run/Service Mode (Engine Off), Propulsion (Engine On), and Start. As the PMM, the BCM uses a number of vehicle states and inputs to determine which power mode is required. It reports this information to other modules via serial data.
MDI 2 Required
The EL-52100GM MDI 2 is required for control module programming, configuration and setup on vehicles equipped with the VIP architecture. The MDI 1 does not have the capability to complete programming and setup procedures. Using an MDI 1 on these vehicles could result in erroneous data or failed programming events that could lead to unnecessary module replacement.
When a scan tool is installed, it will attempt to communicate with every control module that may be available on the vehicle, depending on optional equipment. If an option is not installed on the vehicle, the tool will display No Communication for that control module. In order to avoid misdiagnosis of a No Communication message, refer to the Data Link References that lists the control modules and the buses with which the modules communicate in the appropriate Service Information and the vehicle build RPO codes to determine optional control modules.
Programming a Module
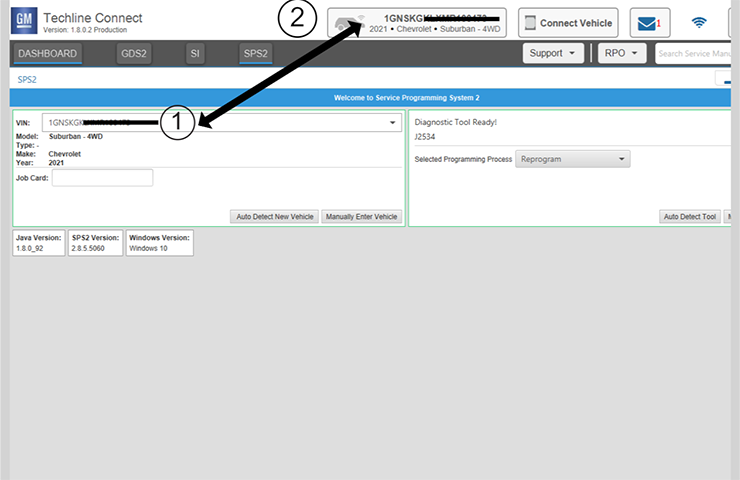
When SPS (Service Programming System) programming a module (Fig. 2), follow all SPS on-screen instructions.

These tips also should will help in successful programming:
Confirm the VIN – Techline Connect (TLC) does not automatically execute the Vehicle Identification Number (VIN) Read with the power mode Off. Technicians must confirm that the VIN is correctly identified prior to programming by verifying the VIN reflected in Techline Connect matches the VIN plate on the vehicle. (Fig. 3) Be sure not to select a VIN that is already in the Techline Connect application memory from a previous vehicle.
To use the VIN Read when using Techline Connect, the vehicle’s power mode (ignition) must be On before reading the VIN from the vehicle’s Engine Control Module (ECM), which is the vehicle’s VIN master module. Programming or reprogramming modules with the incorrect VIN and using software and calibration files from incorrect VINs can cause future serviceability issues as well as potential vehicle performance issues that may require the vehicle to be reprogrammed again.
Battery Voltage – Stable battery voltage is critical during programming. Any fluctuation, spiking, over voltage or loss of voltage will interrupt programming. Install a GM Authorized Programming Support Tool to maintain system voltage. Do not use a battery charger.
Power Mode Off – The power mode (ignition) must be Off to begin module programming. Any load on the vehicle’s battery, such as interior lights, exterior lights and Daytime Running Lamps, and HVAC operation, may affect the download process and may cause errors to occur.
Do Not Change the Power Mode – Do not change the power mode of the vehicle (position of the ignition switch) during the programming procedure unless instructed to do so. Programming will direct the appropriate control module(s) to change power mode as needed during the procedure, independent of the vehicle’s power mode.
Keep Vehicle Fully Asleep – Ensure that the vehicle will not become awake during the programming event by keeping all doors closed (vehicle fully asleep). For access to the vehicle, trip the driver’s door latch to the closed position so that the door can remain open. If a closed door is opened during programming, buses will wake up and cause error codes to set
Clear All DTCs – After programming, clear all DTCs and allow the vehicle to go into sleep mode. DTCs U1962 (Unable to Authenticate Serial Data Message) and U1983 (Serial Data Gateway Module Security Hardware Internal Malfunction) may set and the Check Engine MIL may illuminate if the DTCs are not cleared and the vehicle does not go to sleep after programming or Serial Data Authentication Configuration (SDAC).
If SDAC fails, DTC U1962 will set as a current DTC. It will not clear until another programming event occurs that runs SDAC, or the standalone SDAC procedure is performed using SPS. If DTC U1962 is stored only as a history DTC and not retrieved as a current DTC, do not perform the SDAC procedure.
Wait 5 Minutes – After programming, let the vehicle sit for five minutes with the ignition Off, Retained Accessory Power Off and the key fob removed from the vehicle after completing programming. After five minutes, the system can be operated to verify repairs.
https://gmscantool.blogspot.com/2021/08/programming-with-vehicle-intelligence.html
Posted by: obd2tool at
09:32 AM
| No Comments
| Add Comment
Post contains 1363 words, total size 11 kb.
September 16, 2021
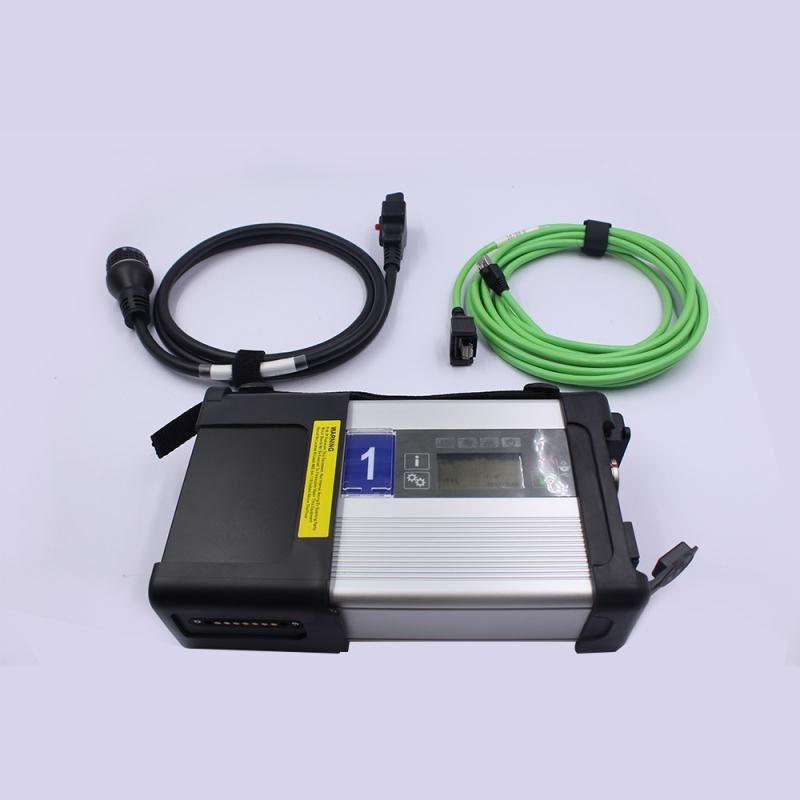
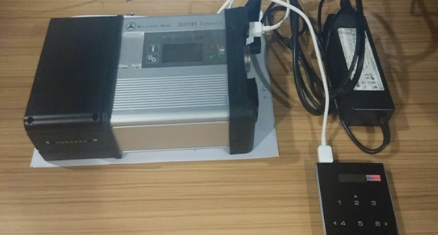
Star Diagnosis DOIP MB Star C5 is the update version of SD Connect C4.
Mercedes star diagnostic system sd connect c5 supprot DOIP protocol
work for new cars.Bellow is the detail guide about how to update DOIP MB
Star C5 Softwar To V2021.06.
Tools required:
Xentry_Kit_09_2017.iso(copy to the folder: iodd 2541 _ISO)
U disk with a Windows machine (recommend Bigbaicai WinCE)
IODD 2541 External Encrypted Hard Drive or similar

Panasonic power adapter

MB Star C5
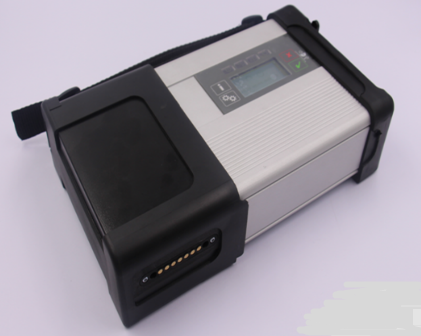
C5 mux in standby mode
connect the Panasonic power adapter to C5
insert IODD 2541 into the USB port on C5

in a standby mode, press "X†and "àat the same time, then it will pop up "Start Update?â€
(if not, it will pop up "Start XENTRY Connect?â€. then, when the prompt disappears, it will display "Start Update?â€)
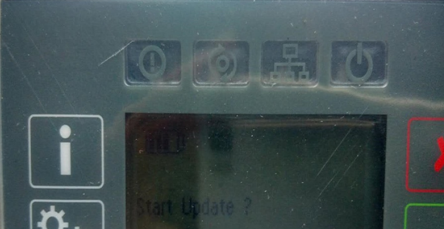
When you see "Start Update?â€, press "àand Connect C5 will go into the update mode and IODD 2541 will light up
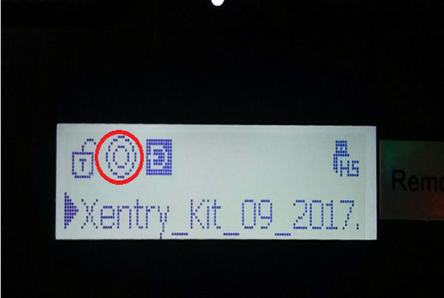
Press button "5†on IODD 2541 as soon as possible. then, the cross "X†will turn a circle "Oâ€

what’s displayed on C5:
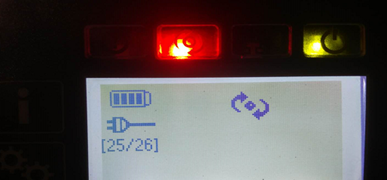
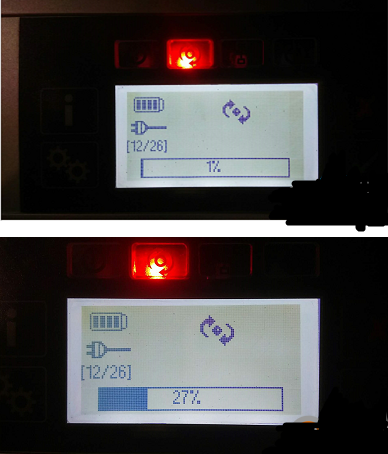

It will take 50-55 minutes to finish the upgrade
The system restarts after installation completes
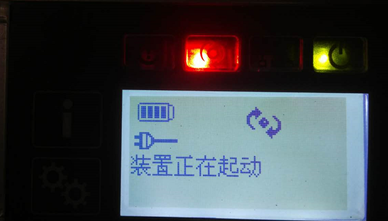
If your system fail to start, turn offMercedes Star Diagnostic C5 mux and restart again
When C5 starts, take out the hard disk on C5 and install it into the laptop (here: Dell 55220)
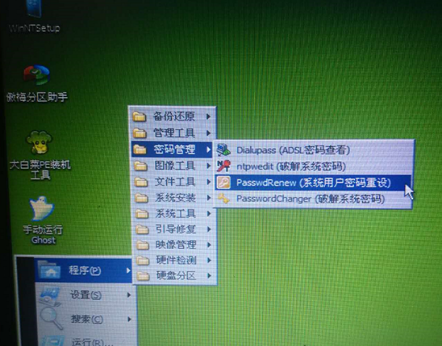
Before it, pls install the Windows machine on the U disk

Press F12 when you see the pop-up "F12 Boot Optionsâ€
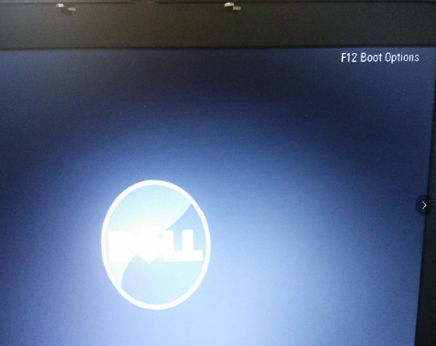
Select USB Storage Device and press "Enterâ€

Pop up the interface, and select [03] WIN2003 PE Classical
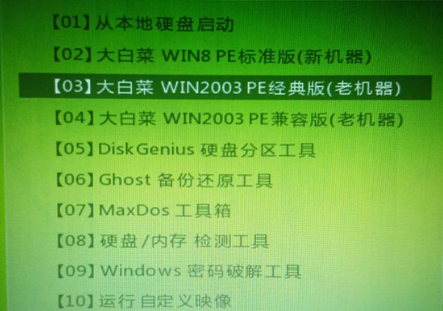
Go to the PE system and create an user account
Posted by: obd2tool at
10:54 AM
| No Comments
| Add Comment
Post contains 282 words, total size 8 kb.
Here is the guide to set up and flash a DME or EGS. Look at the steps starting at "Open up WinKFP†below.
– Install BMW Standard Tools 2.12 (EDIBAS, INPA, WinKFP, NCS Expert) and ensure they work with your car.
– WinKFP 5.1.6 (no earlier version than this)
– INPA 5 or higher
– Get the daten files (download, extract from Progman or Ista/p).
– E39 daten files: https://rapidshare.com/files/1672164095/E39_V41_Daten_Files.rar
– E46 daten files: https://rapidshare.com/files/4196534502/E46_V41_Daten_Files.rar
– See these instructions for extracting the daten files from Ista/p.
– Have jumper cables to another car battery supplying a minimum of 10A power.
– Connect the K-line cable to OBD port on car and USB port on computer.
– Turn the ignition key to position 2.
– Open up WinKFP.
– Select Configuration
– Uncheck Fast baudrate.
– To not increment the flash update counter, uncheck all UIF checkboxes.
– Click OK, cancel all the prompts about creating the new config files, click Ok to save to INI file.
– Select F1 Comfort Mode.
– Select F3 Update ZUSB.
– Select the ECU to update (ex: GD20, GD8604, MDS43, MDS451, etc.).
– Select F4 Enter VIN and paste in the full VIN for the car.
– Select F8 Done.
– Select F3 Prog. ZB-Update to detect current version and latest available update version.
– Click OK to begin flashing.
– It takes 43 minutes for MS45.1, 20 minutes for MS43, 7 minutes for GD20, 12 minutes for GD8604).
– After the confirmation message of flash update complete, close WinKFP.
– Wait one minute.
– Turn off the ignition key.
– Wait one minute.
– Turn on the ignition key to position 2.
– Clear adaptations using either BMW Diagnostic Software INPA or PA Soft 1.4:
– Start INPA, select DME, Errors, Adaptations.
– Start PA Soft 1.4, select Units, select DME/DDE, select called "DME-EWS Adaptationsâ€.
– Clear any error codes in both DME and EGS. Turn off key for one minute. Try again. Do this until all are cleared.
loading..
Posted by: obd2tool at
10:47 AM
| No Comments
| Add Comment
Post contains 347 words, total size 3 kb.
August 01, 2021
Autel MaxiDiag Comparison: Autel MaxiDiag MD808 PRO vs Autel MaxiDiag MD802 (All System) vs Autel MaxiDiag MD808 vs Autel MaxiDiag MD802 (Four System)
| Model | Autel Maxidiag MD808 PRO(All System) | Autel Maxidiag MD802(All System) | Autel MaxiDiag MD808(Four System) | Autel MaxiDiag MD802 (Four System) |
| Throttle Match Function | √ | |||
| System Coverage | All System | All System | Engine.Transmission.
ABS.SRS |
Engine.Transmission.
ABS.SRS |
| Steering Angle Learning | √ | √ | ||
| DPF Functions | √ | √ | ||
| Battery Registration and Reset | √ | √ | ||
| Read/Erase Codes | √ | √ | √ | √ |
| View Freeze Frame Data | √ | √ | √ | √ |
| View Live Data | √ | √ | √ | √ |
| View Vehicle Information | √ | √ | √ | √ |
| View 1/M Readiness Status | √ | √ | √ | √ |
| On-board Monitor Test | √ | √ | √ | √ |
| 02 Monitor Test | √ | √ | √ | √ |
| Modules Present | √ | √ | √ | √ |
| Component Test | √ | √ | √ | √ |
| EPB Brake Pads Replacement | √ | √ | √ | √ |
| Oil Service Reset | √ | √ | √ | √ |
| Save and Playback Data | √ | √ | √ | √ |
| DTCs Help | √ | √ | √ | √ |
| Print Data via Windows-based PC | √ | √ | √ | √ |
| Display | 800 x 480 LCD | 320 x 240 dpi | 800 x 480 LCD | 320 x 240 dpi |
| Memory | 32M+16G | 32M+16G | 32M+16G | 32M+16G |
| Power Consumption | 1.7W | 1.7W | 1.7W | 1.7W |
| Weight | 313 g (0.69 lb) | 280 g (0.62 lb) | 313 g (0.69 lb) | 280 g (0.62 lb) |
Autel Maxidiag MD808 PRO Compare with Autel MD802:
1. Autel MD808 PRO is the upgrade version of MD802, which covers more cars and more systems.
2. Autel MD808 PRO support Steering Angel Learning, DPF functions, and
Battery Registration and reset. MD802 didn’t have these functions
3. Autel MD808 pro is not just a diagnostic tool, but a professional
service tool to service individual specialized systems, including Oil
Reset, EPB, SAS, BMS, and DPF, offers a quick and easy solution to
everyday task in the workshop;
The ARM Thumb Processor (400 MHz) needs only 6s booting time to allow you to build a more fluid user experience.
4. For MD808 PRO, Live data graphing for all available modules.
5. Brand New Design: Autel MD808 pro, a revelation in diagnostic and
service tool is launched with the brand–new exterior in terms of design,
structure, and buttons;
6. Efficient Diagnosis: MD808 PRO Offer more advanced features and
functions to troubleshoot basic four systems (Engine, Transmission, SRS,
and ABS) for major vehicles on the road today;
7. Powerful Hardware: MD808 PRO Included with 16G Micro SD Card, full
color 800*480 display to take your diagnostic experience to a whole new
level;
Posted by: obd2tool at
01:32 AM
| No Comments
| Add Comment
Post contains 422 words, total size 6 kb.
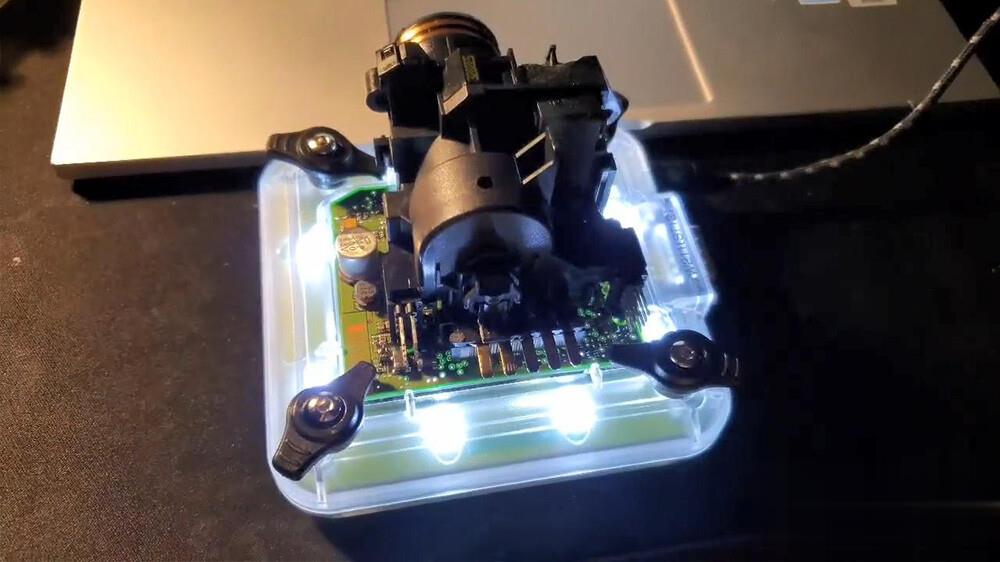
Today, I’m working on a 2004 Mercedes Benz C240 with all keys lost with Xhorse VVDI Prog, VVDI Key Tool Plus (short as KTP),Autel MaxiIM IM608 with XP400 PRO, I took out the EIS cause I tried to calculate password with Autel, but it tells me it will take 20 minutes to 420 minutes, quite frankly I don’t have time for all that nonsense at all. As you can see, it is 209 EIS, funny thing is about this particular yeah won’t be reading it as a tool that has different variations of this adapter.
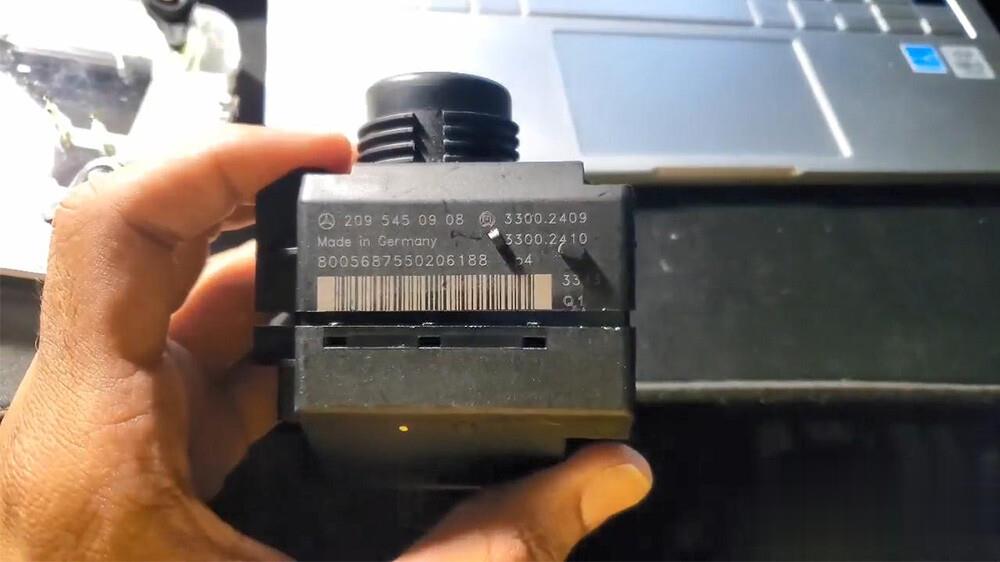
I will be reading with this adapter W209 /211 ZGW.
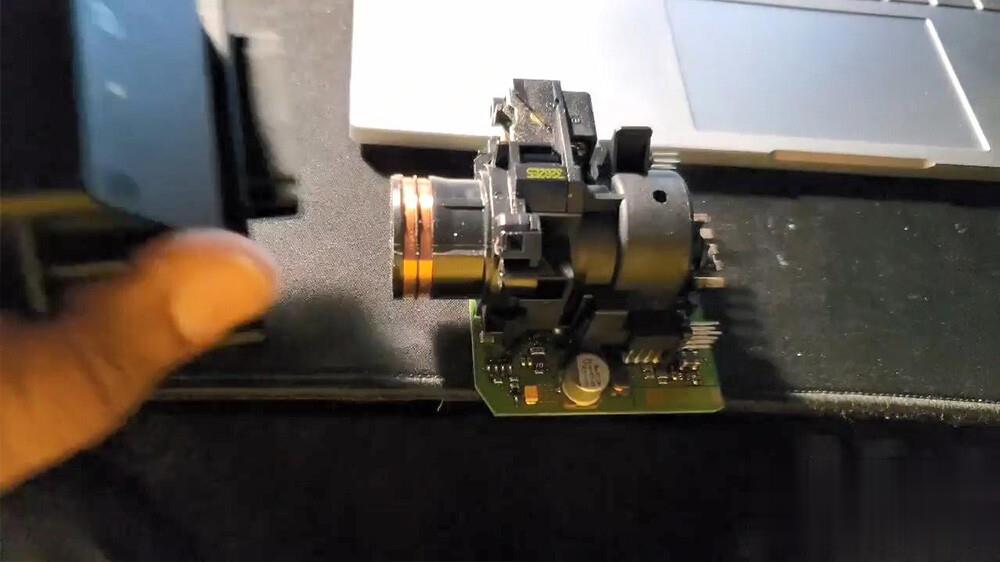
We also have this one W209 /211 (HG12).
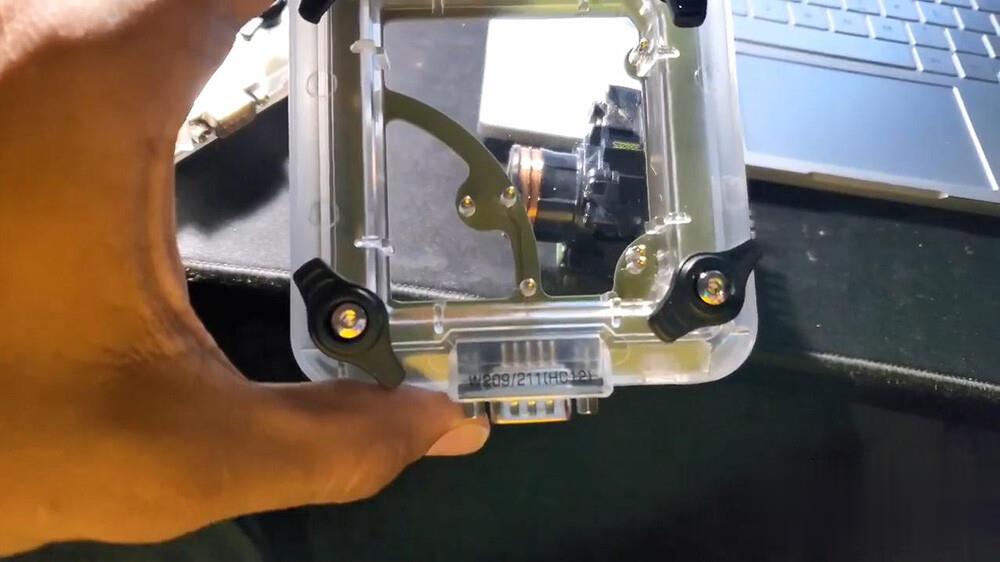
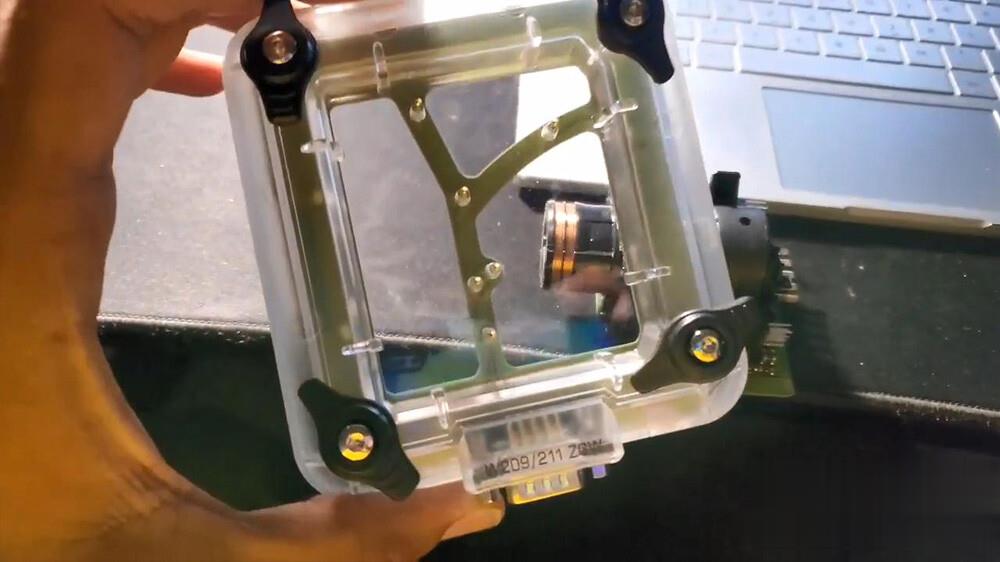
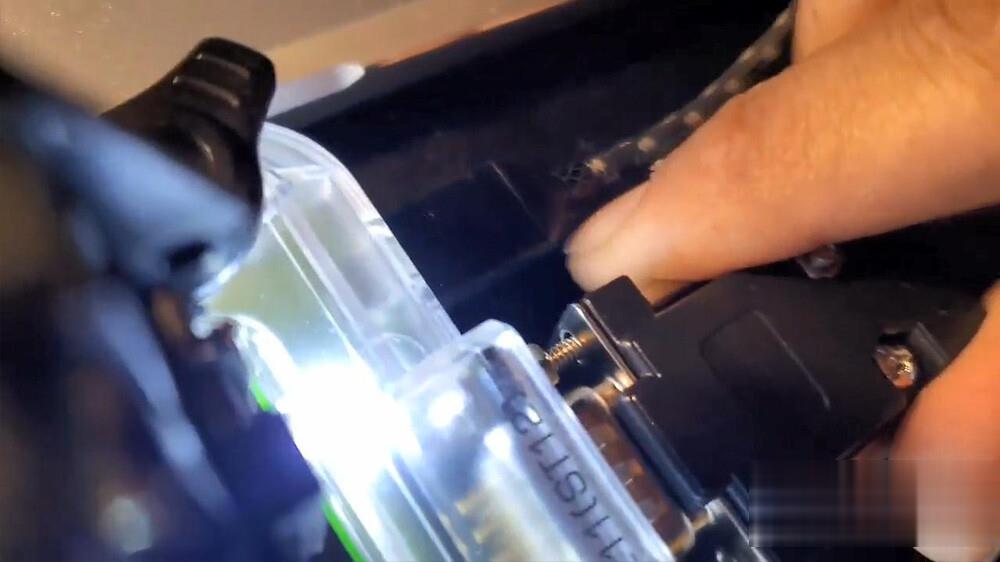
And will use W211 ST12 adapter, and put it into the adapter W211 (ST12).
We’re gonna read with Xhorse VVDI Prog.
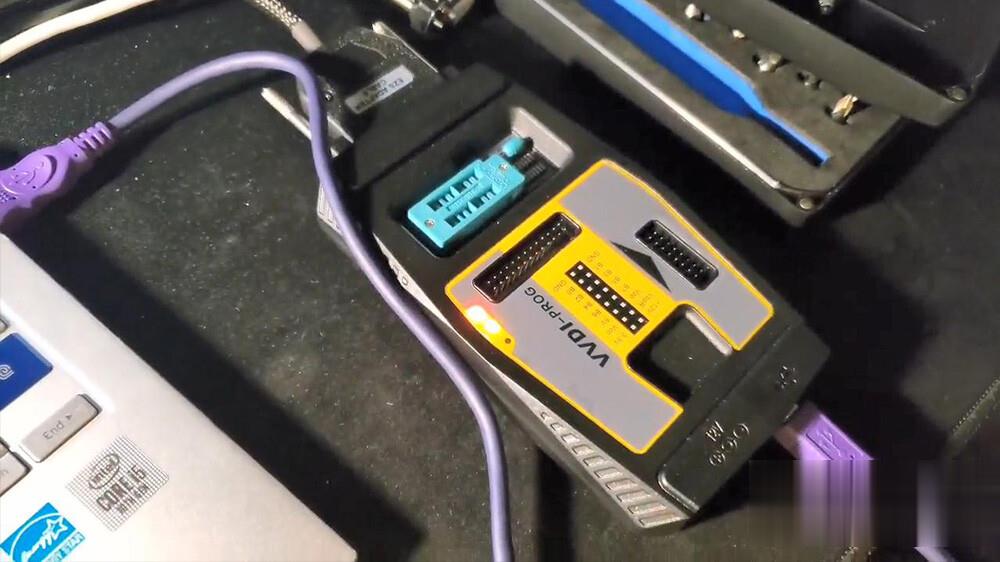
We’re back once I have everything setup, the EIS is on the adapter perfectly.
So now, I’m gonna put it into VVDI Prog, to plug the cable to the adapter W211 (ST12). And the plug the power adapter into VVDI Pro.
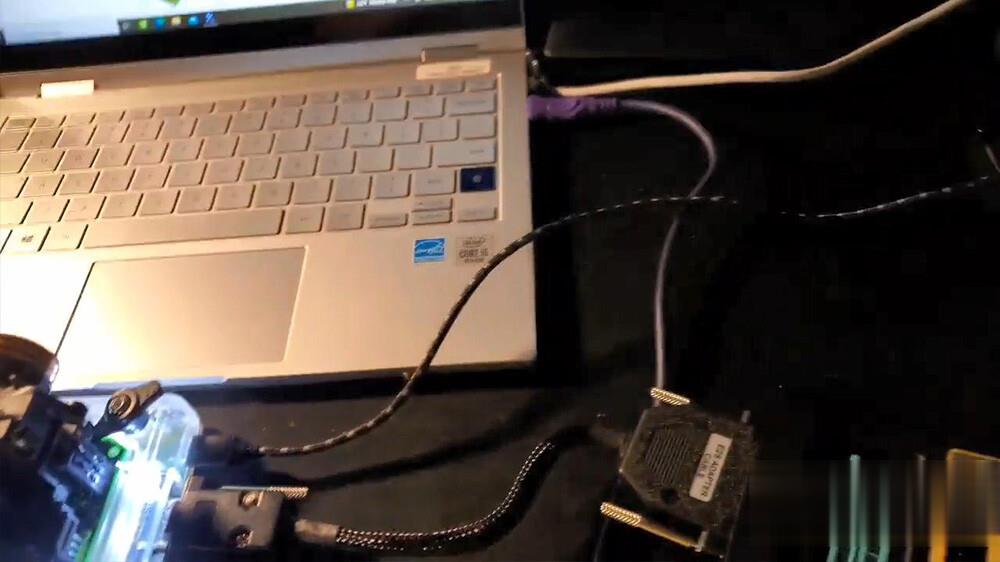
To read with VVDI Pro successfully.
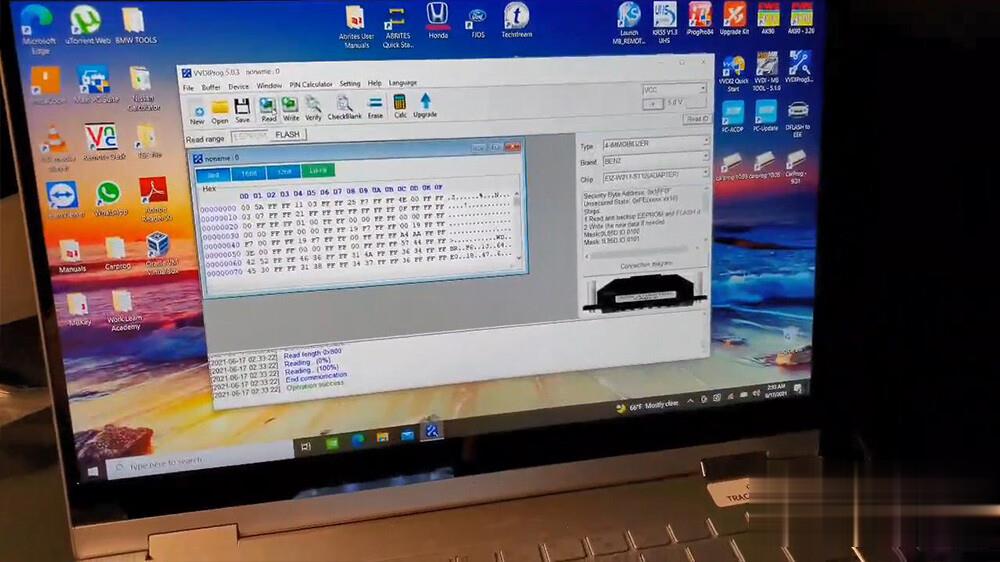
Then, click on "Verifyâ€
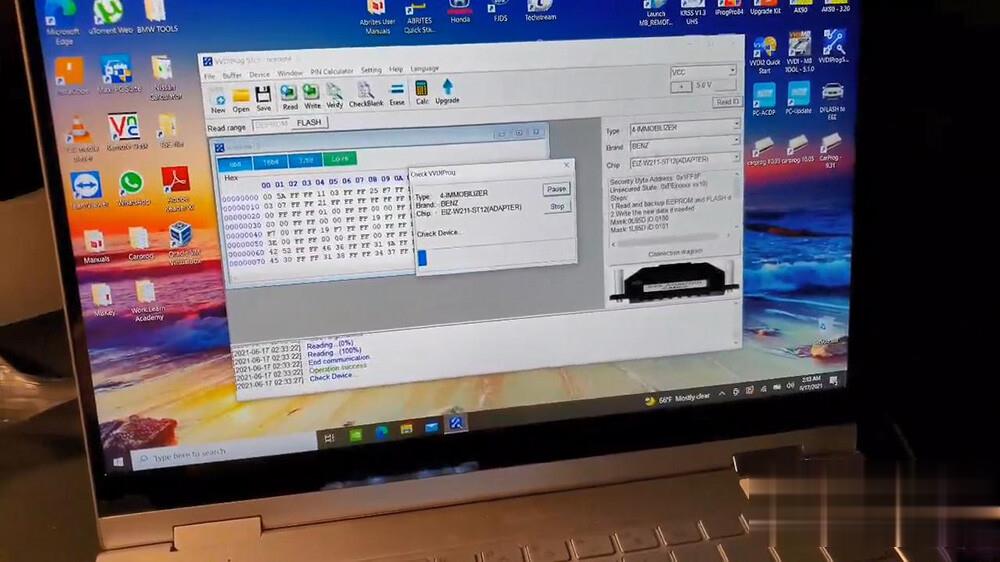
Then save as C240 EEP.
Click on "Flashâ€, and then "Read†until succeed, then "Verifyâ€.
Then, save as "C240 flashâ€.
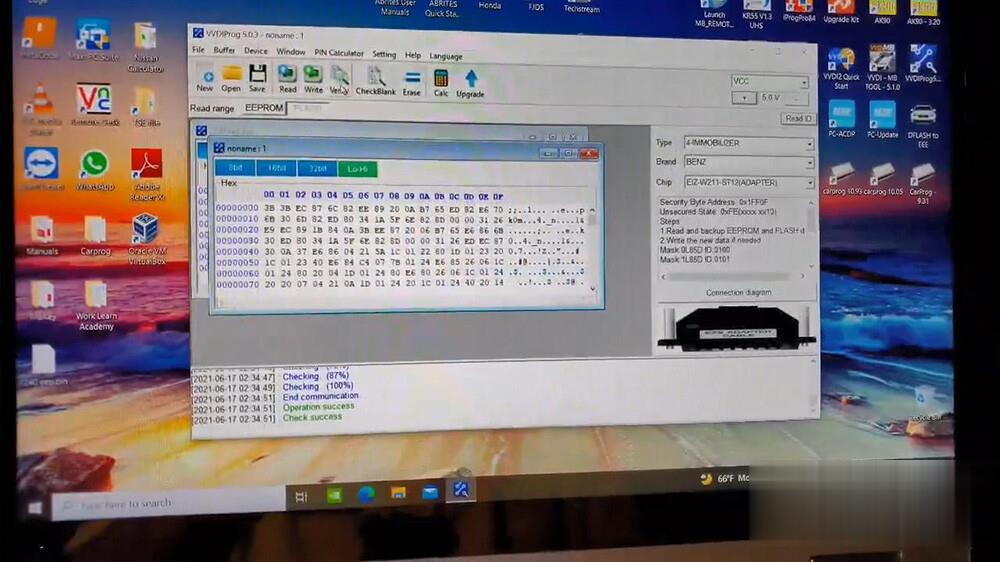
Awesome, so now I have both of those files, so what I’m gonna do is to transfer them both to VVDI Key Tool Plus.
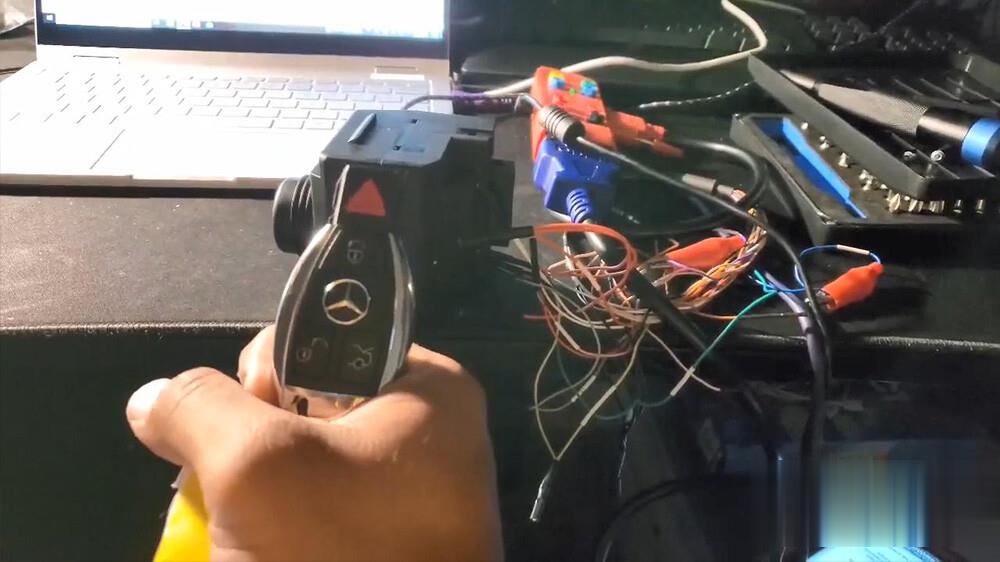
This is the key to be programmed.

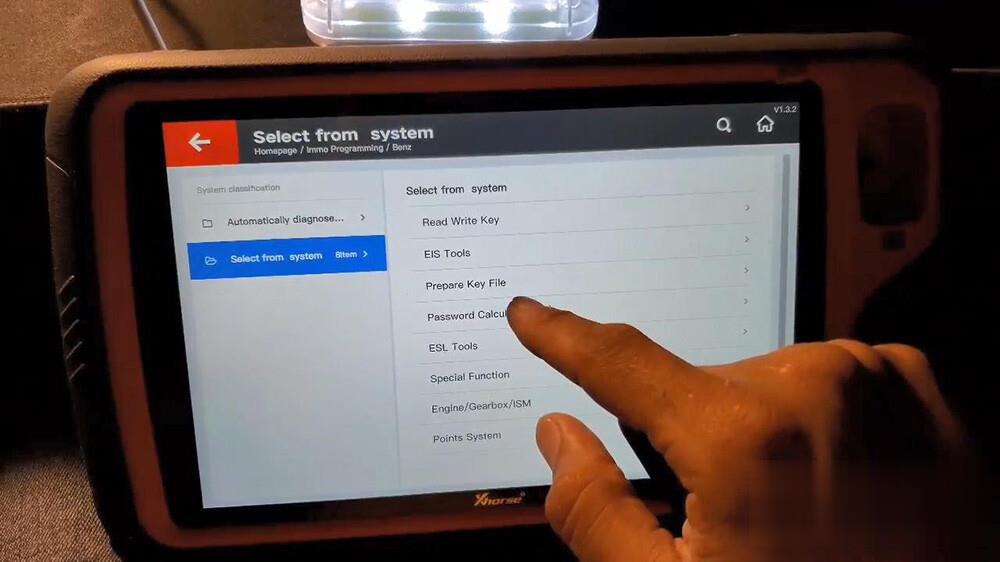
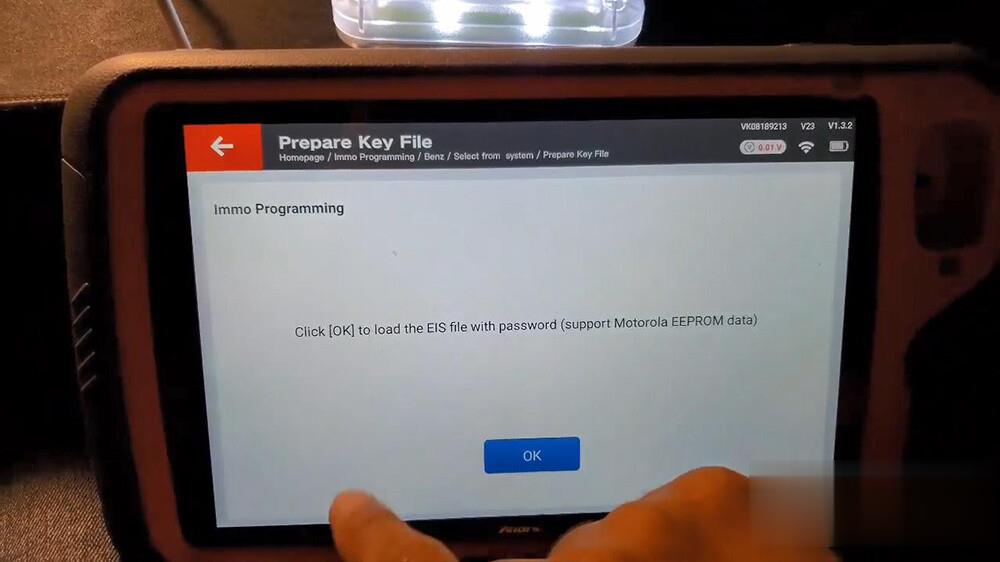
Go to "Immo programming†->> "Europe†->> "Benz†->> "Select from system†->> "Prepare Key File†->> "Start Programming†->> "Prepare key file†->> Click [OK] to load the EIS file with password (support Motorola EEPROM data).
Go to "EIS†-> "20345605†->> C240 eep.bi
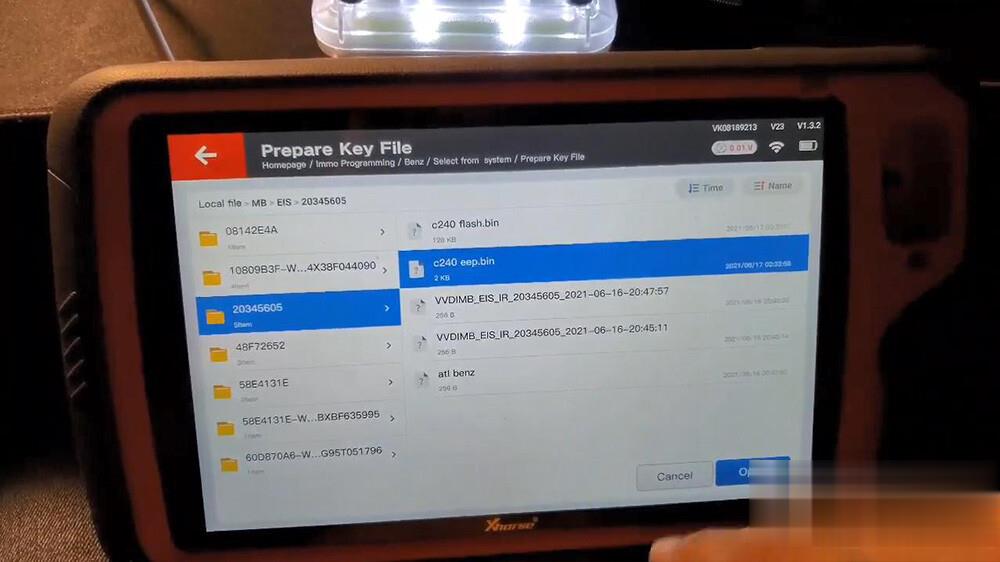
Click on "Yesâ€.
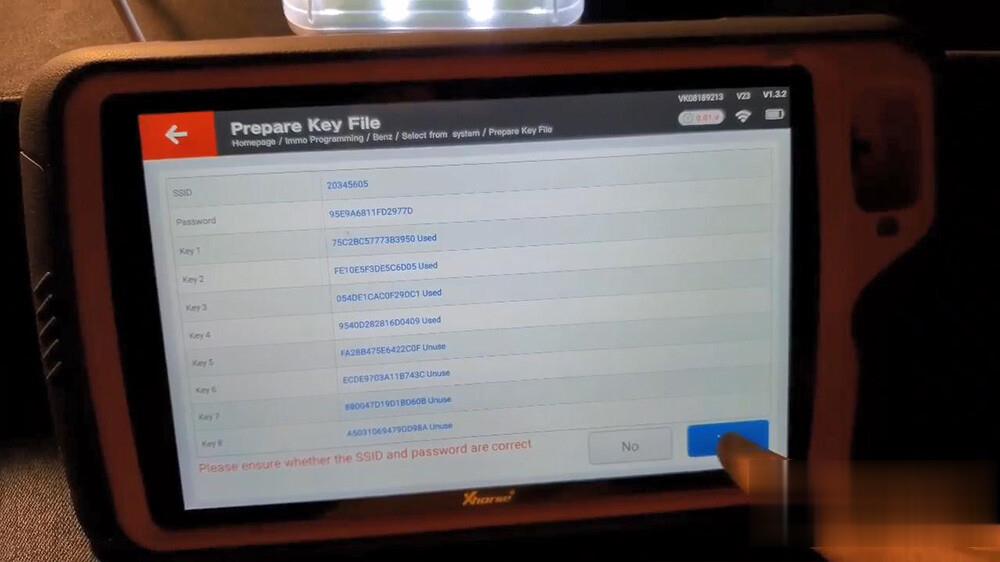
Please confirm the key password, tap "OK†to continue.
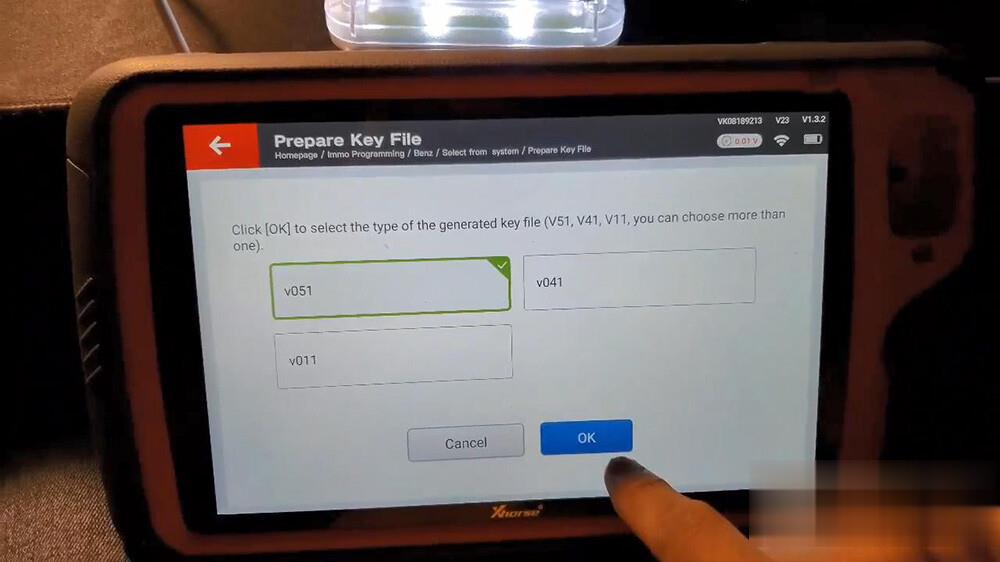
Select V051 type of the generated key file, or you can choose more than one.
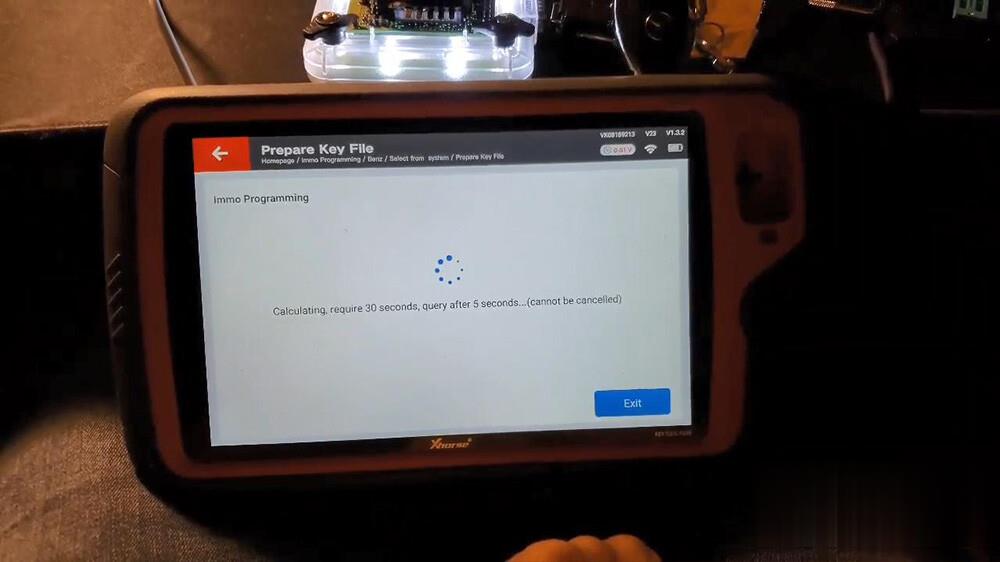
Calculating, require 30 seconds, query after 5 seconds…
Click "OK†to select the path to save the file.
Click on "Save here†and then "OKâ€
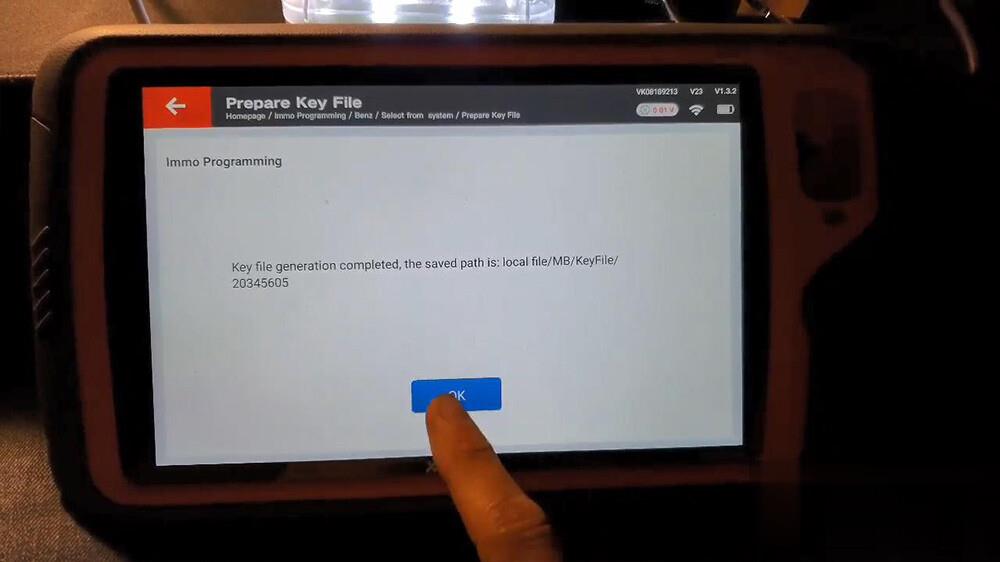
Preparing 1 key, 2 key, 3 key, 4 key, 5 key, 6 key, 7 key, 8 key …
Okay, key file generation completed, the saved path is : local file / MB/ KeyFile/20345605.
Back to tap "Read write key†and then "Read /Write key via IRâ€.
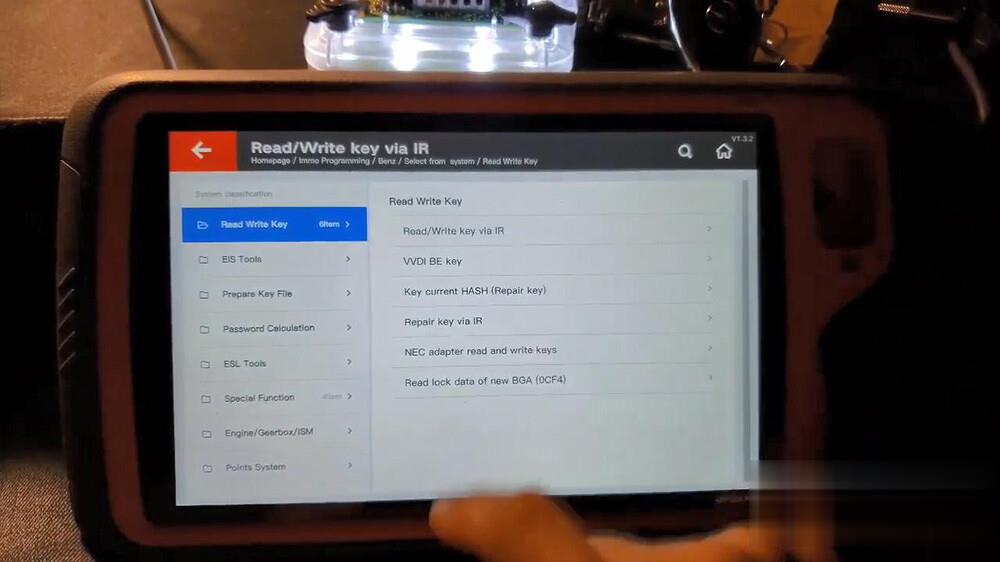
Tap "Star programmingâ€.
Choose "Infrared identification key informationâ€.
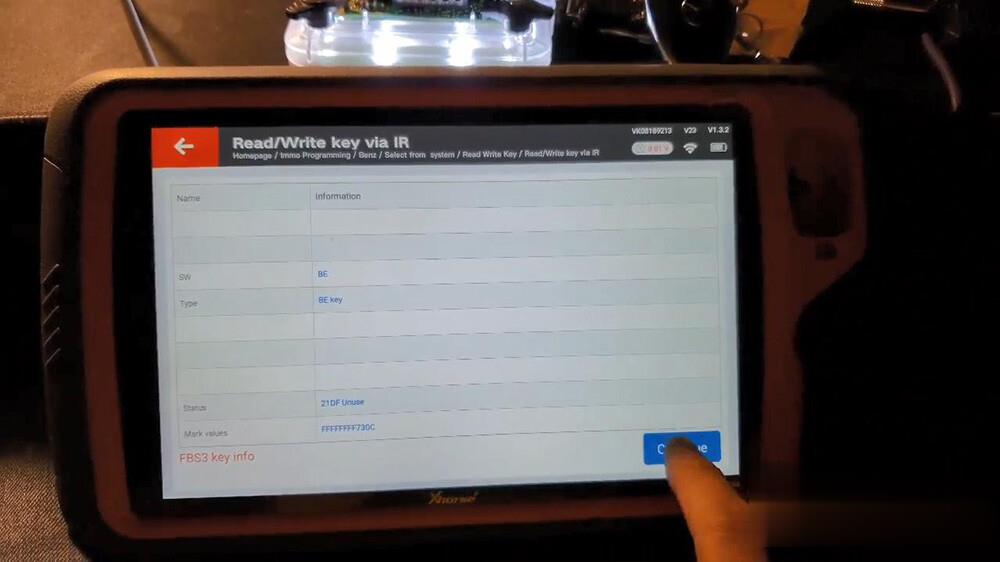
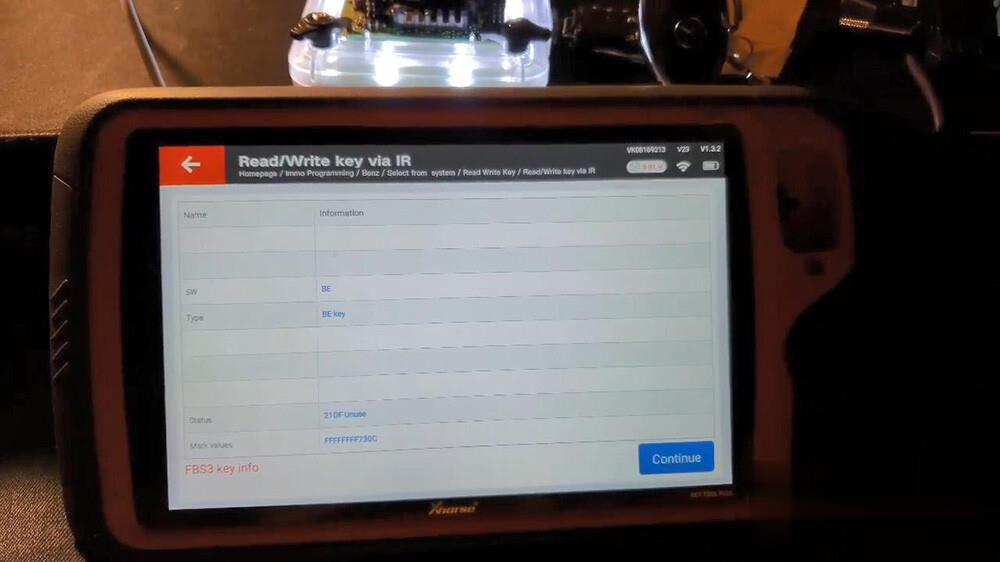
Insert the key into the infrared antenna of the Key Tool Plus, click "OKâ€.
Reading key data…
Click on "Continueâ€.
Choose "Erase the BE keyâ€.
Click "OK†to ensure the key is inserted into the infrared antenna of the Key Tool Plus.
Erase success! Tap "OKâ€.
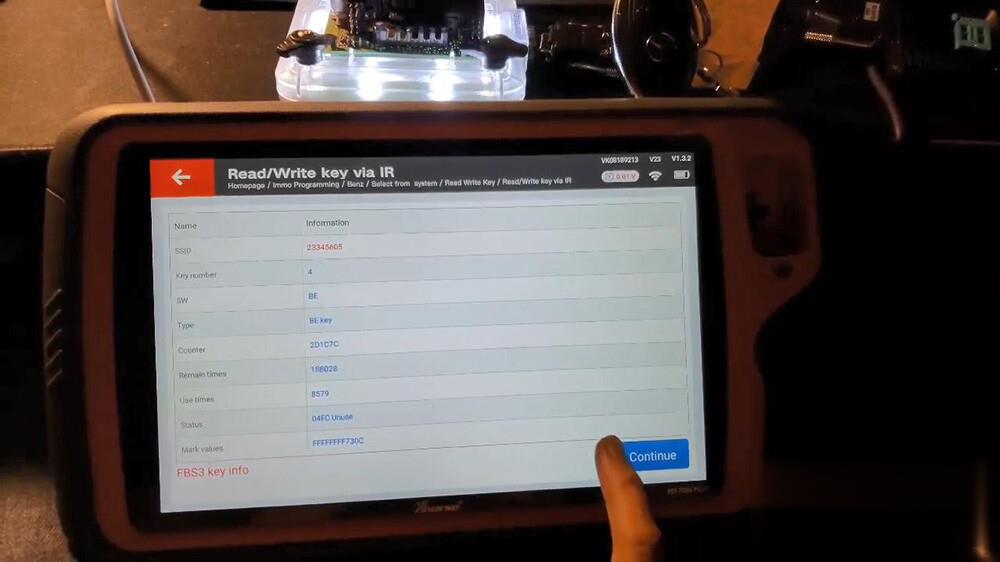
Again, go to "Infrared identification key informationâ€, click on "OK†and then "Continue†to ensure FBS3 key info.
Choose "Write BE keyâ€.
Click on "OK†to load the key file to be written.
Enter "20345605†folder and then "key4_23345605_used_051.binâ€, then "Openâ€.
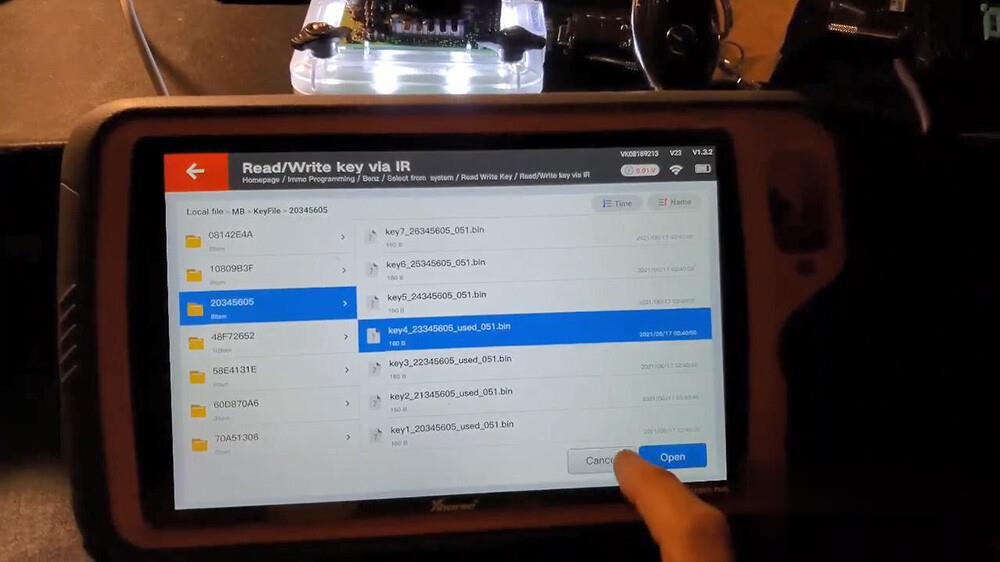
Click on "OKâ€.
Writing data success.
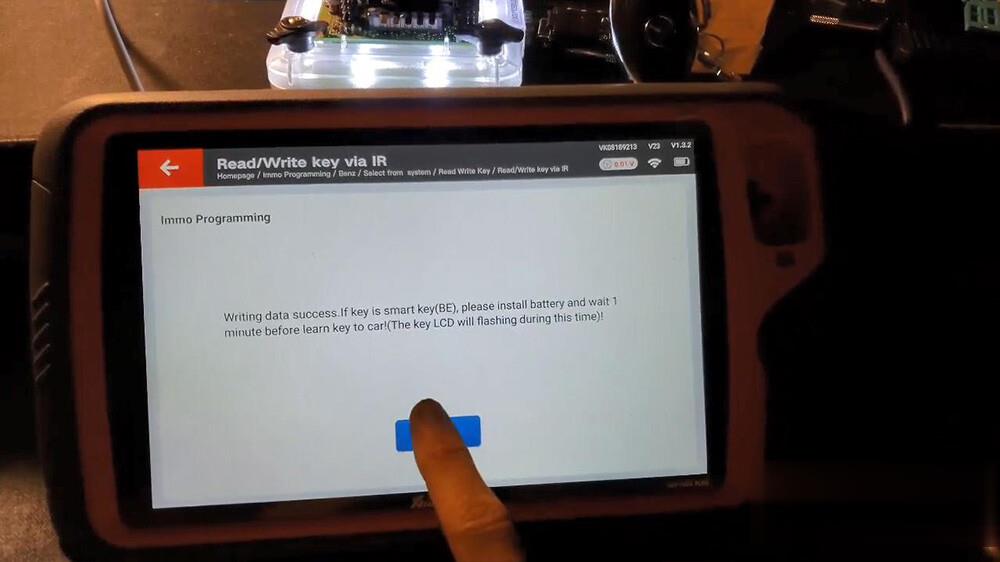
Please directly insert the activation key into the car to activate. If any problem, please following the on-screen guide to do.
Again, go to "Infrared identification key informationâ€.
Now we have 4 key number.
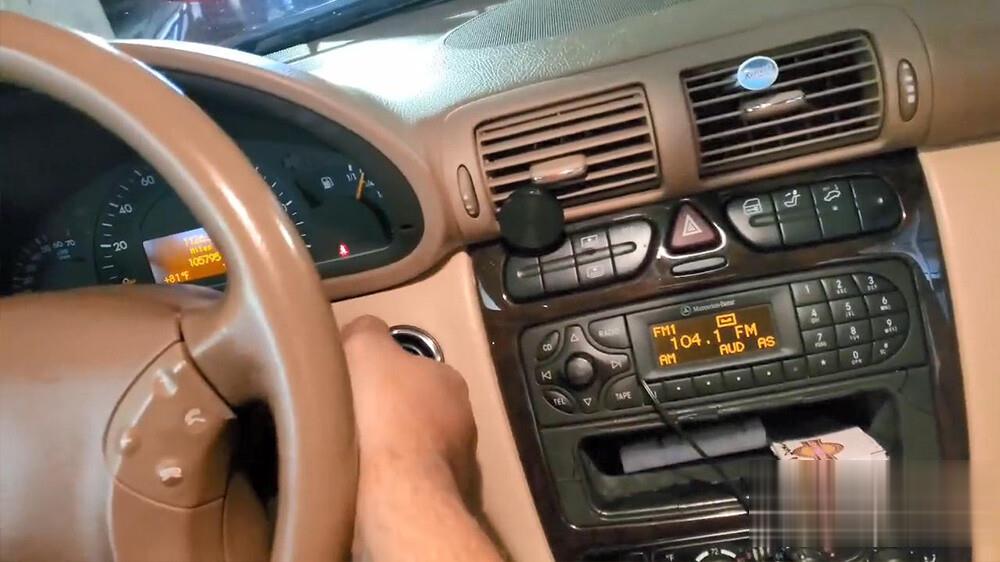
So let me go put this back in the box, plug everything up and try to turn it back.
So I realized that the key won’t turns unless it’s connected to the vehicle
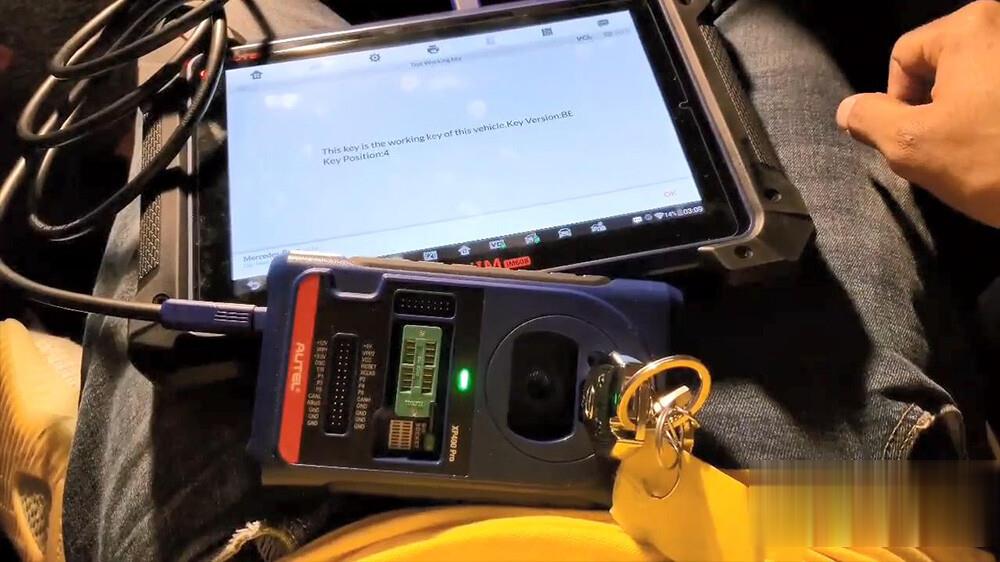
I’m going to test the working key on bench using Autel MaxiIM IM608.
Operation path: ESI tools -> Test EIS status /working key ->> On bench (G-box) ->> Test Working key ->> Current EIS type: W209/2006.
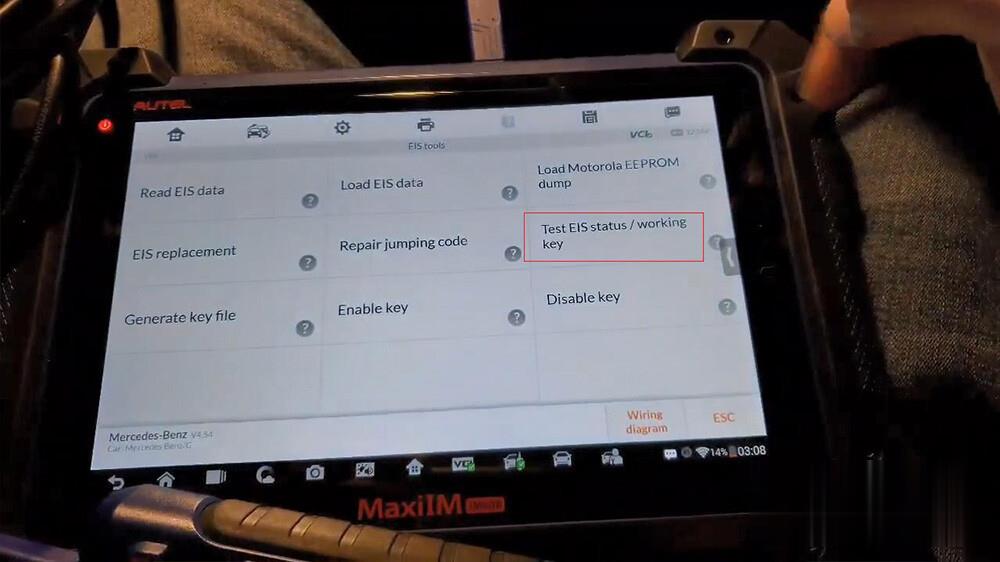
Please insert the key into the IR keyhole on the programmer (XP400 Pro)
Please insert the key into the EIS and remove the key 3 times.
Please insert the key into the IR keyhole on the programmer (XP400 Pro)
This key is the working key of this vehicle, key version: BE key, position: 4
Alright, the key is programmed.
Perfectly, the new key can start the car.
Here follow 3 questions and answers:
Question: Nice job, but why not completed with the key tool plus only? Those adapters work for the tablet as well.
Answer: I’ve tried that method and the tool doesn’t connect with the adapter after modifying it for the Key Tool Plus. I tend not to deviate from the tool’s original purpose unless I’m experimenting with my own modules.
Question: what about ezs cables do they work with the key tool plus?
Answer: it doesn’t work unfortunately. The adapter cable is not yet released.
Question: Nice! Where did you get adapters?
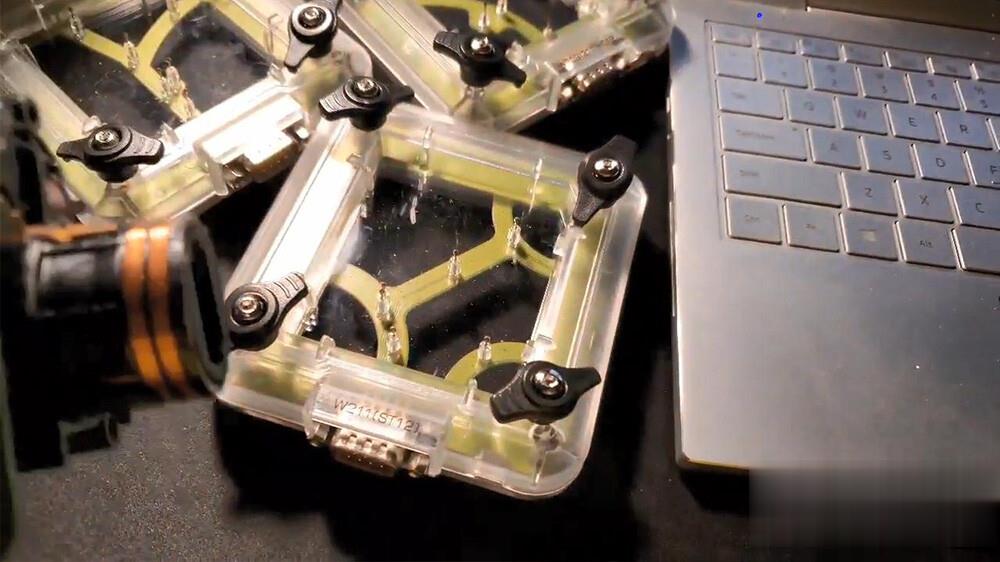
Answer: Xhorse VVDI Prog Mercedes EIS / EZS Adapters Kit
Posted by: obd2tool at
01:24 AM
| No Comments
| Add Comment
Post contains 770 words, total size 16 kb.
June 25, 2021
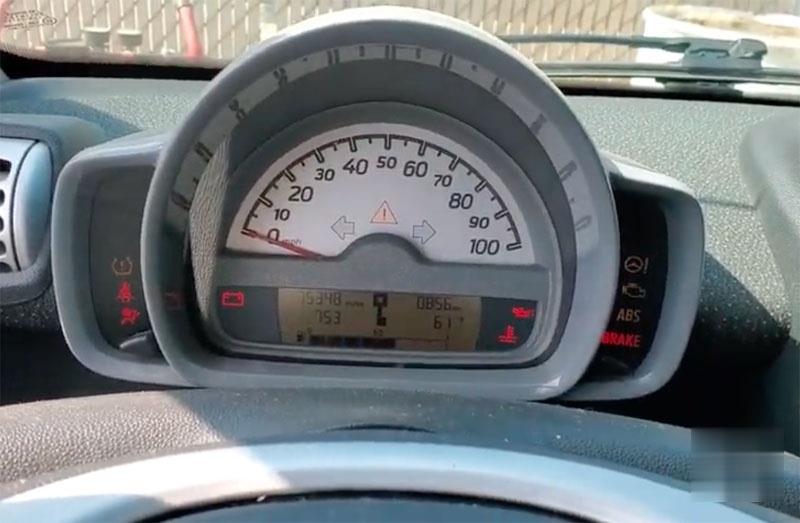
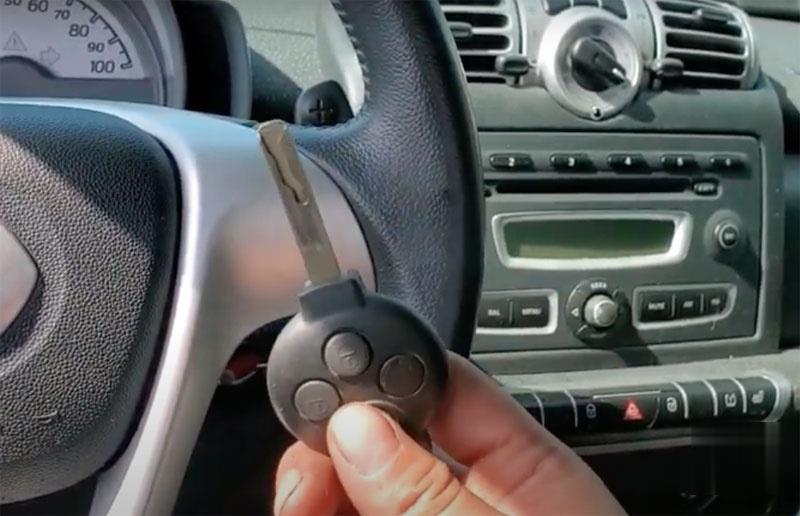
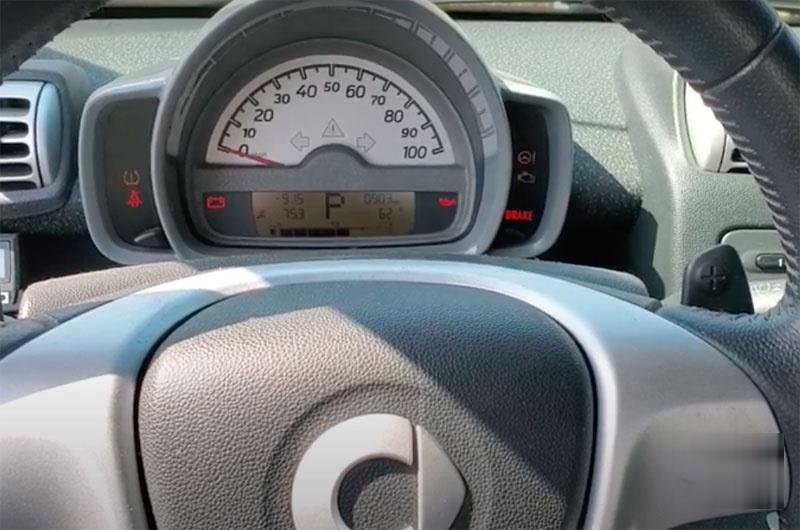
Place the ignition switch. If we try to crank it, we got the message that it not programmed. This key is virgin.
Procedure:
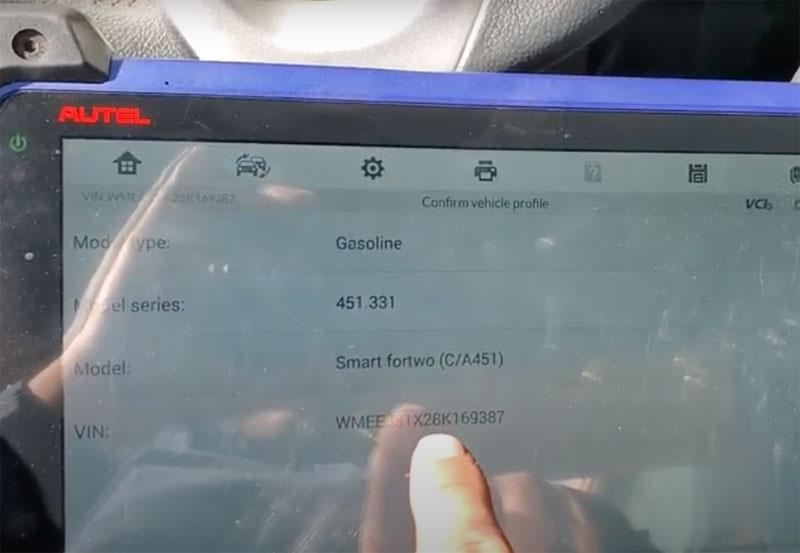
2008-2015 Smart Fortwo (all keys lost, add key, EVU replacement) with Autel IM608
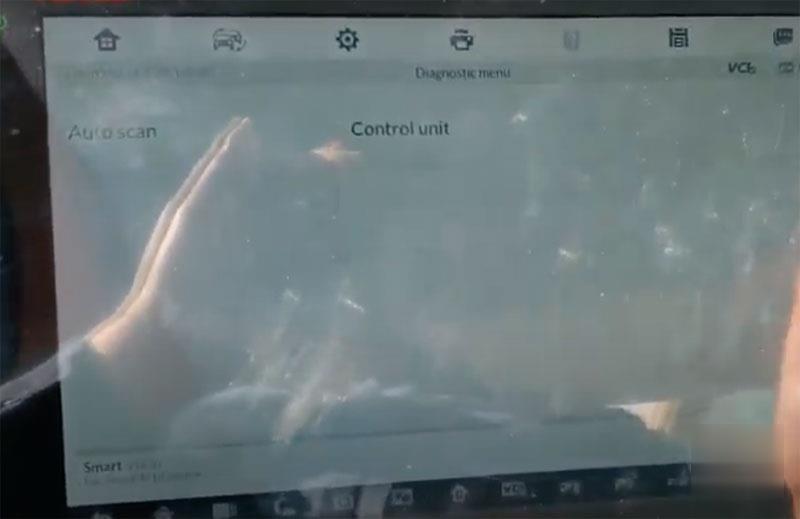
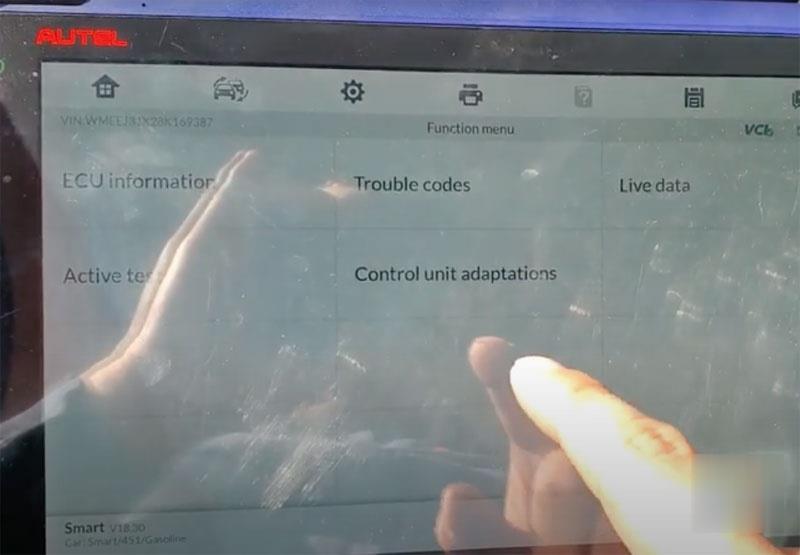
We go to Diagnostic instead of going to Immobilizer function.
Check vehicle information, has vehicle model and vin number here
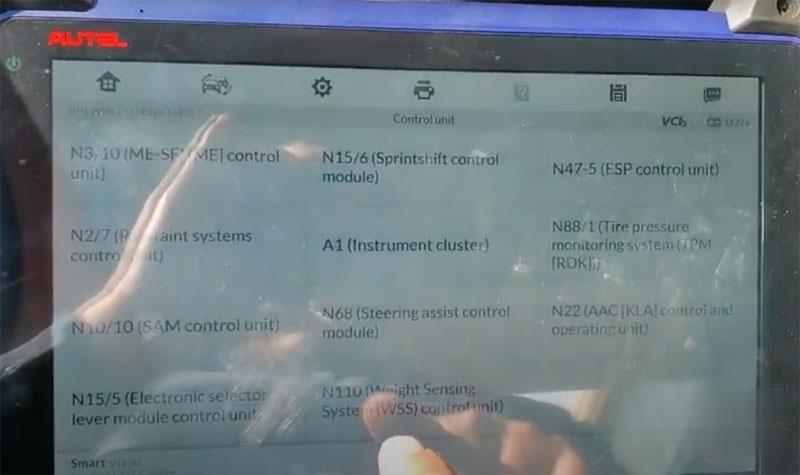
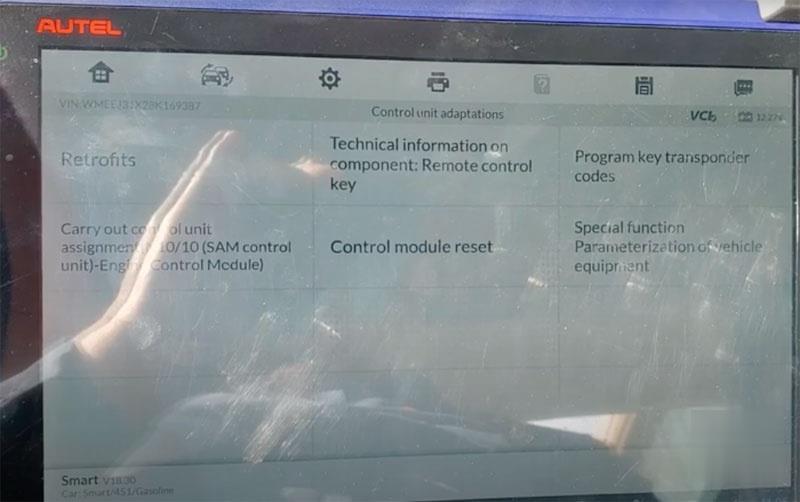
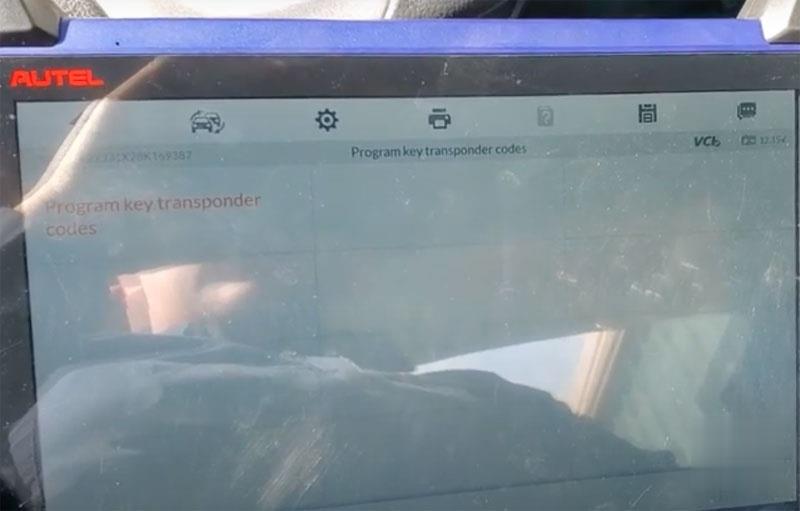
We go to Control unit ->N10/10(SAM control)-> Control unit adaptations->Program key transponder codes
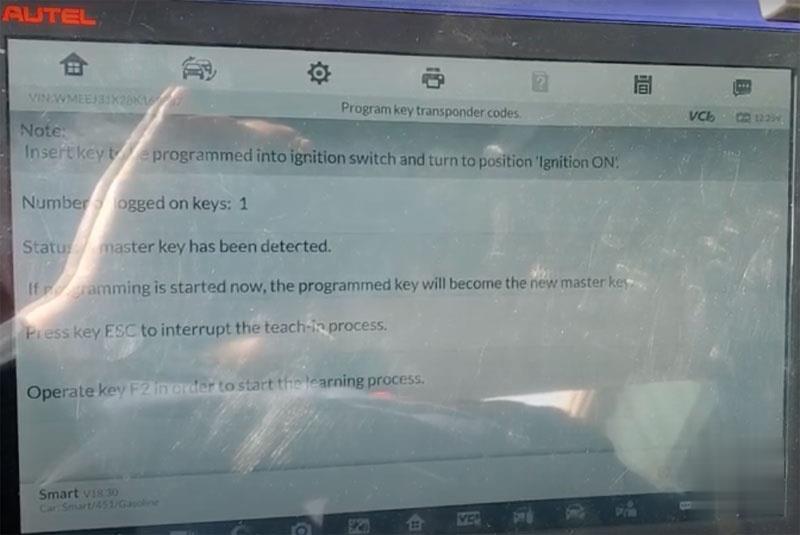
Insert key to be programmed into ignition and turn on ignition
Press F2 to start learning process
Turn off the ignition and then back on.
Press key ESC to interrupt rage teach-in process
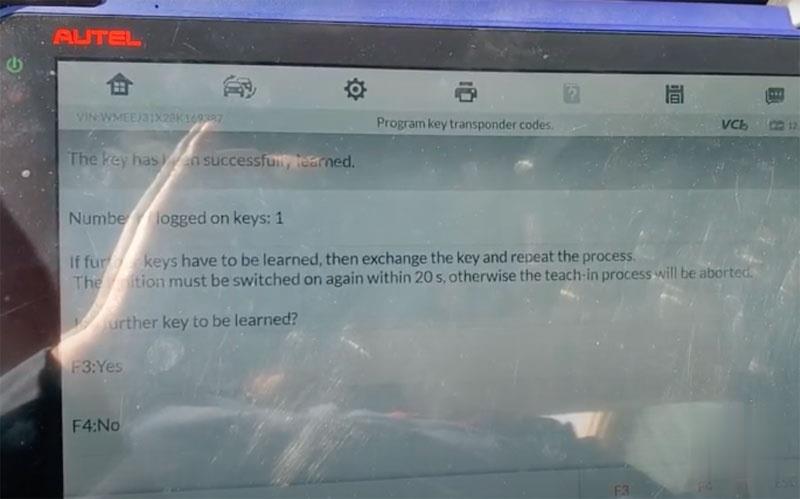
The key has been successfully learned.
Press Yes
Learning key in progress
Press F4 STOP
Remove the taught-in vehicle key
Insert vehicle keys to be taught in into ignition lock and turn to position ignition on
The ignition must be switched on again within 20s
Key has programmed. Now you can start the engine with the new key.

https://obd2-key-programmer.blogspot.com/2021/06/program-smart-fortwo-451-08-15-all-keys.html
Posted by: obd2tool at
08:18 AM
| No Comments
| Add Comment
Post contains 200 words, total size 12 kb.
May 27, 2021
Problem:
I try to make Toyota 8A smart key AKL with Lonsdor K518ISE and LKE emulator, the device said it has bound to k518. but it failed me and LKE is not generating key from eeprom file.
See error images below:
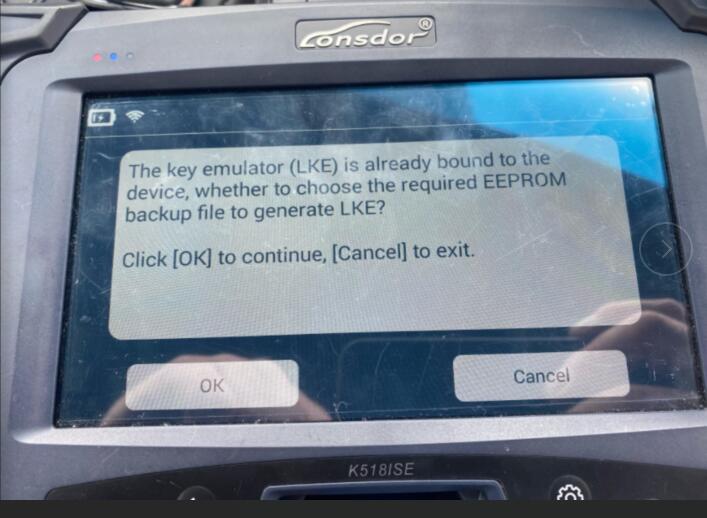
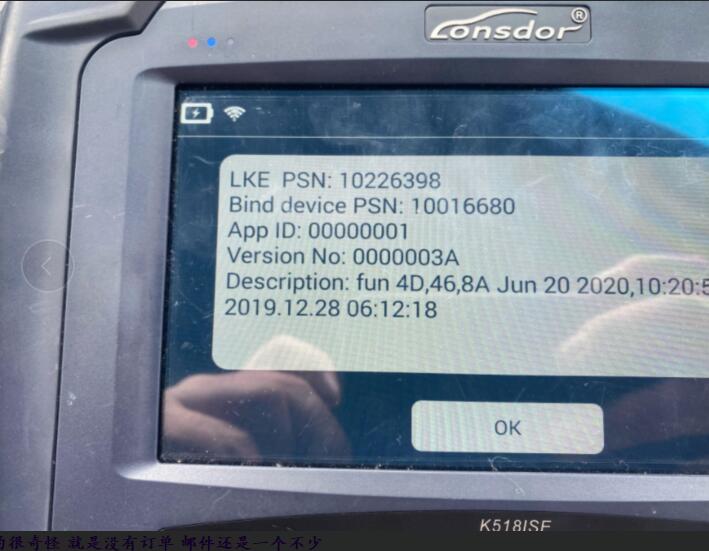
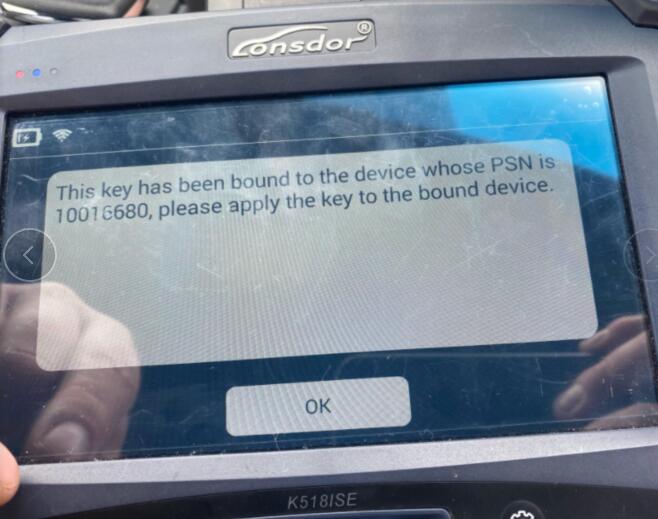
Obd2tool.com working solution:
The problem can be solved by update K518ISE (one key update / check for updates)

If you want to know more key programming tools, please visit our website https://www.obd2tool.com
Posted by: obd2tool at
07:47 AM
| No Comments
| Add Comment
Post contains 82 words, total size 2 kb.
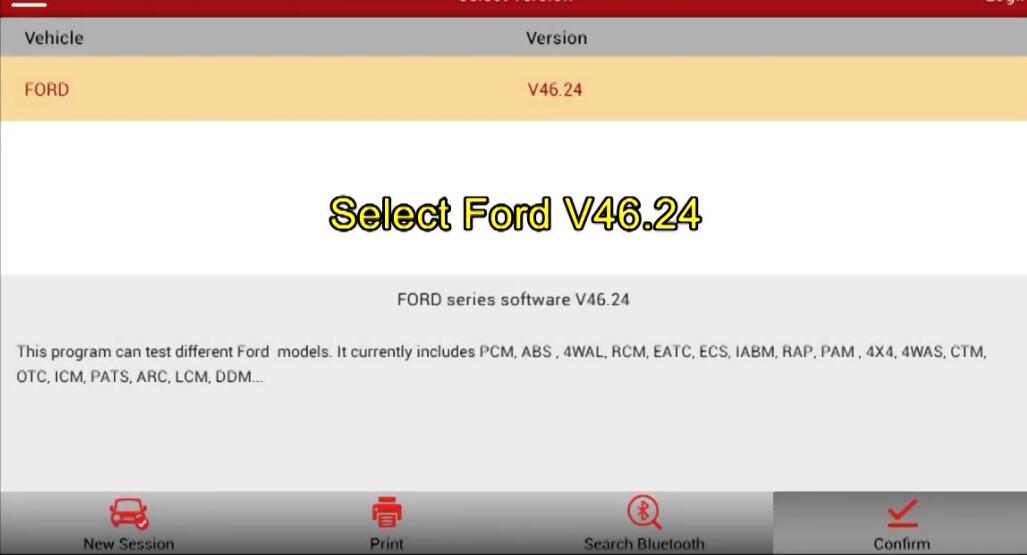
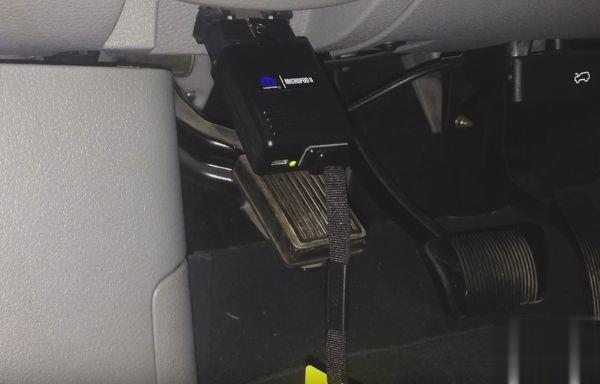
Car: 2011 Ford Focus
Device: Launch X431 V+ pro3
Procedures:
Select Ford V46.24
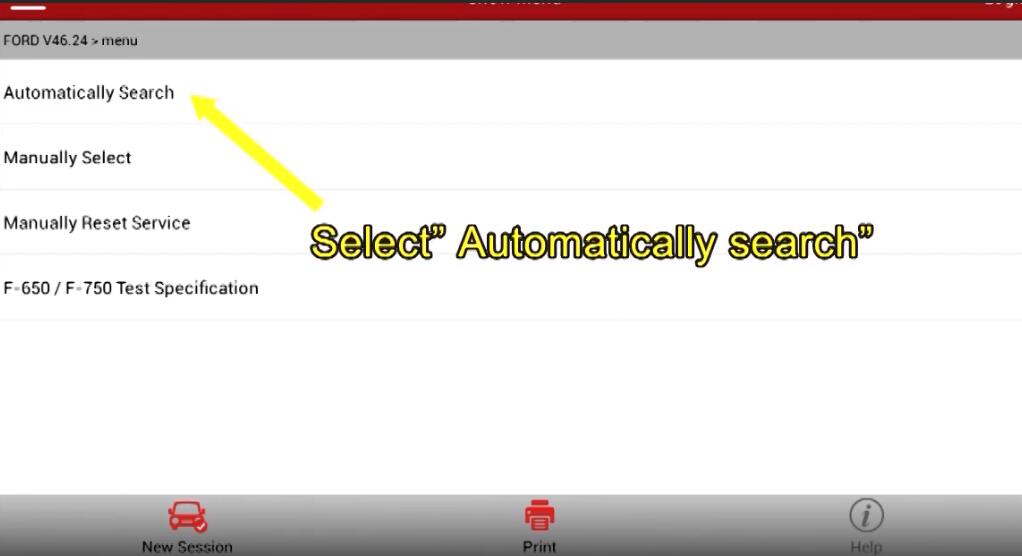
Connecting Bluetooth…
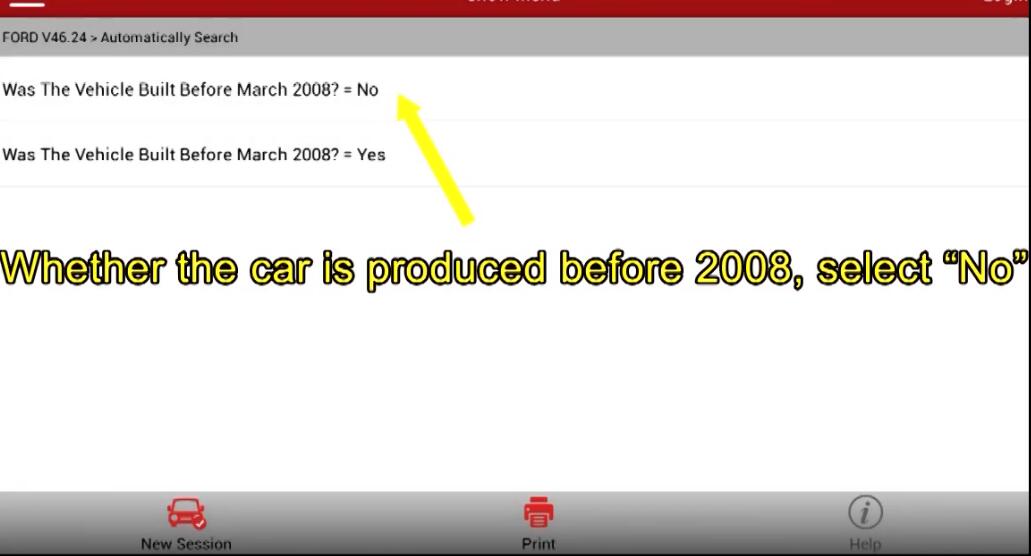
Select "Automatically searchâ€
Pay attention to the vehicle specification and click "OKâ€
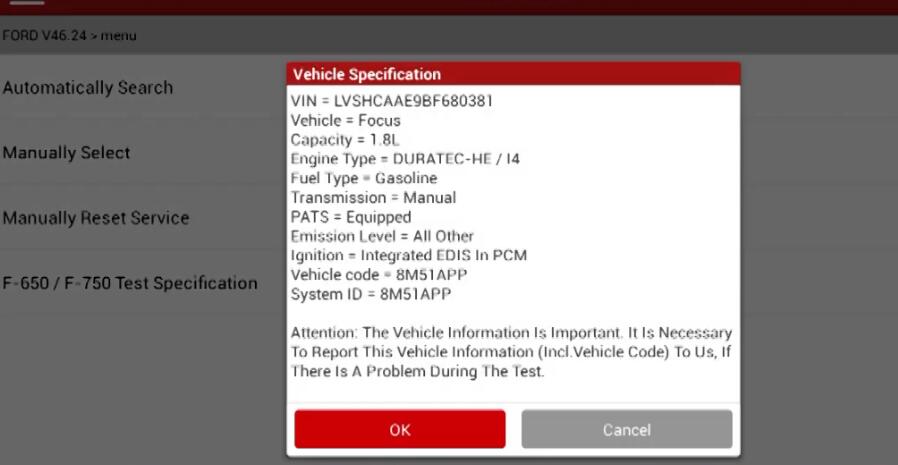
Whether the car is produced before 2008? Select "Noâ€
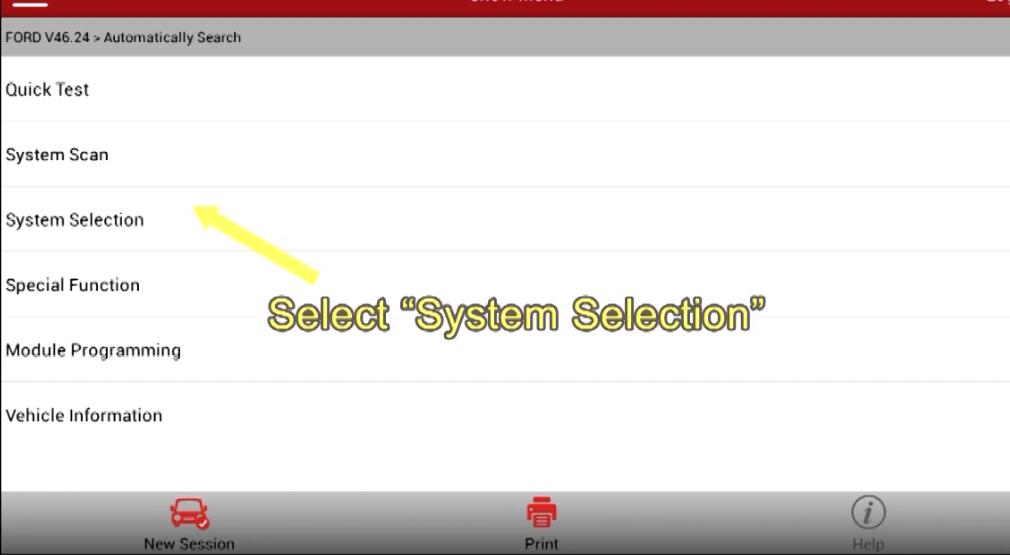
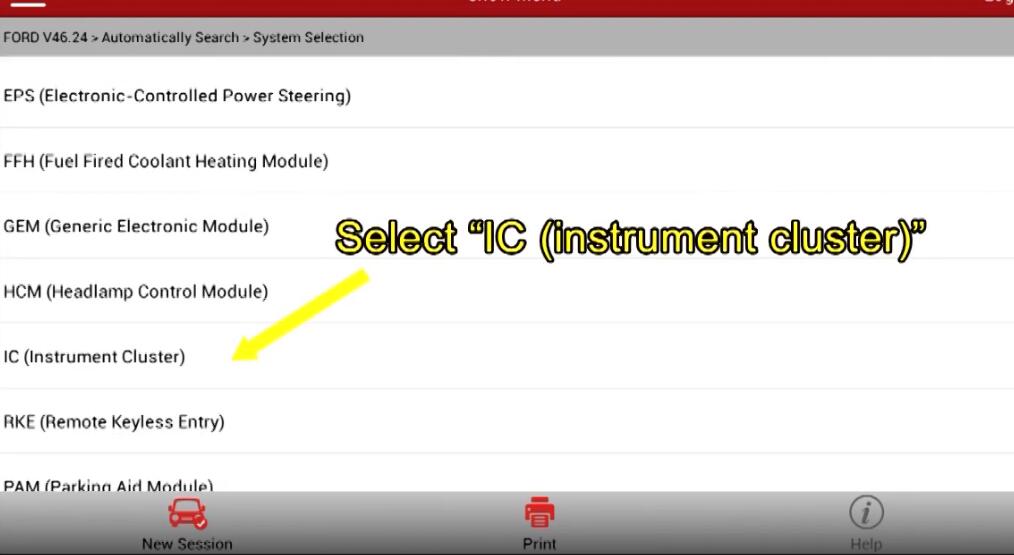
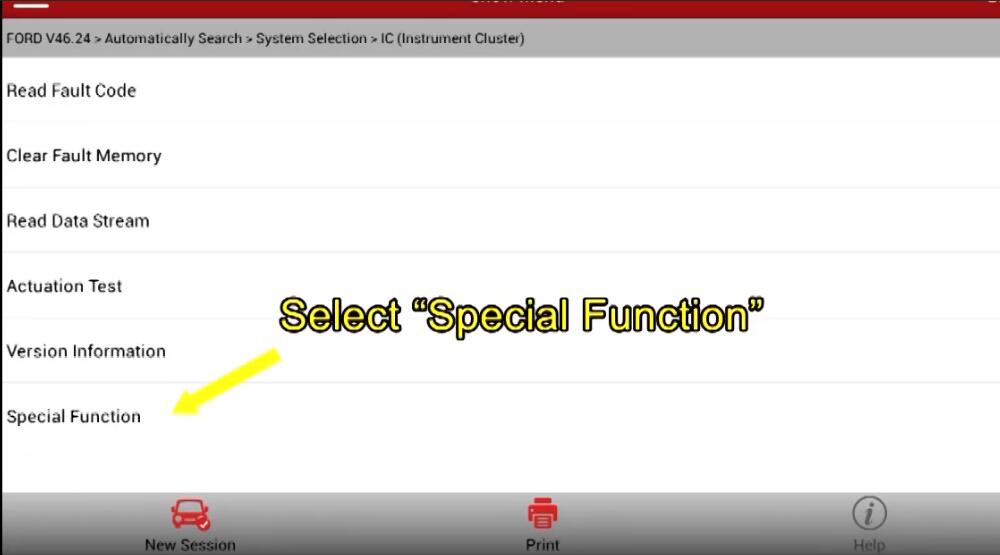
Select "System Selectionâ€-> "IC (Instrument Cluster)â€
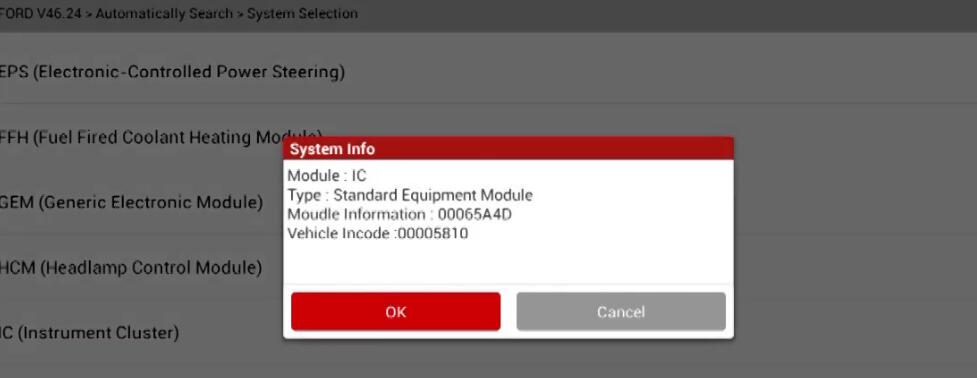
Confirm the system info and click "OKâ€
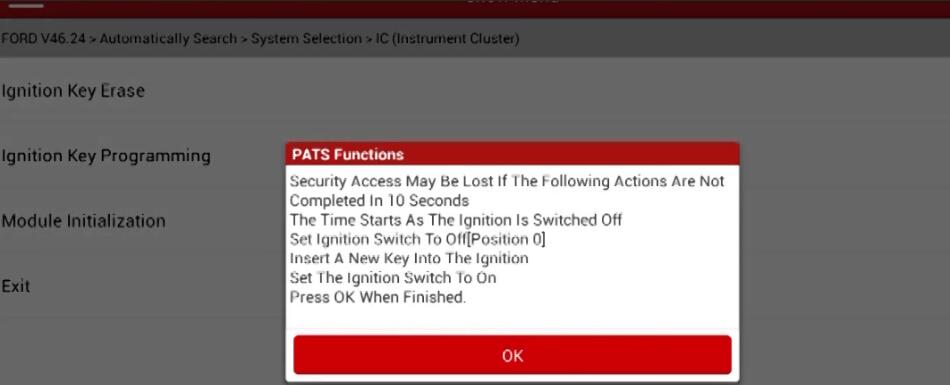
Select "Special Functionâ€-> "Passive anti-theft system functionâ€
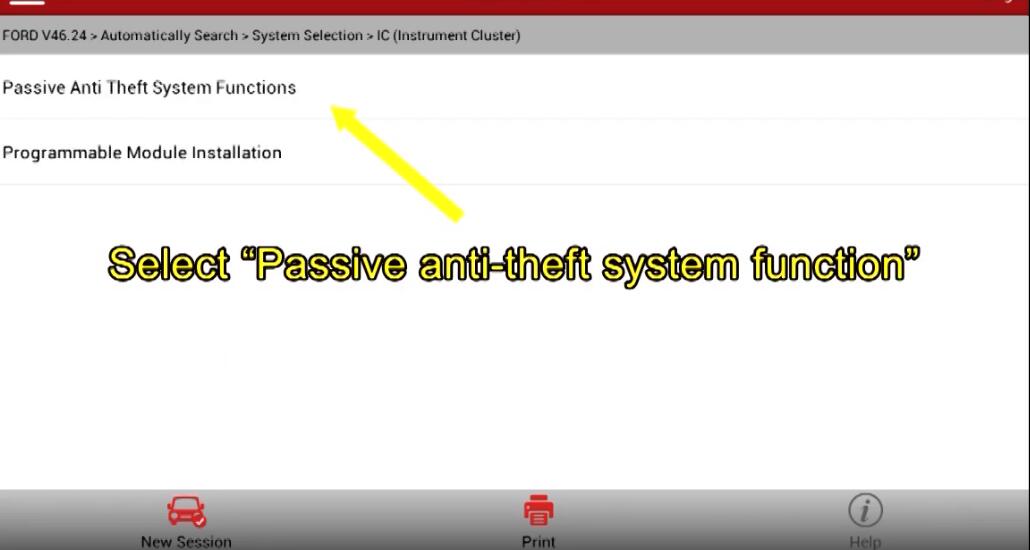
Caution: "This function will change the status of vehicleâ€
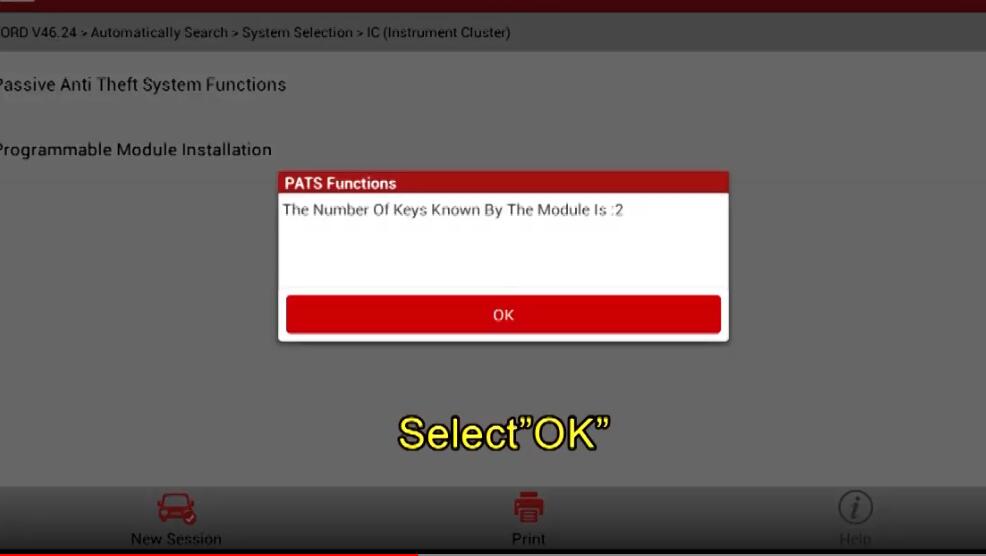
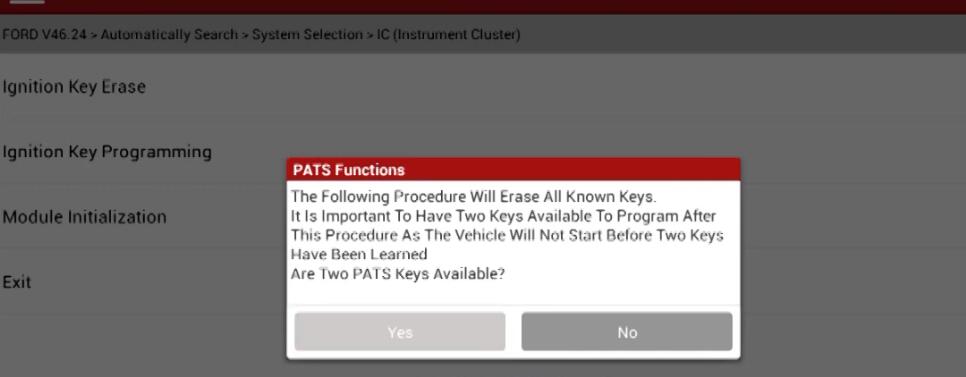
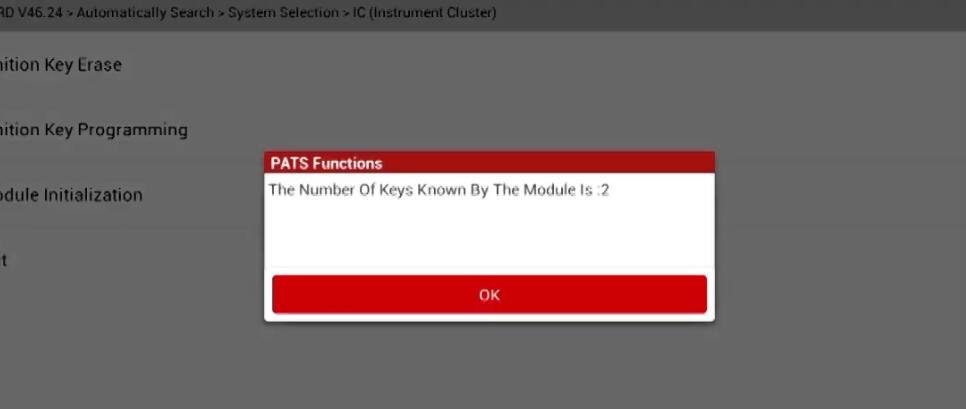
It indicates that two keys are configures for the car, and the key memory value needs to be cleared.

Pay attention to the prompt and click "OKâ€
Select "Ignition key Eraseâ€
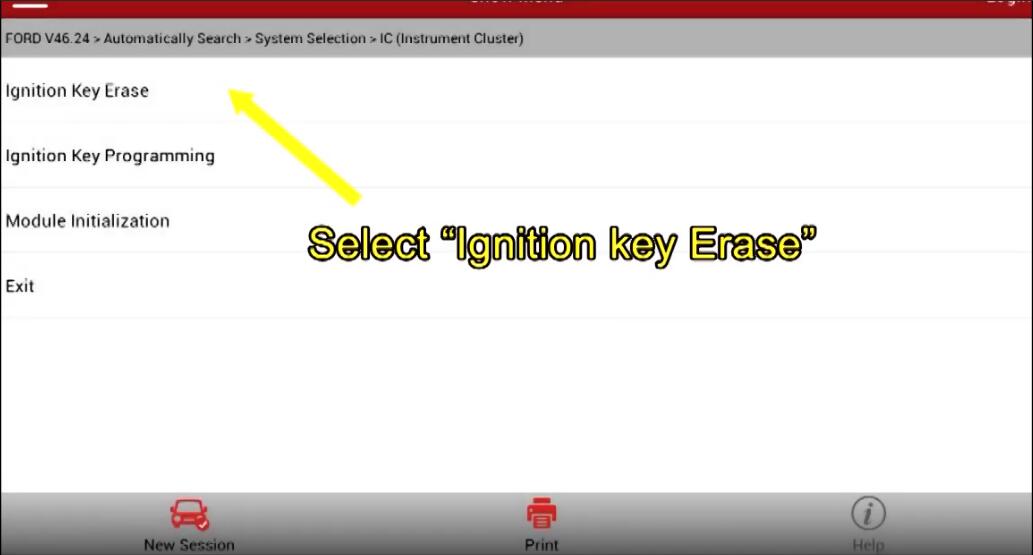
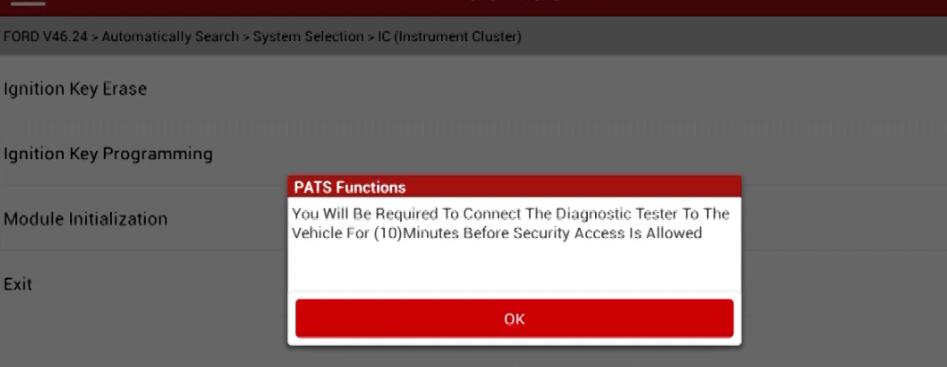
The program needs to obtain the corresponding permission from the ECU, which takes about 10 minutes, and then click "OKâ€
Read the number if current keys again, if the number of keys is not 0 after key clearing, clear keys again.

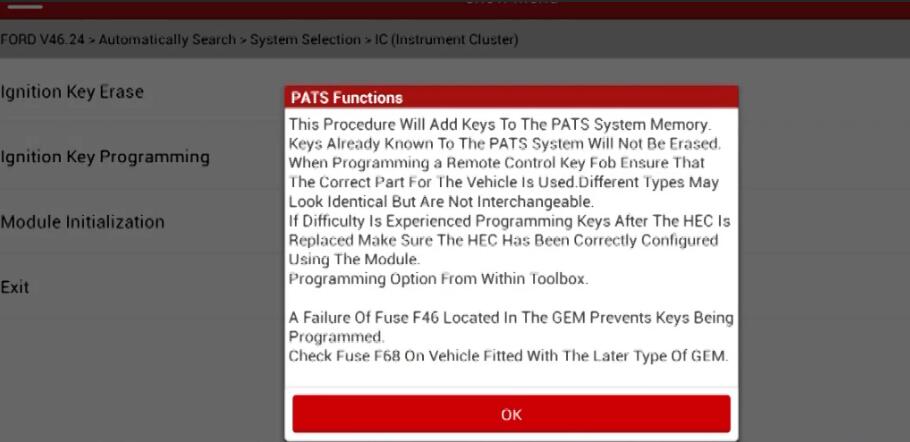
Select "Ignition key programmingâ€
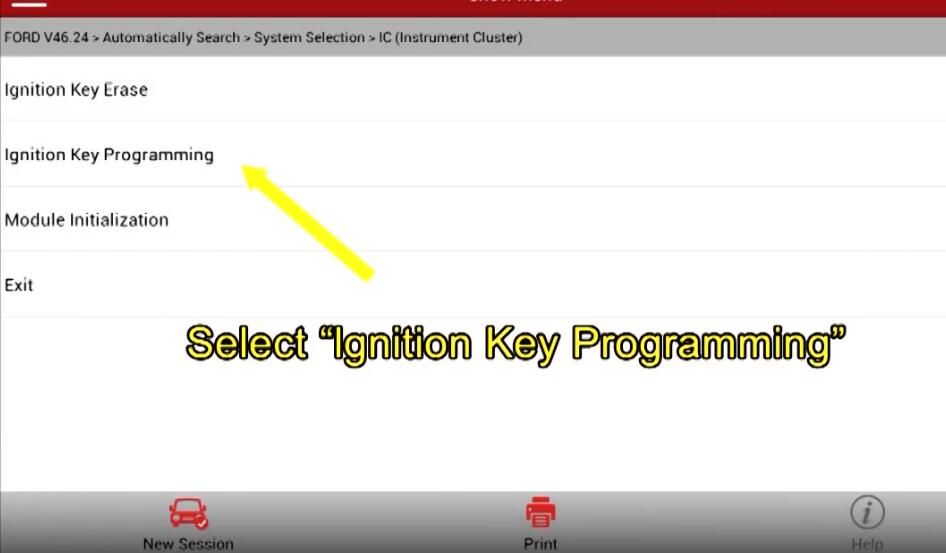
The vehicle ECU keeps the corresponding permission only for 10-15s
Pay attention to the PATS Functions and select "OKâ€
If the safety permission is lost, waiting for 10 minutes to obtain the permission again
The programming has matched one key
If you want to learn more about Launch X431 Scan Tools, please visit our website obd2tool.com
Posted by: obd2tool at
07:35 AM
| No Comments
| Add Comment
Post contains 254 words, total size 9 kb.
May 13, 2021
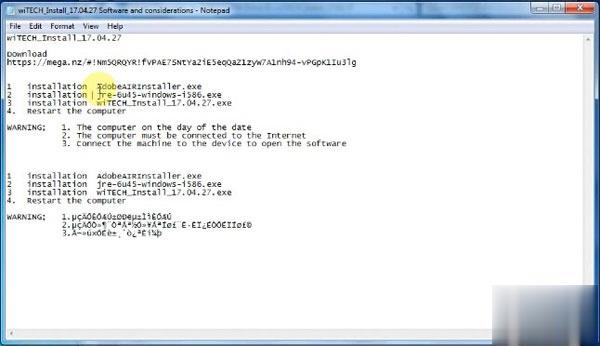
Free downloadwiTech MicroPod 2 V17.04.27 Chrysler Jeep Dodge diagnostic software crack, then install on windows 7 32 bit or 64 bit for use.
wiTech 17.04.17 software crack download on Mega: worked on windows 7 32 bit or 64 bit
https://mega.nz/#!Nm5QRQYR!fVPAE7SNtYa2iE5eqQaZ1zyW7A1nh94-vPGpK1Iu3lg
wiTech 17.04.17 java air download: necessary used with wiTech software v17
https://mega.nz/#!wOpgDZwa!IFV6QI0VF284bymAofBPut_TuUrX-9UN_8I1nj_kk8o
wiTech software v17.04.17 only work with MicroPod 2 clone with item no.sp271-c:
wiTech MicroPod system requirement:
Recommended hardware:
System type: laptop or tablet
Processor: intel i7 – 630M dual core 2.66GHz or better
HDD space: 80GB
Memory: 4GB
Operation system: Windows 7 professional 32 bit or 64 bit
Network adapter: 10/100 wired, 802.22g wireless
Monitor: 1920*1080 resolution
Minimum hardware:
System type: laptop or tablet
Processor: intel i5 – 520M dual core 2.4GHz or equivalent
HDD space: 40GB
Memory: 2GB
Operation system: Windows 7 professional 32 bit or 64 bit
Network adapter: 10/100 wired, 802.22g wireless
Monitor: 1024*768 resolution
Software:
Adobe air: version 3.10 or newer
Java: 1.6.0_21 or newer
Adobe reader: 9.0 or newer
Internet explorer: 8.0 or newer
SVG viewer: 3.0
wiTech MicroPod 2 V17.04.27 Windows 7 32/64bit install:
Open disk E: wiTech V17.04.27, then read the PDF "readmeâ€, wiTech MicroPod II installation manual attached
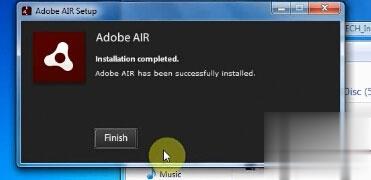
First, install AdobeAIRInstaller.exe
Accept the agreement
Installing…
Adobe air installation completed.
Second, Install jre-6u45-windows-i586.exe
(Update Later: an update to Adobe air)
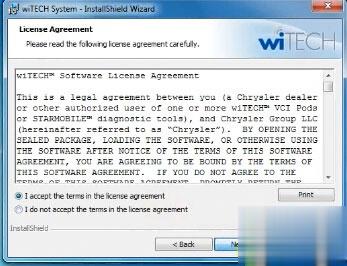
Click on Install to accept the lience agreement
Installing Java…
Have successfully installed Java

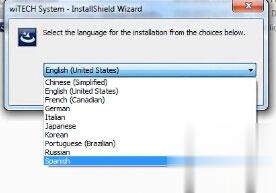
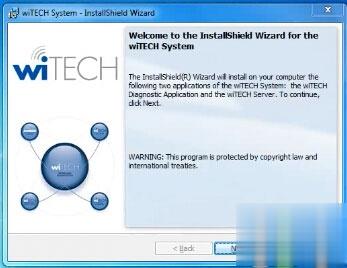
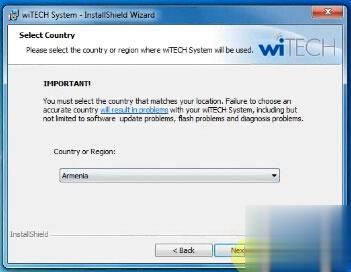
Third, install wiTECH_Install_17.04.27.exe
select a setup language
wiTECH system requires the following items installed on your computer:
Microsoft visual c++ 2010 or later redistributable package (x86)
Enlang 5.8.4.2
Java standard edition 7 update 25

Installing wiTECH…
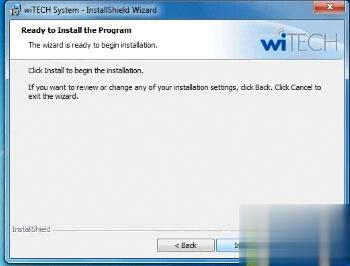
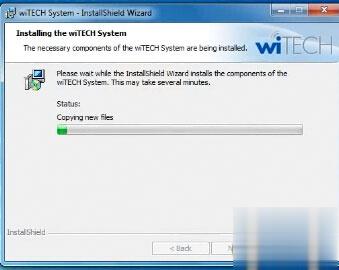

Have successfully installed wiTECH 17.04.27
Windows security alert: allow access
Fourth, restart the computer
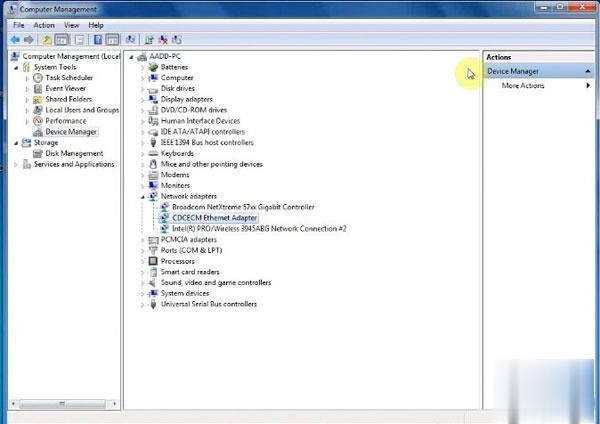
Installing device driver software…
Local network connection: work network
Device is ready for use
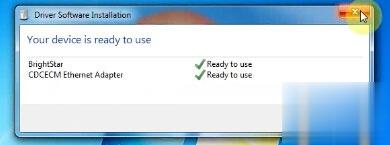
Setup in driver Computer management: select CDCECM Ethernet Adapter
WARNING for MicroPod 2 Setup:
1 The computer on the day of the date
2 The computer must be connected to the Internet
3 Connect the machine to the device and open the Chrysler wiTECH software
Done!
Now, wiTECH diagnostic application is ready for use.
It’s wiTECH version 17.04.27
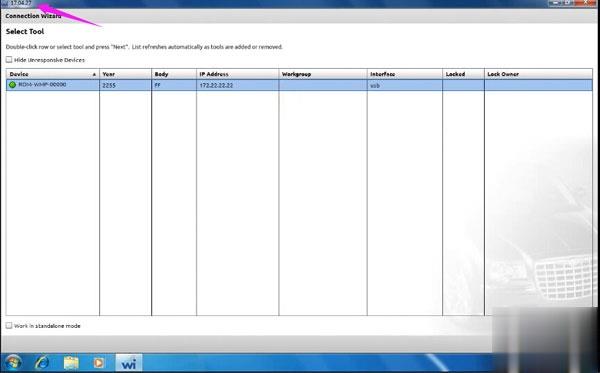
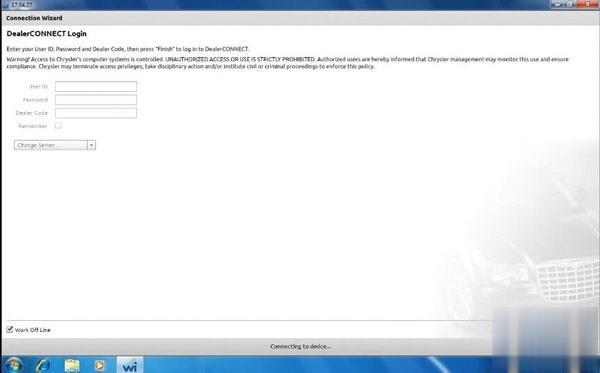
wiTech MicroPod II login: no need user id and password
wiTECH 17.04.27 works offline
wiTECH 17.04.27 supports 2017 models
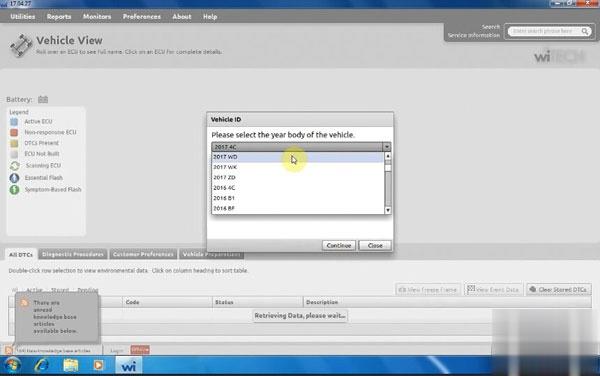
Vehicle id: 2017 WD, has been successfully identified
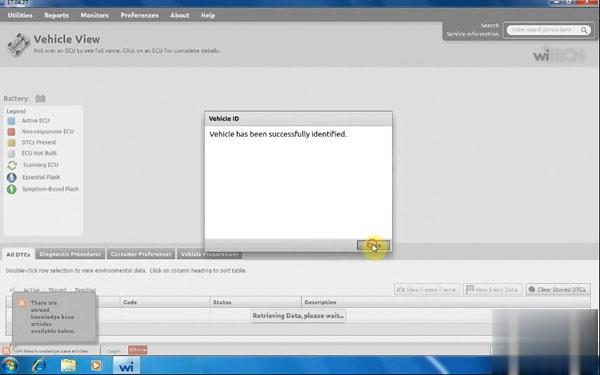
Go to vehicle diagnostics and programming.
Enjoy!
Posted by: obd2tool at
09:46 AM
| No Comments
| Add Comment
Post contains 397 words, total size 10 kb.
March 28, 2021
How do you code a key on a Range Rover L322 vehicle?
Replacing a missing master key is quite expensive. Do not pay the extra cost of ‘Dealer Coding.’ You can do this yourself in two minutes by following the simple process below:
1. Get in and close all doors. Turn ignition on and off quickly and remove the key (all within about 5 seconds).
2. Within 30 seconds of turning the ignition off, while holding down the ‘unlock’ button, press the ‘lock’ button three times. Release the ‘unlock’ button. (You may or may not get the confirmation from the door locks.) Holding the key at your head level provides the best results as the key sensor is in the side window pillar.
3. Repeat for each key you want to initialize within 30 seconds after the last one you initialized (if you have Jaguar and Land Rover Diagnostic Tool).
4. After confirming the last key, quickly put the key back in the ignition and turn it on/off again to finalize.
Posted by: obd2tool at
12:27 PM
| No Comments
| Add Comment
Post contains 178 words, total size 1 kb.
March 13, 2021
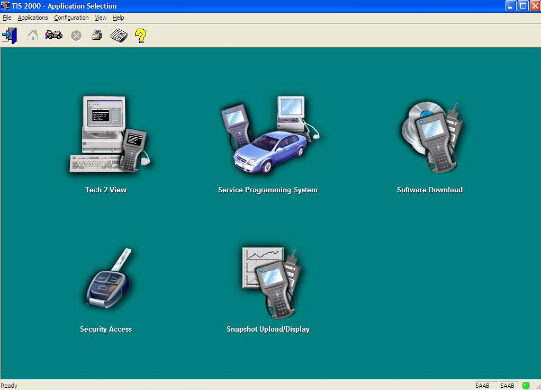
What is TIS 2000 Software?
TIS 2000 is abbreviation of Techline Information System 2000 software application.TIS 2000 is actually a group of serveral programs that perform the following functions:
Service Programming System(SPS)
Tech 2 Updating
Tech 2 Snapshot Uploading and Analysis
Top 4 Reason to Get GM Tech2 Full Package:
1. Multi-langauge: English, Italian, French, Portuguese, German, Spainish, Korean, Japanese, Thai, Chinese
2. Update: via 32MB Software Card, when there is newer version, you can just buy new card to update
3. Support Car Models: GM, SAAB, Opel, Suzuki, Isuzu, Holden
Software Listing :
GM
GM-English 33.004 1991-2014
GM-Spanish 33.002 1991-2014
GM-Germany 32.007 1991-2013
GM-Japanese 32.006 1991-2013
GM-French 32.007 1991-2013
GM-Italiana 32.007 1991-2013
GM-Portuguese 32.002 1991-2013
GM-Korean 32.002 1991-2013
GM-China 32.002 1991-2013
OPEL
OPEL-English Newly Update to V180 1997-2014
OPEL-Italian Newly Update to V180 1997-2014
OPEL- Polski Newly Update to V180 1997-2014
OPEL- German Newly Update to V180 1997-2014
OPEL- Turkish Newly Update to V180 1997-2014
GM Tech2 Card Opel Software Update to V180 Support Cars from the Year 1997 to 2014
SUZUKI
SUZUKI-English V01.210.020
SAAB
SAAB-English V148.000
ISUZU
ISUZU-English CAN-BUS V180 2006-2015 (CAN-BUS support car models after 2010)
ISUZU-English K-Line V11.680 1996-2014 (K-line support car models from 1996 to 2014)
Holden
Holden-English  V149.000 1999-2013 (For North American Area Only)
Holden-English V147.000 1999-2012 (For Australia)
4. Year Coverage of Diagnosis: From 1992 to 2013, With Help of Tis2000 Software, It Can Do Programming for Cars Before Year 2007
5. Package light and easy for carry.
Global TIS 2000 Software Free Download:
TIS2000 Software:
http://www.mediafire.com/file/bc92by7ao7fp1la/GM+2000NAO.7z
TIS 2000 Dongle Crack Download:
https://rapidgator.net/file/a081c4c028aa1fb80ea98e15a540b9a9/TIS2000_Dongle_Crack.7z.html
Opel-Vauxhall TIS 2000 v96 Multilanguage
Opel-Vauxhall TIS 2000 v116.0E Multilanguage
O.S.: Windows XP; Windows Vista; Windows 7; Windows 8
– CPU: Pentium/Athlon 1 GHz or higher
– RAM: 256 MB of system memory
– Hard Drive: 5 GB of available space
– DVD-ROM
https://mega.nz/#!K8Vz1I4S!AFnVYQCst3VqNTCmSTuwE4B-lw87wJR3gz547bnwETQ
Opel TIS 2000 Download:
https://kitorrent.com/opel-tis-2000-dvd-t1309837.html
SAAB Global TIS Free Download:
https://mega.nz/#F!ut9kCK5S!v6XY8ROGHR_TJISdGr0BAA
SAAB GlobalTIS 1.2010:
http://cartechnology.co.uk/attachment.php?aid=10129
SAAB GlobalTIS1.2010 Activation:
http://cartechnology.co.uk/showthread.php?tid=1457
Opel GlobalTIS V32B:
https://mega.co.nz/#F!rloGUAha!-hBJWlK9iuIy-i6LCDRjAQ
PASS: cartechnology.co.uk
The support Languages they are ONLY these:
– Italian
– German
– French
– Dutch
TIS2000 Software Installation Guide:
Method 1:
A lot of info I found over at SaabCentral but it is just a giant thread
to read through although a lot of the info is on the first page. And a
lot doesn’t apply since it’s geared towards Saab (even the 9-7x doesn’t
apply, it’s under GM).
So you have a Tech2 but a lot of the things you would like to do is locked out because you don’t have access to the computer software to allow you to do it. Things like updating PCM’s and modules and anything security related are locked out. If you bought one of the Tech2 clones, it probably came with a CD with the Tis2000 software. If you install it and try to use it, it says that it can’t find the USB security dongle or something like that. That’s because only dealers have those or a clone of one wasn’t included.
First of all, this is old software. It was discontinued in 2008 by GM which means that it works only for vehicles up to model year 2007. It will have PCM and module updates included. For example, I was able to update all of the modules and PCM in my 2006 9-7x even though it had only been a year or two since production and issue of this software. It will also allow you to reprogram a module that you are replacing.
The Tech2 communicates with the computer using a serial port on the computer running Windows XP SP3. This can be a problem if you only have newer computers. Best and easiest scenario is to use an older laptop computer that has a serial port running windows XP. In my setup, I used an old IBM T40 laptop, which is fairly decent processor wise, installed a fresh copy of Windows XP SP3 and used a docking station with it that has a serial port. Laptops that have actual serial ports built in are probably so old that they are too slow or have age and reliability issues. Another solution would be to get a USB to serial port adapter and specify the proper COM port number during the install of Tis2000.
Another possible solution would be to use a virtual environment on a host computer. VMWare is free to use and it has been done from what I read but could be a fairly involved process because of the serial port issue, especially when using a USB to serial adapter. The challenge of communicating from the virtual environment through the real computer’s hardware ports can make it difficult but can be done. I’m not going to discuss this type of installation but the basic software installation and use will be the same. If anyone gets a virtual install working, please post it up.
In some detail, this is what I did. Keep in mind that you should have some computer knowledge and know how to install Windows.
1. Installed a fresh copy of Windows XP SP3. I didn’t bother with updating anything else as far as security updates to Windows or install a virus scan because this computer will never be connected to the Internet or used for anything else.
2. Installed ALL the required drivers until there were no more yellow check marks in Device Manager. I failed to do this at first and caused a lot of headaches later, including a BSOD during software installation.
3. If you’re using a USB to serial adapter, plug it in now and set it up. Go into Device Manager and make note of the COM port used by the adapter.
3. Install the Tis2000 software from the CD included with the Tech2. During the install, it will ask you to specify the COM port. If you have a serial port on the computer, it’s probably COM 1 or use the one from the USB adapter.
4. Before you can use Tis2000 with your Tech2, you have to make it "think†that there is a dongle connected that authorizes it. You can download the crack below. Follow the read me file for instructions on how to use it.
That’s it. More threads will come explaining how to do stuff with it but this will get you going.
And if you need them:
TIS2000 Software(Extracted from my CD)
Tis2000 Dongle Crack
When you click on the links, they will bring you to 4Shared, click on
"Free Downloadâ€, a little window will pop up asking to log in using
either a social media account or sign up for an account. Sign up with an
email and password and then create a name. After that, you will be
brought back to the download page and the 60 second timer will count
down, after which the download will start.
Warning: In Tis2000, whatever you do,DO NOT USE THE "SOFTWARE DOWNLOAD†BUTTON!This will retrograde the card in your Tech2 to an old version from 2008.
Some more install info, especially for VM’s, is also available in this thread from SaabCentral.
Method 2:
Insert TIS2000 software CDinto the laptop
2) Install the setup driver in the CD
3) Select Activator. Select first one Activator hardware key
4) Load DATA DVD (tis2000+data+0802) to run TIS200 on desktop after
compete install the setup. TIS2000 will update the data automatically.
5) Find out and locate SuperPro.dll file in TIS2000 crackfile folder
after update data and copy the SuperPro.dll file to "C![]() rogram
filescosidsbinâ€
rogram
filescosidsbinâ€
6) Then run TSI2000 software
7) Connect GM Tech2 device with computer
![]() Start ECU programming and follow the windows prompts.
Start ECU programming and follow the windows prompts.
If you order GM Tech2 scanner with Saab software, you’d better choose Saab TIS2000 CD with USB key.
Opel GlobalTIS V32B Installation:
1.Mount the .iso for to install GlobalTIS and during installation click in all windows "Nextâ€!
DO NOT CHANGE anything and leave all AS THEY ARE!
2.When installation finish, 1st DISABLE any Firewall that you have all ready enable!
(EVEN and Windows Firewall!)
3.Run the GlobalTIS and go and FILL Dealer info form (anything you wish…) BUT FULL filling!
4.Save your Dealer details
5.ATTENTION!: Request key by: E-mail/Fax and it will generated one Registration.pdf file
6.Save somewhere this .pdf file
7 .Log-off now from GlobalTIS & CLOSE it
8.POST HERE on this Thread your Software Key or your .pdf file
9. Wait to receive your Subscriber ID & your License-Key
10. When you receive your ID & your Key, run the GlobalTIS fill your details and Click Activate
11. Click "OKâ€â€¦
12. Install now the apearing & needing Plugins!
Anthony1s’s method to install TIS2000 for any computer
64-bit versions of Windows contain backwards compatibility with 32-bit applications, but not with 16-bit applications. And 32-bit versions of Windows are backwards compatible with 16-bit applications. The problem with installing TIS2000 on newer machines is that, while the TIS2000 program itself is 32-bit, the installer and drivers are 16-bit. Therefore, you are able to install TIS2000 natively on ANY 32-bit Windows system. This will just work, without having to run anything in compatibility mode.
However, if you have a 32-bit copy of Windows 8 installed (I don’t wanna know why you do), running 16-bit applications are disabled by default. You can enable it by going to Control Panel and clicking on 16-bit Application Support then clicking Enable.
For those of you with genuine copies of Windows 7 Professional, Enterprise, or Ultimate with a multi-core processor (who doesn’t run Win7 on a multi-core these days); these versions of Windows 7 allow you to use Windows Virtual PC, which lets you virtually run Windows XP Pro without a disc or OS installation. You need to install Windows XP Mode and Windows Virtual PC in order to use it. Before you can download these updates, M$ makes you run a little .exe that checks if your OS install is legitimate. Anyway, after you get that all installed and XP Mode is booted, you can copy the OP’s cracked TIS2000.zip over to the WinXP Desktop and follow the README.txt inside to install it. Here is a link to the thread with the cracked TIS2000
http://www.saabcentral.com/forums/showpost.php?p=2435898&postcount=1
I have tested this on my desktop running Windows 7 Ultimate 64-bit and the cracked copy of TIS2000 the OP posted installed and ran with no problems. Instructions for Win7 XP Pro virtualization mode here:
https://support.microsoft.com/zh-cn/products/windows
Now to the most common problem. If you are running a 64-bit version of Windows XP, Windows Vista, Windows 7 Home Premium or lower, or ALL versions of Windows 8 and 8.1, I guess any version of Mac or Linux too, you have a couple of more involved and more risky options…
You can obtain a legal copy of Windows 2000 or XP Pro 32-bit on your own. It includes two programs for making a bootable CD or USB drive. Pop the bootable device you created into your laptop, reboot to the device, then install that operating system onto a seperate partition of your hard drive, or a different hdd altogether. Or you can install Virtualbox (free software), and run the cracked Windows copy via a virtual machine… The method I took to test this was to create a separate partition on my ssd and install it there. When the computer reboots, it will ask you what OS you would like to run. Select Windows XP Pro, then continue installing TIS2000. If you’re gonna be writing to the main drive on your computer, I suggest first creating a bootable USB with Clonezilla on it and creating a drive backup with that
http://clonezilla.org/downloads.php
This allows you to make a complete backup image of your hard drive, and allows you to flash it back to that drive at any time. A good thing to have around anyway.
I do not have a Tech 2 device and am unable to test that everything is working with any of these methods. However, I see no reason why these solutions will not work with a RS232 to USB Convertor on any computer you may have without a serial port.
GlobalTIS FAQs:
A1:how to install and use the keygen for globalTIS?
Q1:Just did this – everything you need is in the "global tis keygen.txt†file that comes inside the crack rar. However –
Run the gtis install. It’ll prompt you for a dealer ID. I don’t think it
actually matters, but I googled "Saab dealer ID†and used the six digit
number I found… maybe 218599? Whatever.
After you install it, run it and it will prompt you to register. Fill
out all the dealer information (fake info…) and make sure you select
register via fax. It will spit out a PDF – save that on your desktop or
whatever then exit gtis.
Copy the keygen files into the gtis webserver folder – normally /program files/globaltis/tomcat/webapps/tis2web/web-inf/lib
Open the PDF file you saved to your desktop and get the software key
number – it’s really long with a bunch of hyphens Open a command prompt,
go to the gtis webserver folder, and run keygen.bat followed by that
long software key number – REMOVE ALL THE HYPHENS. It’s great to type
keygen [long number] > regcode.txt so that the output of keygen gets
put in regcode.txt so it’s easy to copy and paste.
Fire gtis back up and it will continue the registration process. Open
regcode.txt – there will be a short number and a long number. Cut and
paste them into appropriate boxes in gtis.
That’s it…
Posted by: obd2tool at
05:30 AM
| No Comments
| Add Comment
Post contains 2255 words, total size 17 kb.
March 05, 2021
For the similarities and differences between the GM MDI 2 China clone and the original one, please look at the following comparison table:
| Device | GM MDI 2 (original) | GM MDI 2 (clone) |
| Image | 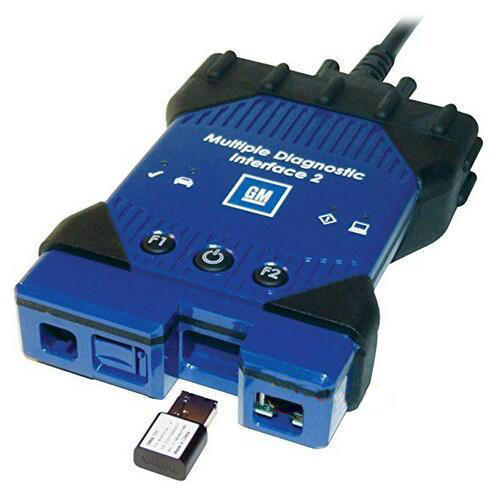 |
 |
| Price | At least 1200usd | €172 (MDI2 unit) + €100 (2019.4 GDS2 & Tech2 Win software) |
| WiFi | OK | OK |
| Speed | Fast | Fast |
| Safety | Good | Good |
| Update | Ok | Ok, available with newest GDS2 & Tech2 Win software in HDD |
| OS | Win 7 8 10 etc, no limitation | Windows 7 64 bit ONLY |
| Global TIS | OK | OK |
| GDS2 | OK | OK |
| Tech 2 Win | OK | OK |
| TIS2Web–SPS. | OK | Yes (SPS programming for existing and future SGM vehicles) |
| GM Diagnosis via OBD | OK | OK |
| ECU Programming | OK | OK |
| Key Programming | OK | OK |
| Pass-Thru Programming | Yes, done by TIS2Web–SPS | OK |
| Reflash the hidden features | OK | OK |
| GM car list | Vauxhall Opel, Buick, Chevrolet 1996-2017-future | All Vauxhall/Opel 16 pin vehicles from 1996 to 2017 |
To sum up:
If you have limit budget: GM MDI 2 China clone is a nice choice.
If you have GM garage: GM MDI 2 from the original dealer is a good choice.
Review 1: I am a gm trained factory-trained technician and I purchased
this tool for my personal use on my own gm vehicles. I love this tool
cause it not only programs the modules but also can be used as a scan
tool with a pc or laptop on newer gm vehicles. its two tools into one.
awesome tool and can be used wirelessly.
Review 2: Works great. Have to have the GMSI subscription to use with GM. Good for programming and as a diagnostic tool.
How do I use GM MDI 2?
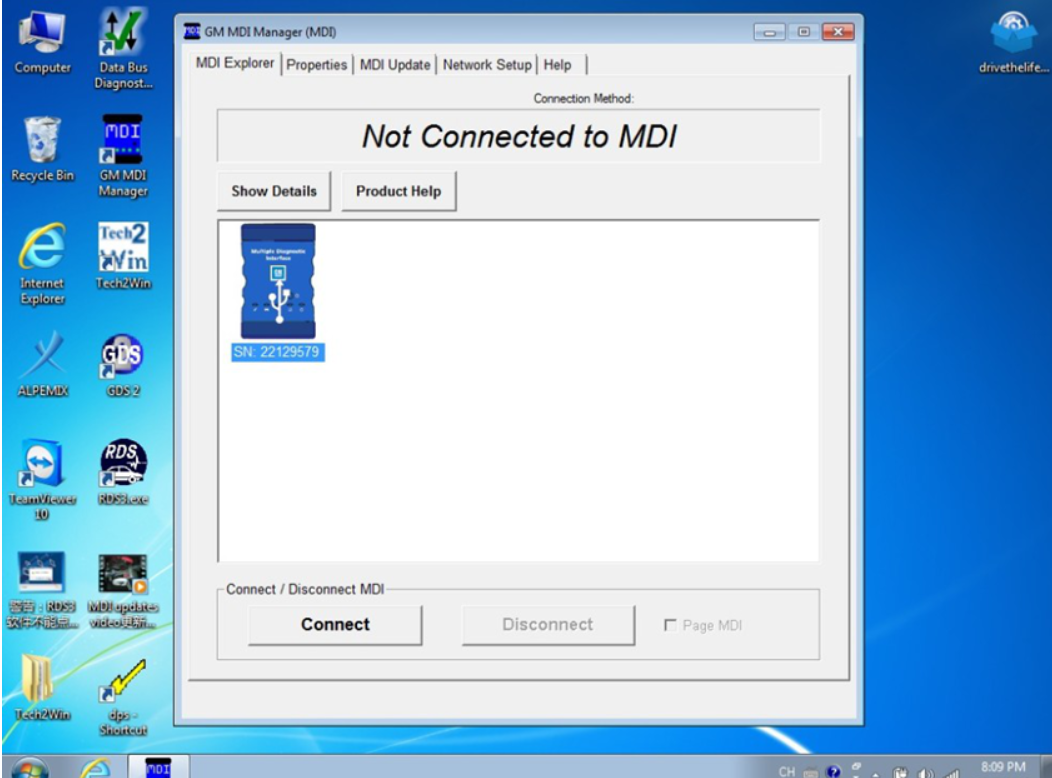
Connect MDI 2 to the PC using a USB cable to complete the setup.
Wireless adapters in the PC and in the Tester are incompatible with each
other. Double-click the MDI Manager icon on your desktop to launch the
MDI Manager software. In the MDI Manager software MDI 2 Explorer tab,
select the MDI 2 in the window.
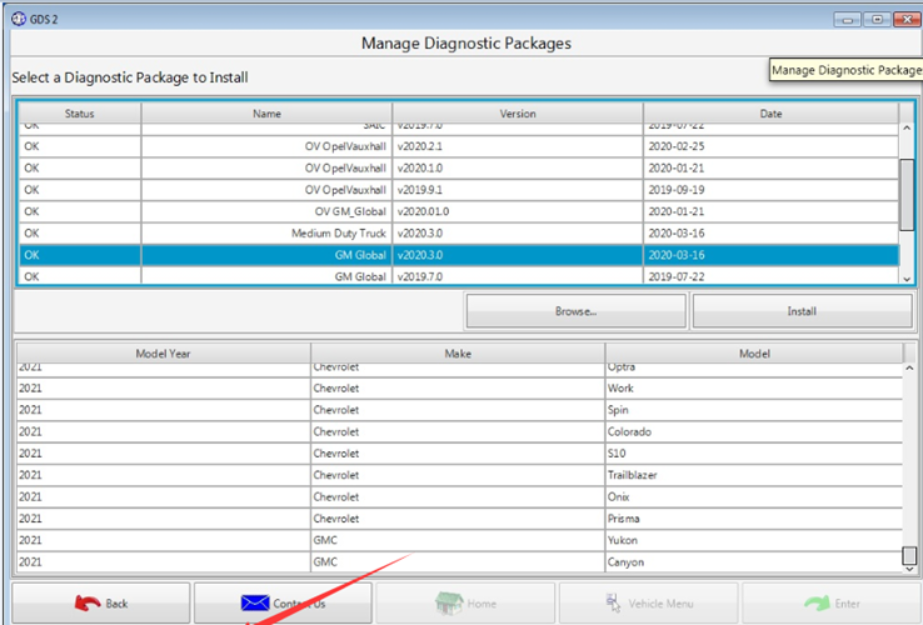
MDI2 clone software compatibility, install:
MDI 2 clone comes with one hard disk recorded the GDS2 and Tech2win
software, just plug the hard disk into one computer (win7), it will be
compatible with the MDI2 without activation.
Besides, GM MDI 2 China clone is compatible with the original GDS2 and Tech2win software, if you can’t, open the packed CD, run the MDI manager.
* Please make sure your computer supports Win7 64 bits system.
* Computer system requirements: the year after 2008, 4GB RAM
* If the computer failed to boot up, please enter the BOIS system and change the SATA driver to AHCI.
How to install Tech2Win on Windows 7 or XP system?
1. Run Tech2Win\AutoInstall.exe, Everything will be done.
2. install VX Manager.
3. Open VX Manager, install GM Driver.
How to install GDS2 with VMWare?
1. Install VMware-player-6.0.6-2700073.exe
2. copy GDS2 VM to hard disk.
3. open GDS2 VM with VMware Player
GM MDI GDS2 GDS Tech 2 Win Software from our here:
What is GM gds2?
Global Diagnostic System 2 (GDS2) General Motors LLC. July 1, 2015. The
GM Global Diagnostic System 2 (GDS2), a PC-based software application,
is designed to diagnose and repair on-board automotive electronic
systems. The software application is used with a personal computer and a
GM MDI or MDI 2 (or J2534-2 equivalent).
What is Tech2Win?
Tech2Win is the Tech2 emulator software for GM diagnostics. It allows
you to use your J2534 pass-thru as a Tech2 on GM vehicles. The following
instructions will walk you through downloading and setting up Tech2Win.
What is TIS2Web?
TIS2Web is the internet-based subscription service for GM vehicle
calibrations, Global Diagnostic System software, and scan tool hardware
updates.
gm mdi 2 subscription:
Here you can go https://www.acdelcotds.com/subscriptions
For diagnostic package: OK
For programming package: OK
for service information: OK
gm mdi 2 gm mdi programming
The PCMCIA card stores diagnostic information intended to diagnose
powertrain, body or chassis control modules and related vehicle
malfunctions. It also contains the Service Programming System (SPS)
application which allows theTech 2 to program control modules with vehicle calibration data.
Posted by: obd2tool at
03:25 AM
| No Comments
| Add Comment
Post contains 693 words, total size 7 kb.
February 21, 2021
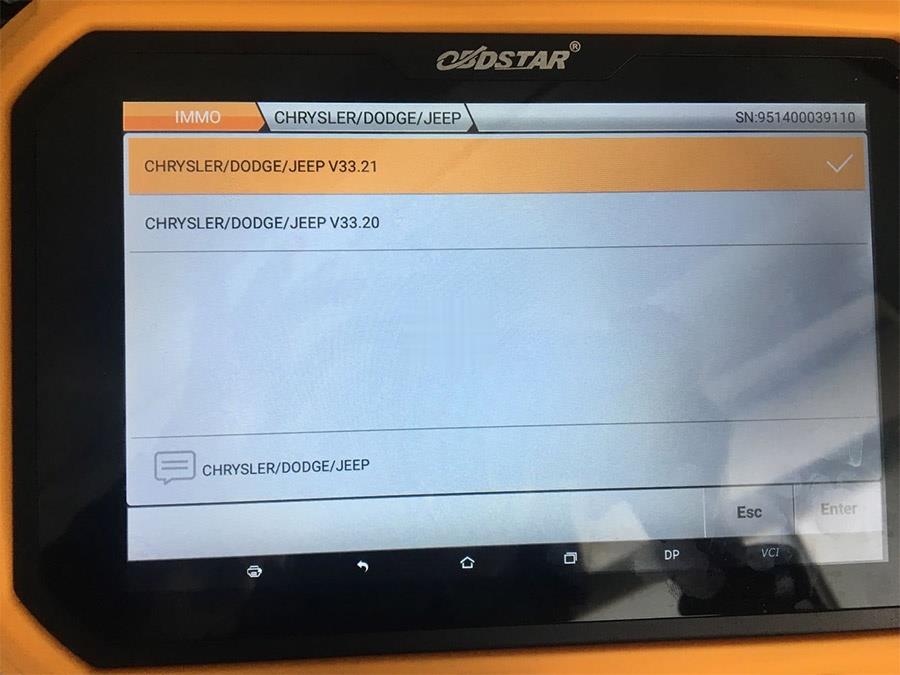
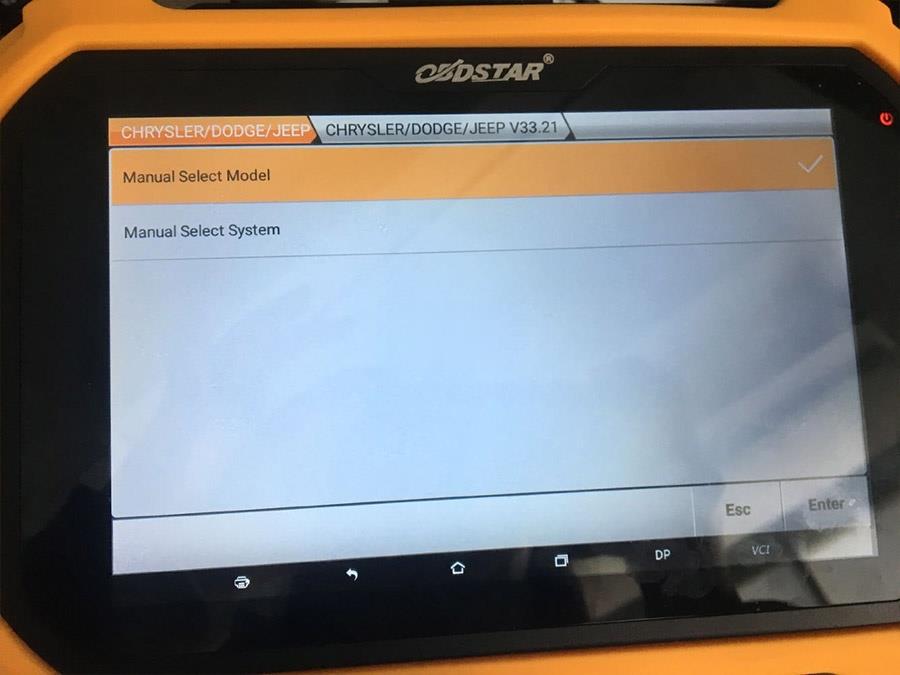
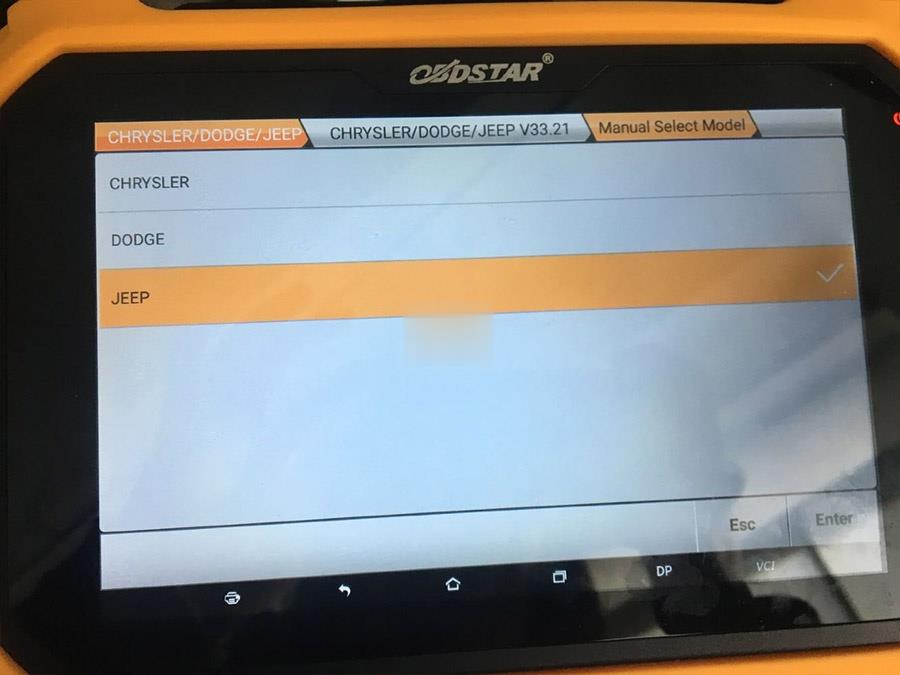
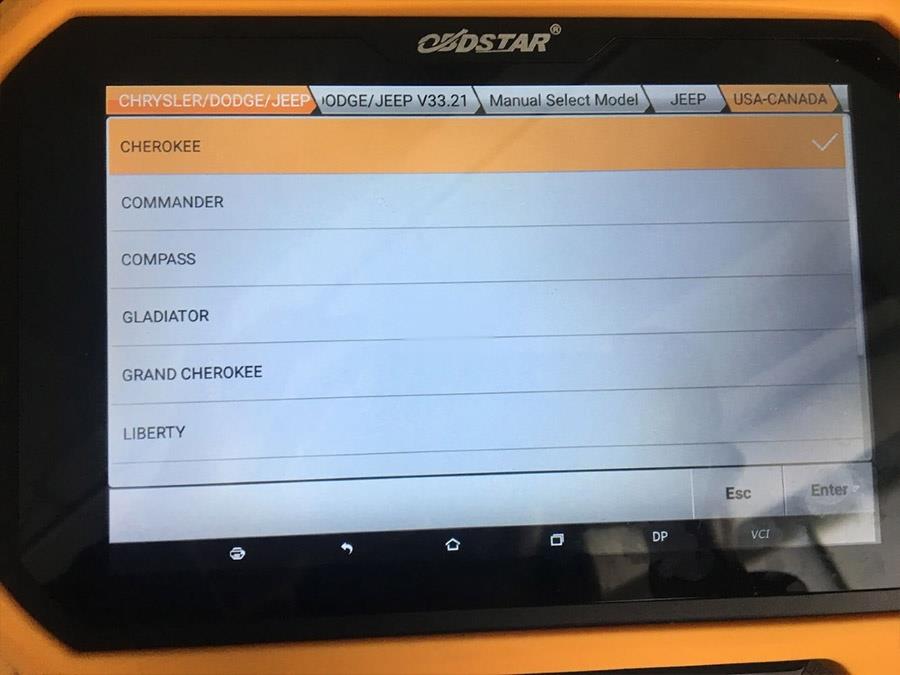
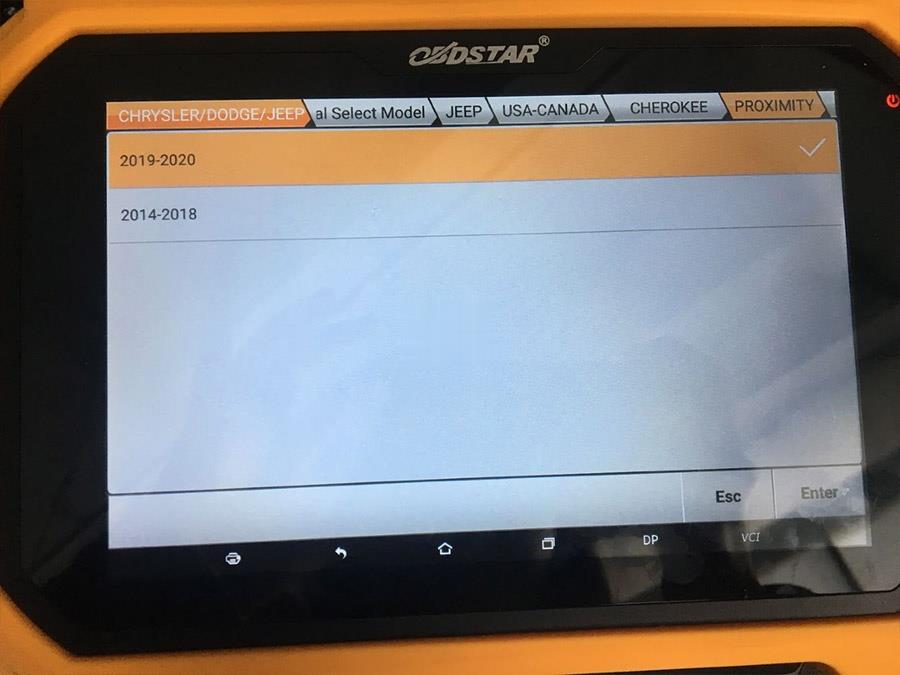
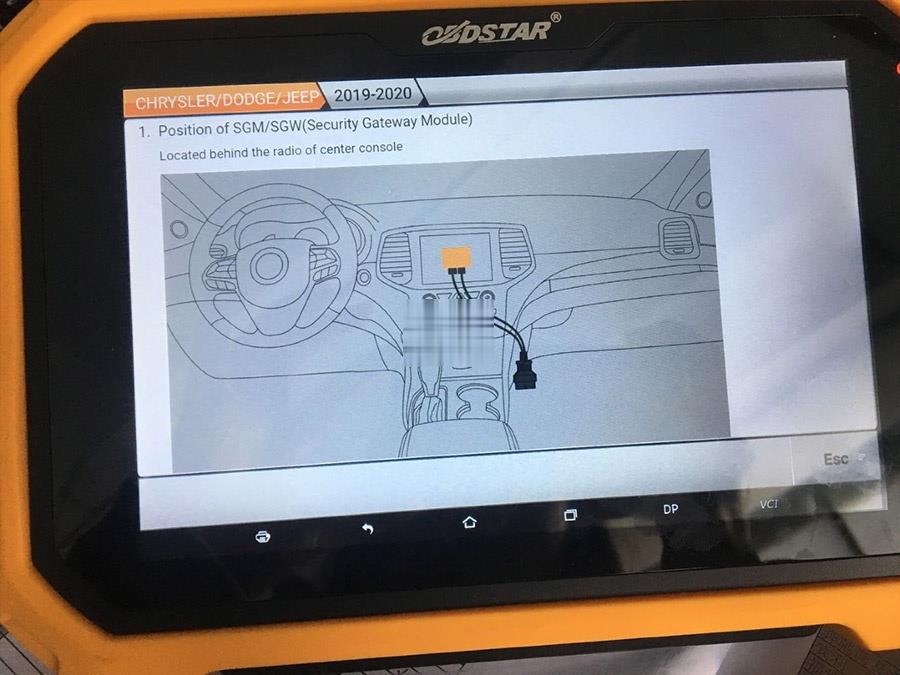
Today, I’d like to share the path of using OBDSTAR X300 DP PLUS to program the Jeep Cherokee 2019-2020 Proximity smart key, operation tips and some possible problems & solutions.
First come with obdstar DP Plus operation path:
IMMO -> Chrysler / Dodge/Jeep V33/21 -> Manual select model ->Jeep -> Cherokee -> Proximity ->2019-2020.
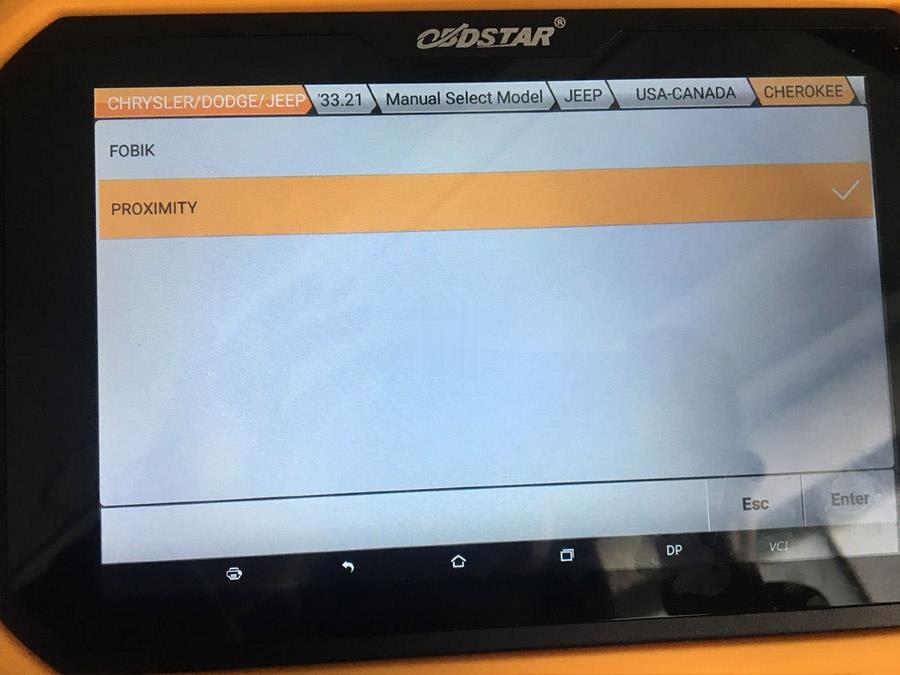
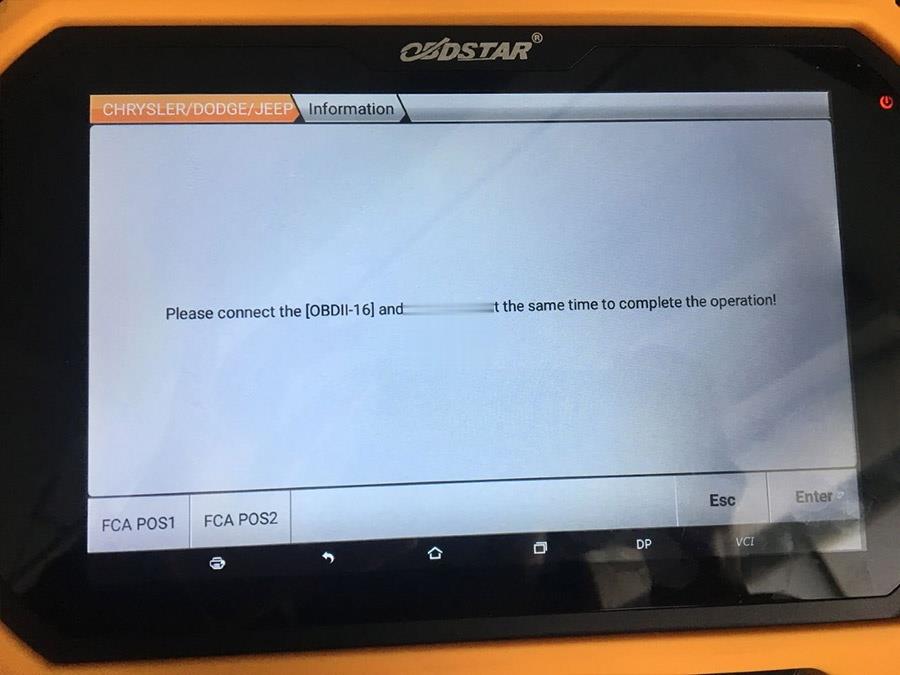
Here, it will remind you "Please connect the [OBDII-16] and [FCA 12+8] adapter at the same time to complete the operation!â€.

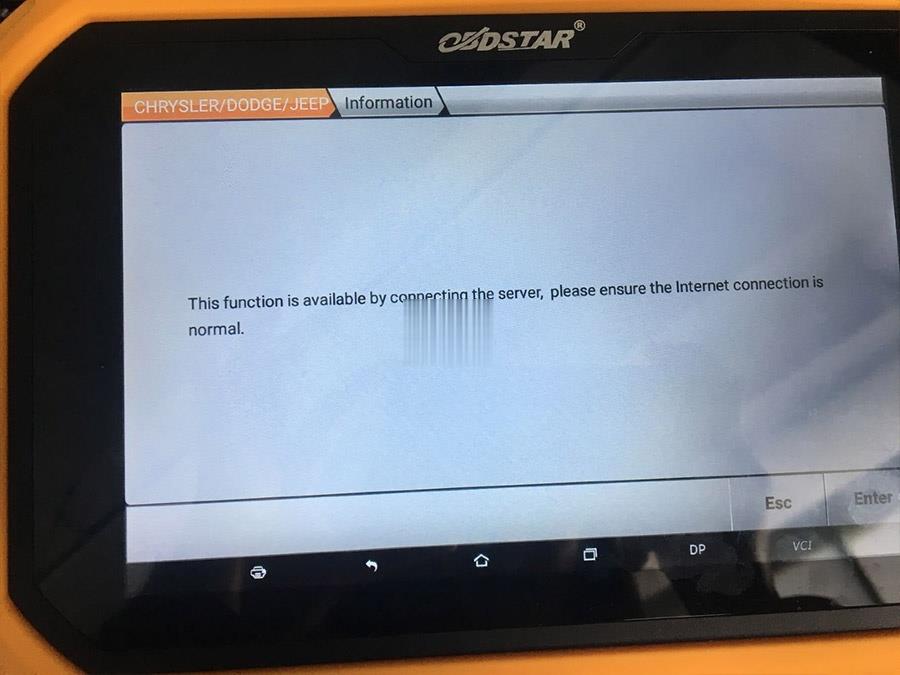
Then, it will remind you "This function is available by connecting the server, please ensure the Internet connection is normal. â€
Next is to read pincode first, then program key. In the process of programming the key, you can click "Tips†to refer to any problems encountered.
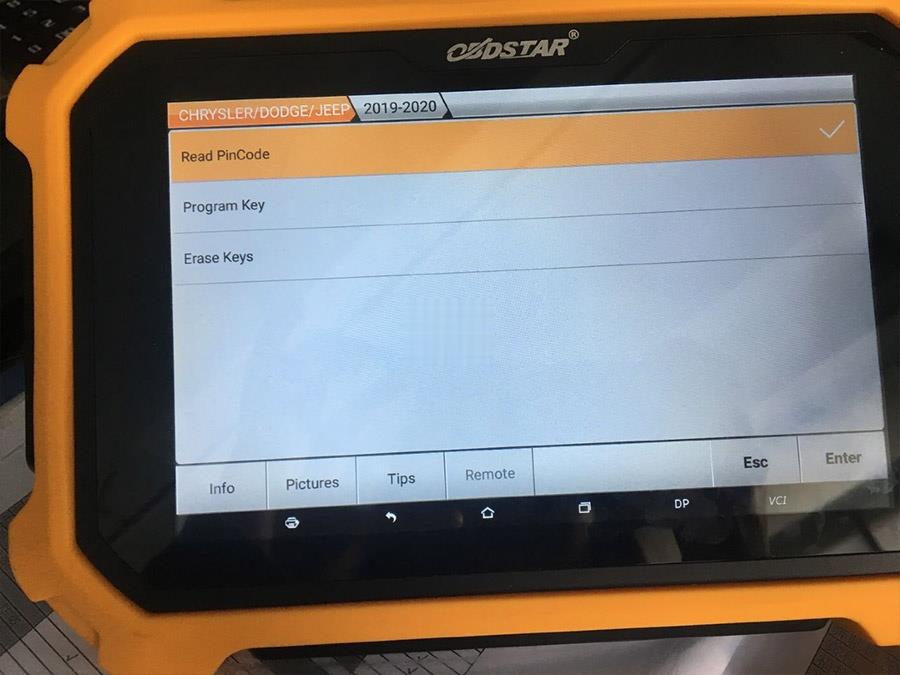
Okay, I stop here, the next operation is rather simple, just follow the instructions on the screen to operate it.
Next are the collection of some possible problems & solutions:
Fiat 500x 2020
Obdtsar X300 DP+
FCA 12+8 adapter
Read Old Mileage = OK
Write new Mileage = FAILED
Told ok but after i can see on dash only —— and on diag I see 1000000km
Tried to Write value to 0 But after this RED H0 error show on cluster
Solution:
After H0 error dash is at 0km.
Connect Multiecuscan:
Perform dash replacement. After This cluster show 0 and H0 error is solved
Increase odometer with MES to desired value
Jeep Renegade 2019
Obdtsar X300 DP+
FCA 12+8 adapter
Read Old Mileage = OK
Write new Mileage = FAILED
Told ok but after i can see on dash only —— and on diag I see 1000000km
Solution:
Write 0km and after Go Up with another diag tool (I used multiecuscan)
3.
Jeep Compass 2018
Obdtsar X300 DP+
Read Old Mileage = OK
Write new Mileage = OK
Posted by: obd2tool at
03:27 AM
| No Comments
| Add Comment
Post contains 312 words, total size 7 kb.
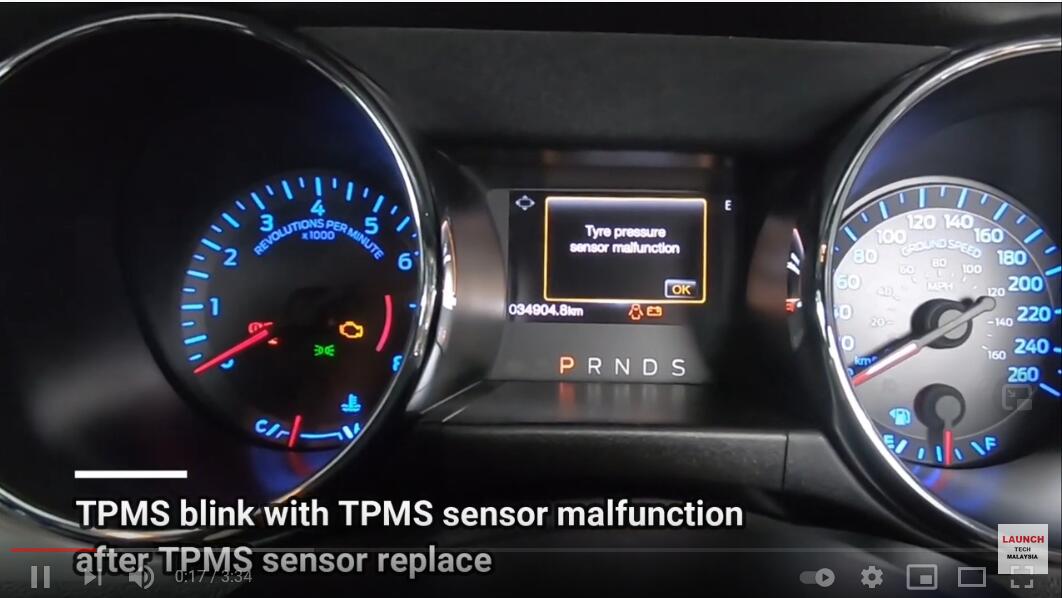
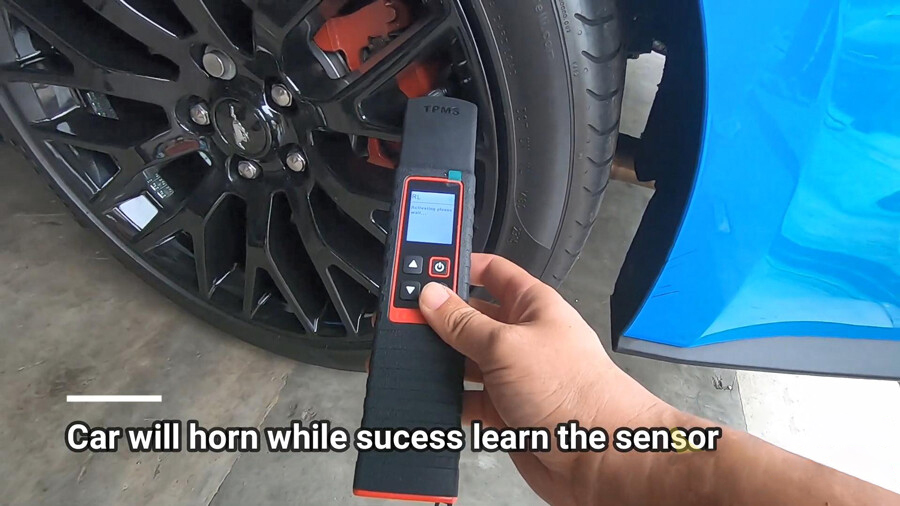
Have one Ford Mustang 2017, the TPMS blink with TPMS sensor
malfunction after TPMS sensor replace. And we prepared these tools: a
Launch X431 TSGUN TPSM Wand, a Launch X431 Diagnostic Tool (X431 V, X431 V+, X431 PAD V 5,
X431 PAD II etc), 4pcs 315MHz + 433MHz TPMS sensors (Shown as below).
And X431 TSGUN will communicate with X431 Tool via Bluetooth.
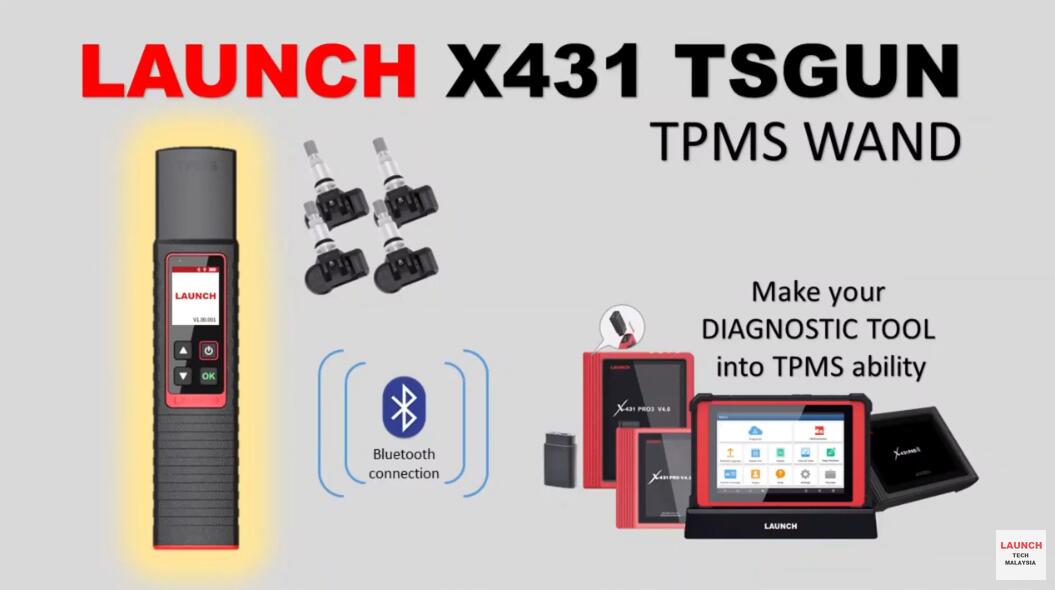
Note: X431 TSGUN can only program the sensors from Launch, for the activation, it can apply to the original tire pressure sensor.
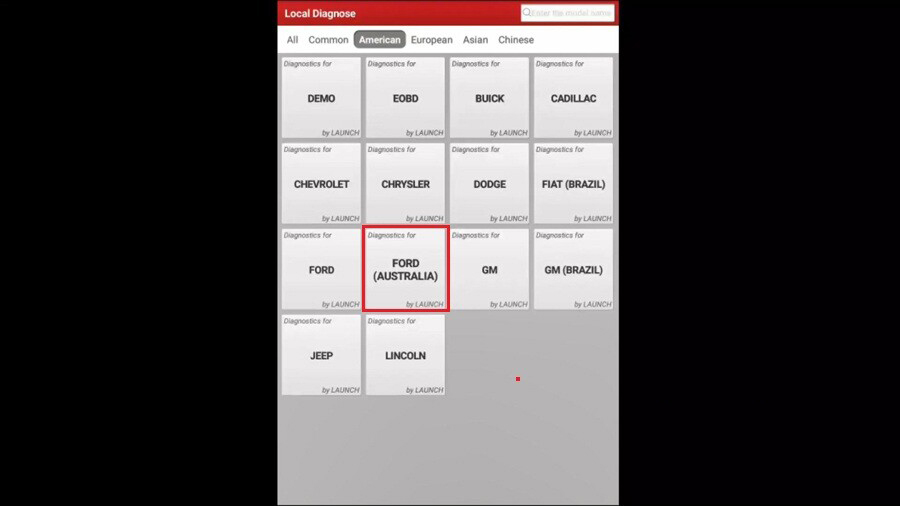
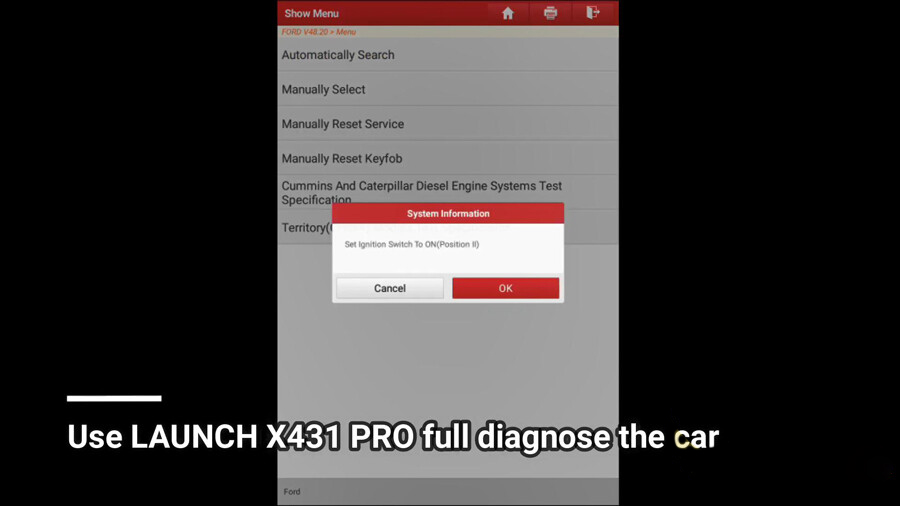
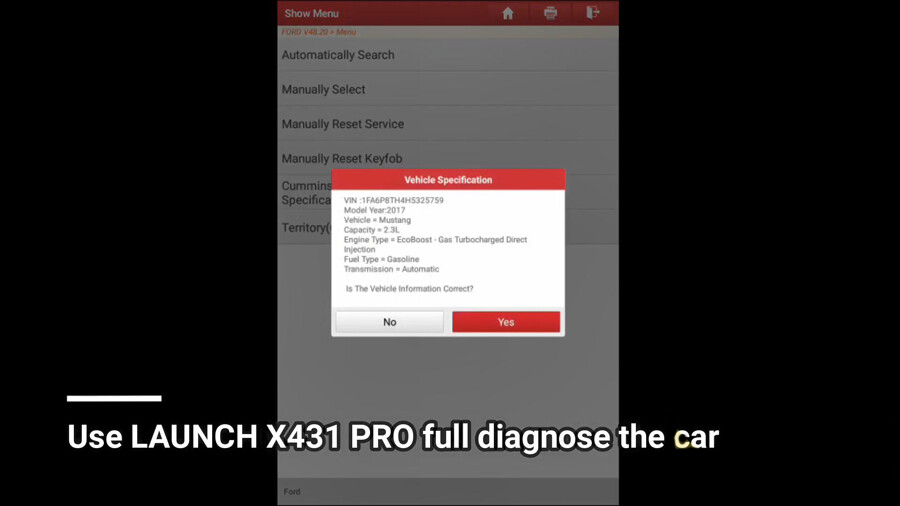
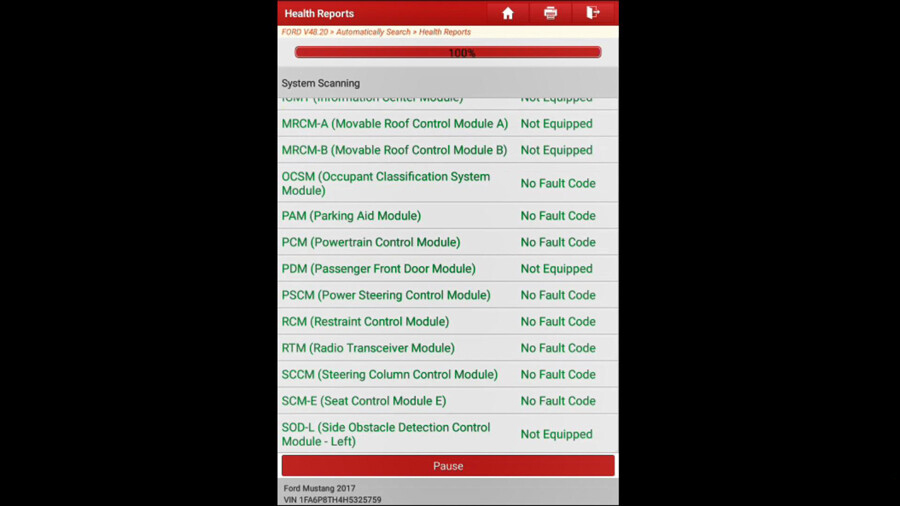
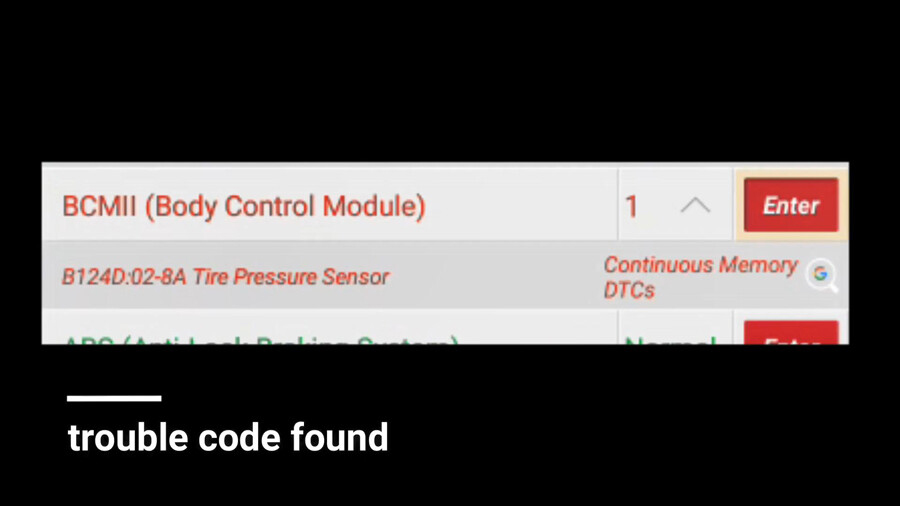
Next we will use Launch X431 Pro full diagnose the car.
Operation path: Local diagnose -> American -> Ford -> Vehicle version information (i.e Ford V48.20) -> Loading -> Automatically Search -> Set ignition Switch to ON (Position II) -> Vehicle specification -> Health Reports-> Trouble code found.

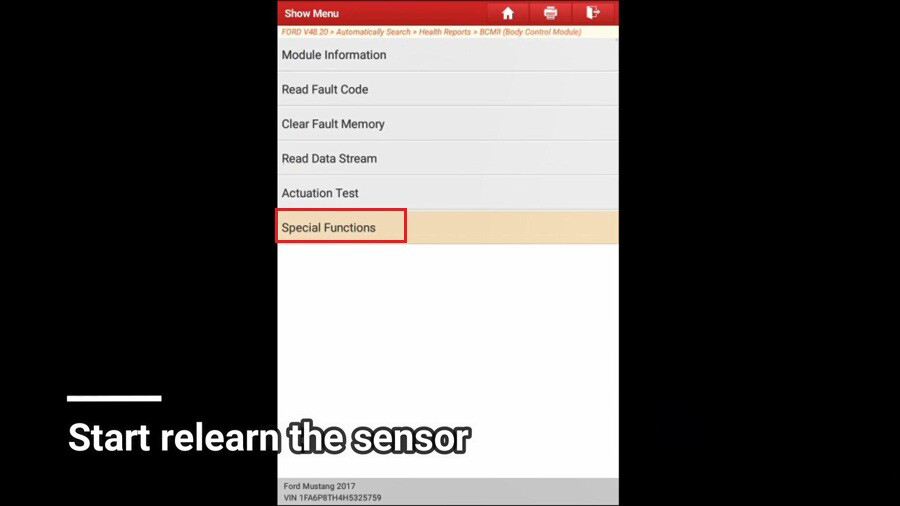
Next, start relearn the sensor.
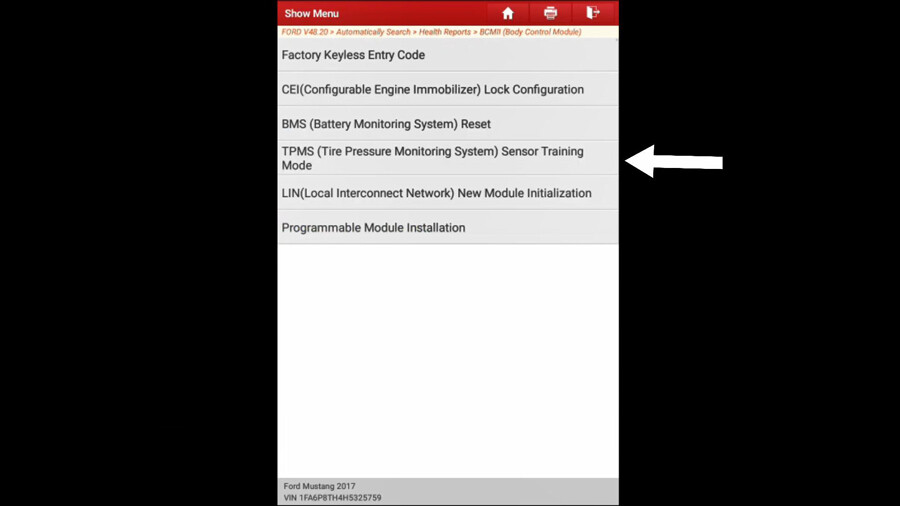
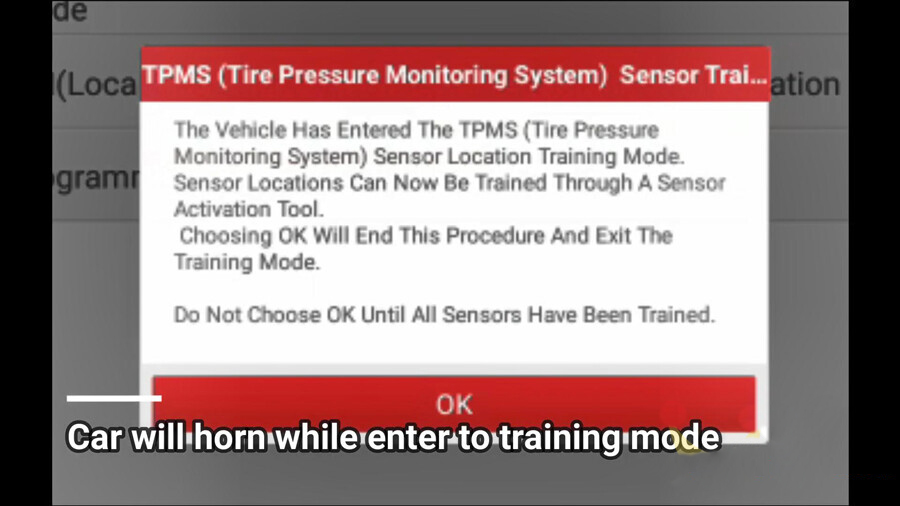
Operation path: Special Functions -> TPMS (Tire Pressure Monitoring System ) sensor training mode.
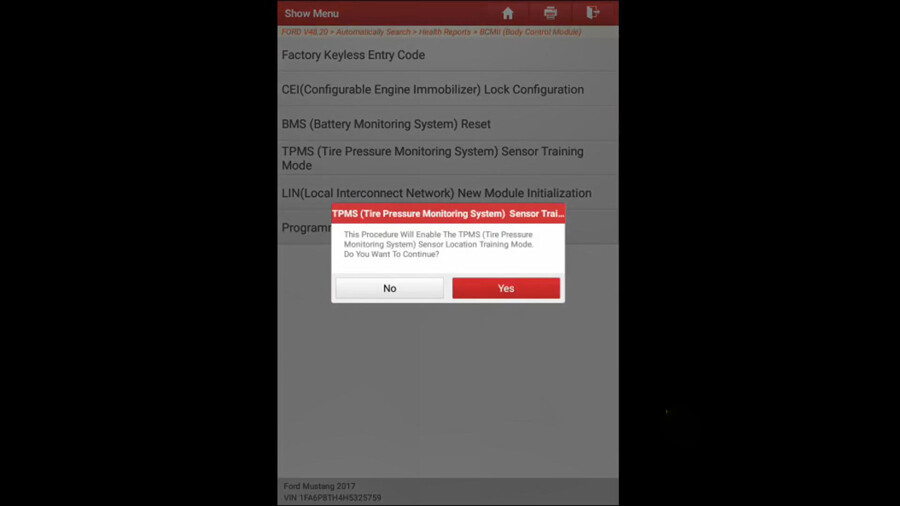
Next is to follow the pop-up prompts to operate.
1. This procedure will enable the TPMS (Tire Pressure Monitoring System ) Sensor location training mode. Do you want to continue? Select "Yesâ€.
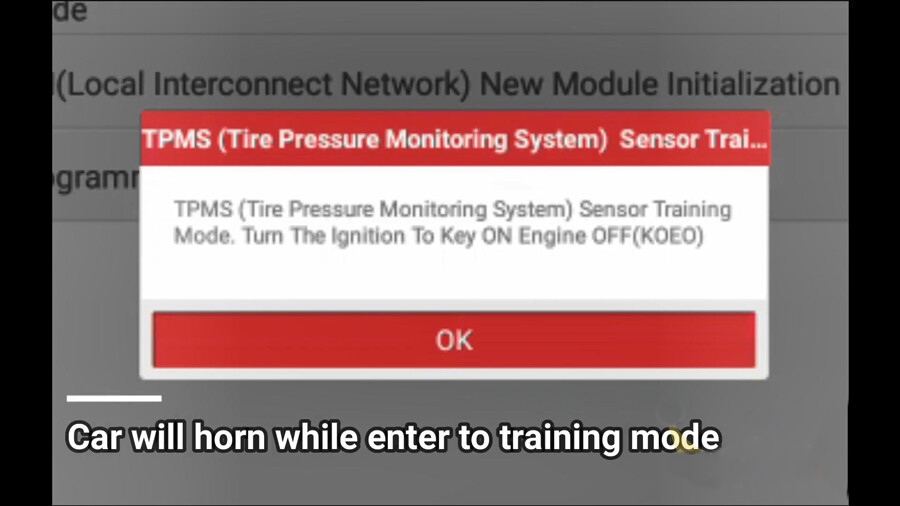
2. TPMS (Tire Pressure Monitoring System ) Sensor Training Mode. Turn the ignition to Key ON Engine OFF (KOEO).
And the car will horn while enter to training mode.
Sensor Locations can now be trained trough a sensor activation tool. Do not choose OK until all sensors have been trained.
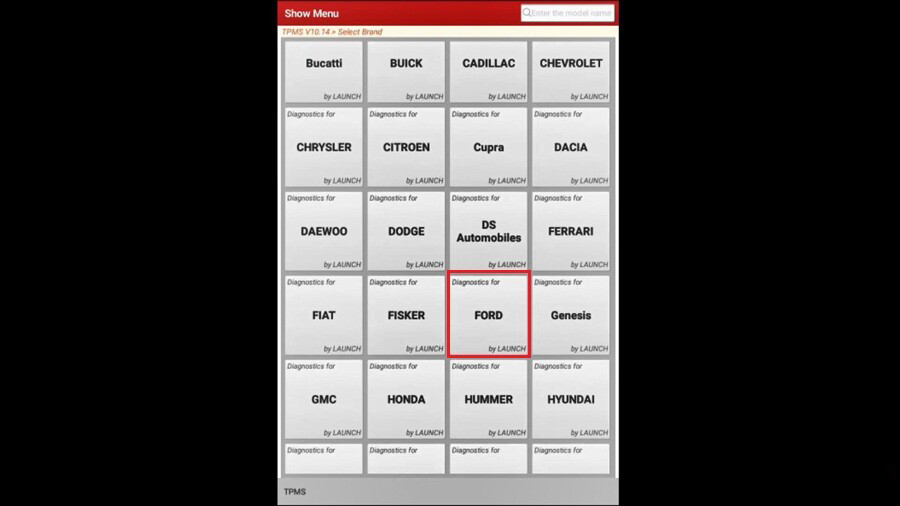
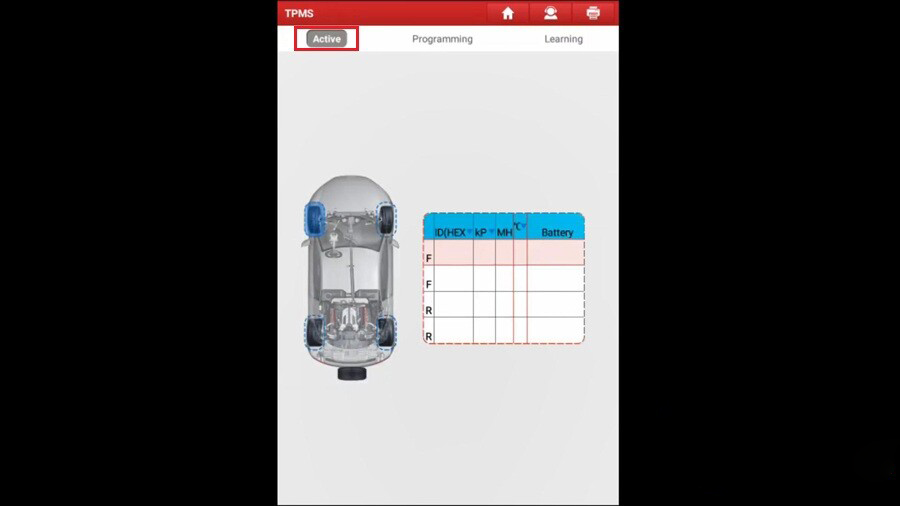
Next, back to X431 Pro home menu and choose "TPMS†to diagnose TPMS, activate and program sensor.

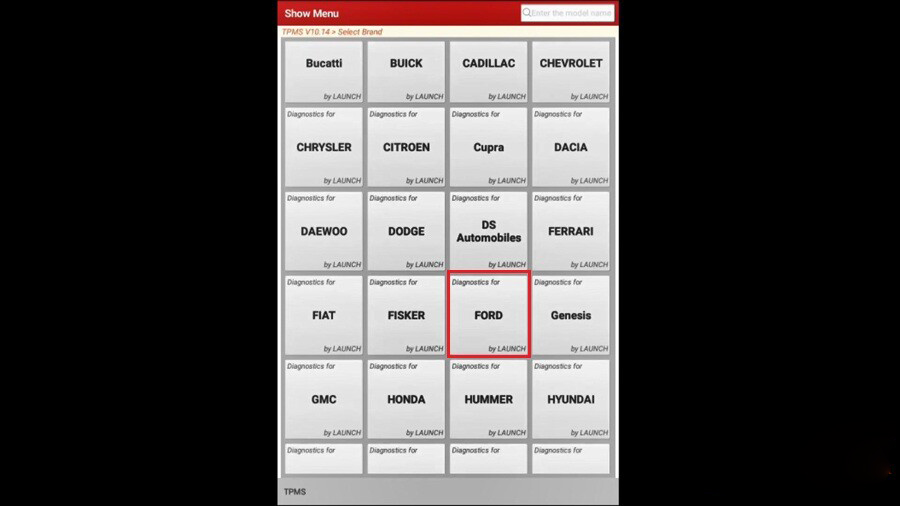
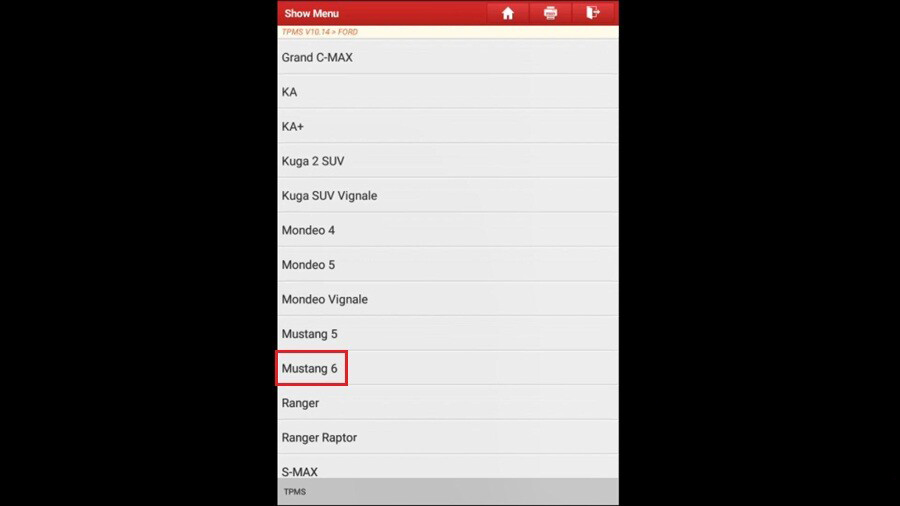
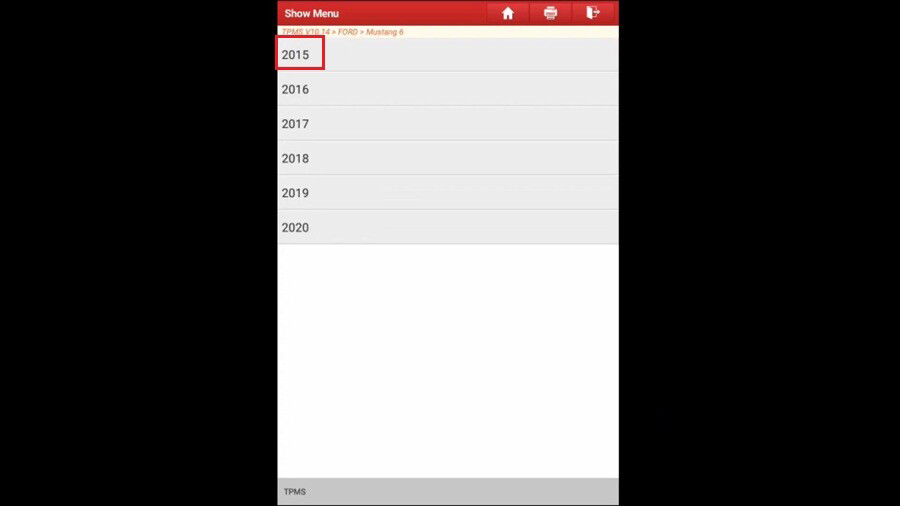
Europe -> select brand "Ford†-> Mustang 6 -> 2015 (up to 2020)
Active first.
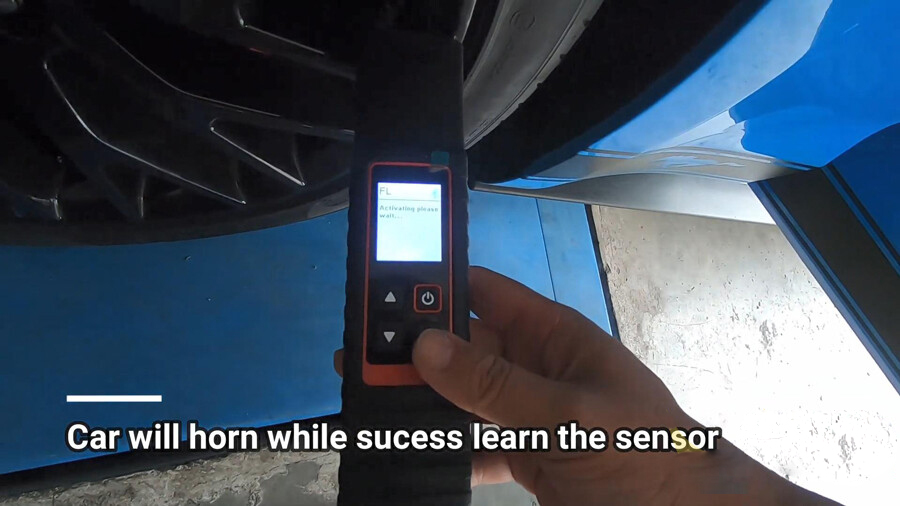
The first tire to be activated is the front left. And the car will horn while succeed learning the sensor.
Then to learn the front right sensor.
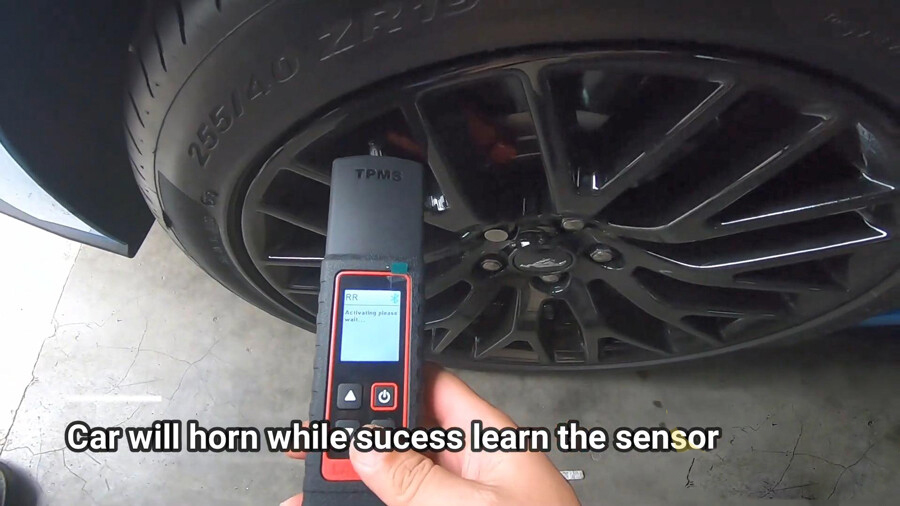
Then to learn the rear right sensor.
The last one is the Rear left sensor.
Back to X431 Pro Ford V48.20 ->Automatically search -> Health Reports -> BCM (Body Control Module), tap "Yes†to ensure all sensors have been trained.
And car will horn while exit from training mode.

Finally, make a test drive the sensor will start working.
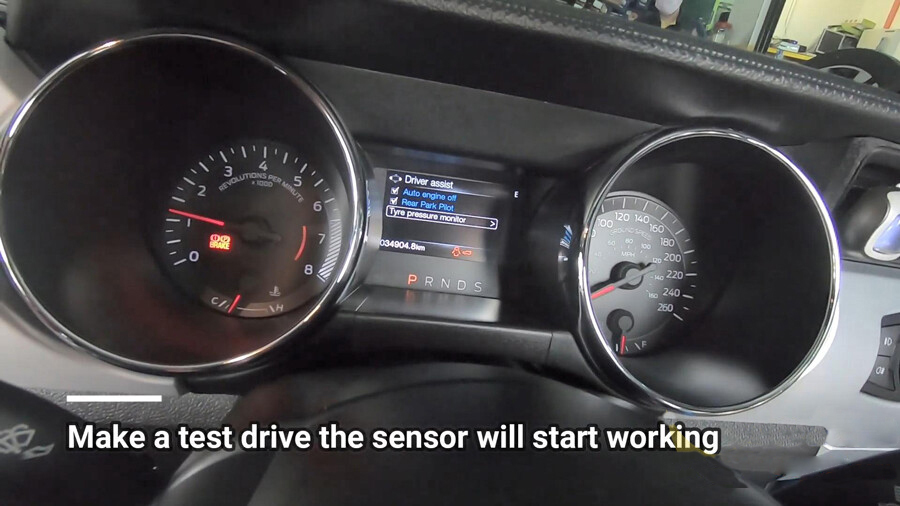
Job is done.
Let us drink a cup of coffee to celebrate it. Thanks to Launch X431 Pro, TSGUN TPSM Wand, TPMS sensors etc. Which make my life wonderful.
Posted by: obd2tool at
03:02 AM
| No Comments
| Add Comment
Post contains 392 words, total size 12 kb.
30 queries taking 0.0598 seconds, 178 records returned.
Powered by Minx 1.1.6c-pink.

